Home Site Map - Techniques - Interior Design -
Lighting
![]() Create the right ambience with the right lighting design.
Create the right ambience with the right lighting design.
This page relates to the interior design aspects of lighting. The electrical wiring aspects are covered here .
Lighting Basics
LED lighting
These days it is best to use LED lighting because you don't get unnecessary heat in the summer and you don't have to worry about turning them off as much. In the winter in a heating climate it is ok to use incandescent bulbs within the insulated house envelope, but you don't want the hassle of changing to and from LED bulbs for the summer.
I very much prefer warm yellow light so these are the LED type I buy. Warm light is a low Kelvin number.
Incandescent bulbs and "warm" LEDs are about 2,700 K.
Cool white fluorescent tube
and "daylight" LED bulbs are
about
4,100 K.
Noon sunlight is 4,500 K to 5,400 K.
If you want "correct vision" then you should use bulbs that are about 5,000K but that is a very harsh light and as I said I prefer the warm cozy feeling that 2,700K provides.
In most cases it is best to stick with the same E26/27 standard light fitting as used for incandescent lights.
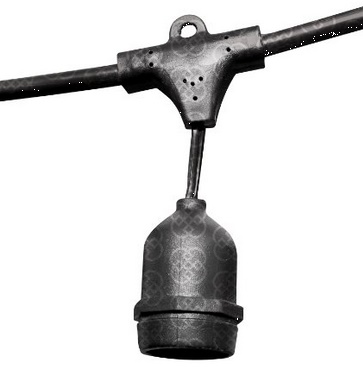
I really like using ready made light strings with LED bulbs. They provide lots of already wired sockets and because they plug in they are not subject to building code inspection.
Types of lighting
Ambient light
Soft general illumination that fills a room and softens shadows. The best ambient lighting fixtures are designed to bounce light off the ideally white ceiling.
Task lighting
Focused source of light near a work surface, a countertop, or a book. It needs to be close to the thing you are trying to light. Personally I'm not a huge fan of relying too much on task lighting. I tend to prefer a greater amount of ambient lighting. Task lights should have a switch close to the light.
Accent lighting
Directed illumination used to spotlight an object eg a work of art or a particular architectural feature.
Decorative
A fixture chosen for its attractiveness eg a chandelier. Its main function is to look nice.
Layers of light
You want layers of light. The layers come from the four lighting types listed above. Some background and some task lighting. You will also want to accent some particular features or just create interest on a blank wall.
Lighting designers advocate using several layers because they enhance the feel of the room, offer flexibility in setting mood, and generally make for better illumination for how the space is used.
Think about how you're going to use each room and whether there are any specific tasks that you'll be doing there that require special attention from a lighting perspective.
Being able to control the brightness of each of the light types is important in achieving the desired layering effect.
Light placement
Uplights from cornices
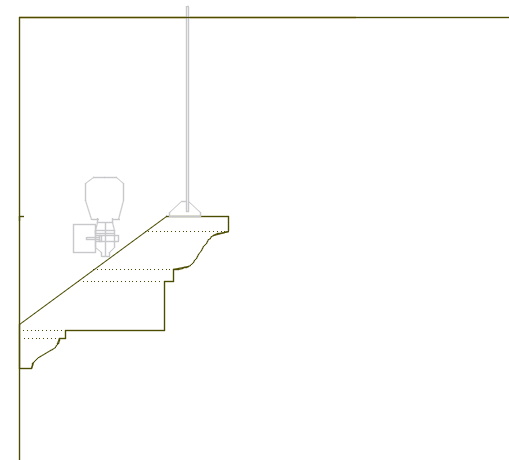
The cornices are made from CNC Hotwire cut EPS. They conform to classical architectural dimensions. Rather than being at ceiling height they are on the wall further down to leave a gap above. Simple low cost bulb holder strings are used with LED bulbs. The bulbs are typically every 1 foot round the room. A transparent acrylic strip is used to keep the dust out. Much of the light is reflected off the ceiling but some also shines across to the opposite wall. It relies on having high ceilings so that people even when standing do not see the actual bare bulb.
If you make the string of light sockets plugin to a switched power outlet (say one per wall) then it is not subject to building code.
Use dimmable LED light bulbs.
Use ready made light strings.
Hold each socket with a plastic 1" conduit clamp round the body of the socket.

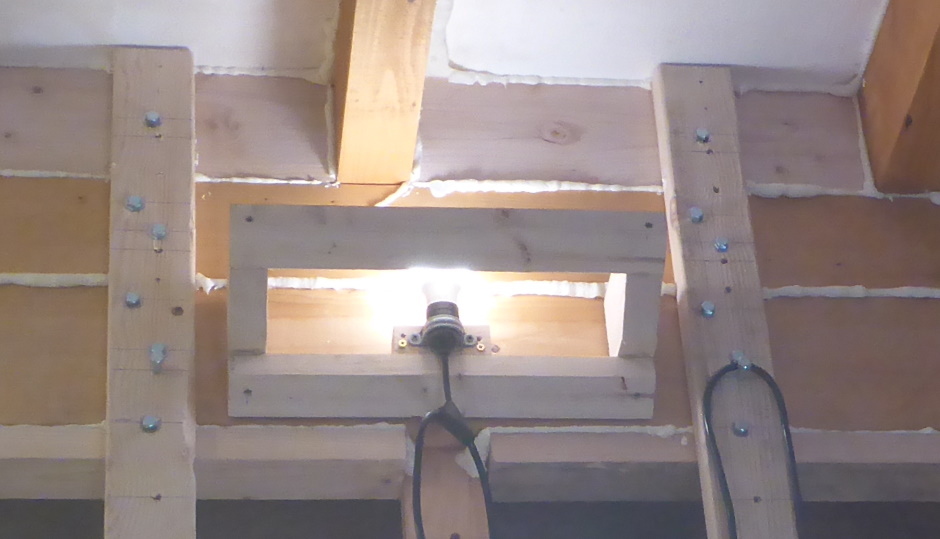
To make light soffits...
Cut 2x6 to 5-1/4"
Cut again to be 3-3/4"
Cut to 5" lengths
Mark long edge at 2-3/4"
Mark short edge at 1"
Set chop saw to 36 deg to left
Saw corner off at the marks
Cut
2x4 to 3-3/8"
Cut again to be 3-1/4"
Set table saw to be 36
degrees
Set fence to e 7/8"
Cut to produce two identical angled
pieces
Drill screw holes 3/4" from edges per drawing
Tablesaw
cut 1-1/2" square edge
Chopsaw cut to 4" lengths
Cross pieces
at 16" on center
Glue 4" long blocks for lights centrally between
cross pieces
Uplights from cabinet tops
You can use light strings with the bulbs mounted horizontally behind a 1.5" lip on the front top edge of the cabinet. This is my preferred option.
Another possibility is to use low profile LED "downlights" that point upwards. They can be wiped of dust and are low profile. Negatives are that they the need to wired, are subject to building code inspection, are very directional, and are a pain to change when they break.
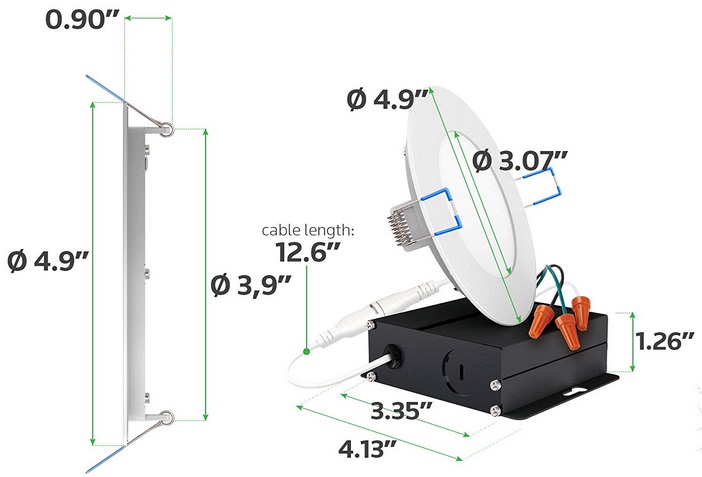
https://smile.amazon.com/gp/product/B07D8CPTCJ/ref=ox_sc_saved_title_1?smid=AJXBVINE72UI4&psc=1 $12 each.
Task lights
If you are building your own wooden furniture then incorporate task lighting (and the switch) into the wooden piece. Also you can make wooden pieces who's only function is to act as a table lamp on a table, although even a table lamp can have useful flat surfaces and alcoves for placing nick-knacks. Use the wood to shield the bulb so you don't see the bulb and the light just shines downwards. Use a large Decora rocker light switch (definitely not a silly knurled rotate switch). It's a good idea to include a USB+100VAC outlet in the base of table lamps for charging phones and plugging in laptops.
A nice thing about plug-in task lighting that has its own switch and plugs into a regular power outlet is that it is not subject to building code.
A hollow 4 sided wood pyramid can make a nice lamp shade.
LED down lights (as shown above) are potentially useful for implementing task lights.
Lights in alcoves
Alcoves in internal stud walls are useful and break up a blank wall. They look even nicer when they have lighting. It can be a light set into the top inside edge or a stick on LED strip.
Emergency lighting
In the cornices and other places can be placed 12V LED light strips. The 12V can come from a 12V car battery that is continuously trickle charged. It has a wall switch to turn it on and off. When it is on it will continue to provide light without interruption in the event of a power outage. Using 12V lighting is more efficient than using a power inverter, but it requires thicker wiring.
Personally I prefer to have 110V emergency lighting that is fed from an inverter in the case of a power cut as it avoids having 12V wiring. The 110VAC is converted to 12VDC for the actual light strip using a power brick.
Party/holiday lighting
The same 12V LED strip used to provide emergency lighting can also be used to provide lots of colors for parties. Typically these light switches come with a remote control to change colors and/or make it pulsate.
Avoid recessed can fixtures
These are used in most American houses and they produce horrible lighting. The floor is lit too much and the ceiling is too dark. They are no good for ambient lighting as they are too harsh and focused and they are too far away to be task lighting.
Accent lighting
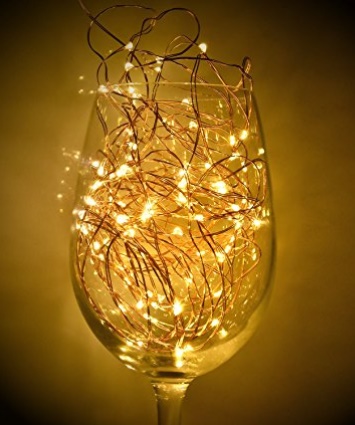
This just for decoration and can be done in lots of creative ways, even with lots of small LED lights in a glass bowl...
Light control
Intelligent dimmers
Ideally you want just one switch per light circuit but you want the ability to be able to turn the switch on remotely. Hopefully "home automation" intelligent dimmers eg Insteon will get more reliable.
Personally I rarely set the lights to anything other than full on or full off, but it is nice to have them dim between those two states as it is less jarring.
Rooms that have multiple entry points should have lighting controls close to all the entry/exit points. Placing them at only one entrance means you'll have to walk through the dark to reach the switch if you enter from the "wrong" location.
You only need one actual decora automated dimmer switch at one of the entrance/exit points and at the other you can put a dumb momentary action decora switch that sends a message to the automation controller to request the light to change state. Annoyingly momentary decora switches are currently overpriced so you may have to use a toggle switch and detect the changed state in software.
Motion activated
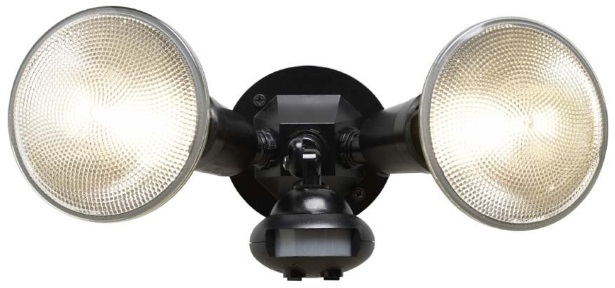
Motion activated light fixtures are inexpensive. Using them also avoids having to wire a wall switch. They are a great solution for infrequently visited places in the house such as storage rooms.
Typically a motion activated light also has a light sensor so it does not operate when not necessary (eg in daylight). The motion sensor can be mounted independently of the actual lighting fixture. You could use a completely different light fixture, ie just use the sensor module. You can also gang together multiple sensor modules for a bigger detection area.
I like to have a motion activated light as a backup light in each main room so you never have to fumble for a light switch. A motion sensor can also tie into your security system. For internal applications it is good to use wall mounted decora motion sensors. These can be used to send a message to the home controller to request lights to be turned on.
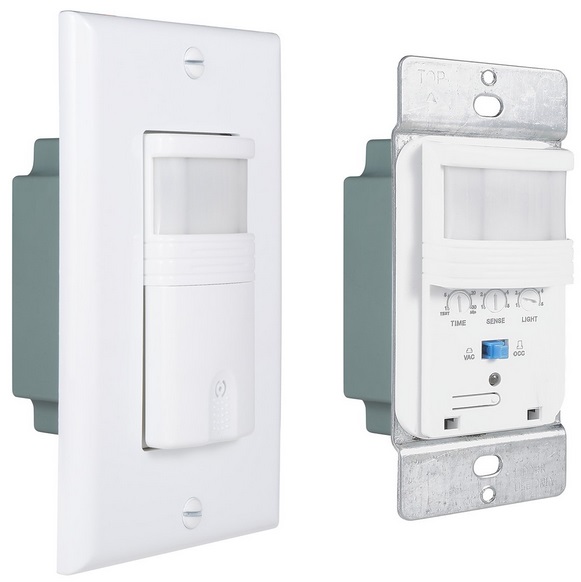
https://smile.amazon.com/gp/product/B0799R5HTJ/ref=ox_sc_saved_title_2?smid=A2P985UG1YLI2I&psc=1 $12 each.
In each house area it is good to have basic lighting that is activated by a motion sensor. If at night you just need a quick drink of water from the kitchen then there is no point in turning on the main lights. When going round the house just before going to bed then motion lights are the easiest way as they go off automatically when you leave the room.
In a hallway you need a motion sensor at each end, either of which turns on all the hall lights.
Motion sensors can also turn on lights in closets.
Don't want motion lights in bedrooms at night (after 10pm). From sunset to 10pm it is ok to have bedroom motion lights.
Different lighting in different rooms
Living room
Ambient lighting is provided by cornice uplights done with light strings .
Task lighting is provided by plugin table lamps. The lamps have their own switches so they just plugin to regular power outlets.
Alcoves are provided in the divider wall and have LED light strips.
LED light strips can also be provided above and below windows.
Kitchen
Ambient lighting
Put uplights (using light strings or LED "downlight" fixtures) on the top of cabinets.
Counter task lighting
Under cabinet lights are useful in the kitchen for lighting the work surface. They are best done with a routed groove into which is stuck an LED strip.
Floor accent lighting
Put a stick on LED strip in the top part of the toe kick area under the cabinets.
Counter edge accent lighting
Put a stick on LED strip on the underside of the counter overhang. This lights the cabinet wood doors when the doors are shut and provides light into the cabinet to find stuff when the door is open.
Bathroom
Put a strip of lights on both sides of the mirror. This is better than a strip light above the mirror.
It is good to have a motion activated low brightness lamp in a bathroom for use in the middle of the night. It should also have a light sensor so it does not come on during the day.
Small bedroom
In a small room such as a bedroom there is sometimes no room available other than to put a hang down light fixture in the center of the ceiling. This will meet building code requirements.
Attic lighting
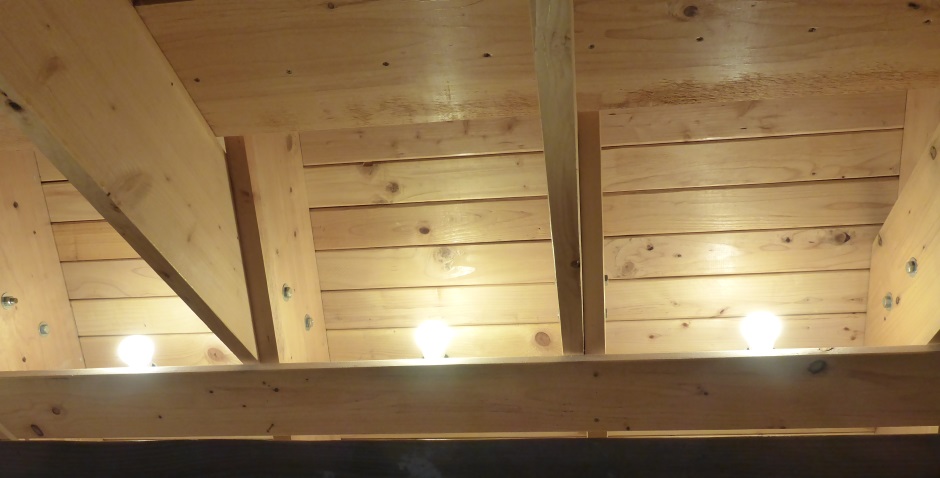
High wood ceiling look particularly dramatic when you can see a long way up from the atrium into the wood beams and cladding of the roof.
Use a light strings .
Stairs
Use accent lighting on the stair tread noses that is turned on and off by a motion sensor at the top and one at the bottom. Lights on stair treads look nice and make the stairs safer. Do it with a stick on strip of LED lights on the underside of the stair tread nose.
Occasionally visited places
It is good to provide motion sensor lights in places such as closets and storage rooms.
Party colored lighting
You can buy LED disco lights and hide them in the soffits.
Use color capable LED stick on strips. Can make them controlled by a sound to light converter.
Chandeliers using E26/27 light strings
Use light strings .
Wood Cube Chandelier
Make a 1' cube wood box. Drill 1.5" diameter holes on a 3" grid to allow sockets from a light string to poke through. Use filament LED bulbs. The box does not want to be bigger than 1'x1'x1' because the biggest available wood width after trimming is 10.5". The biggest issue is cramming all the wiring into the 9"x9"x9" space within the 1' cube so you will need to test with the specific light string wire you have
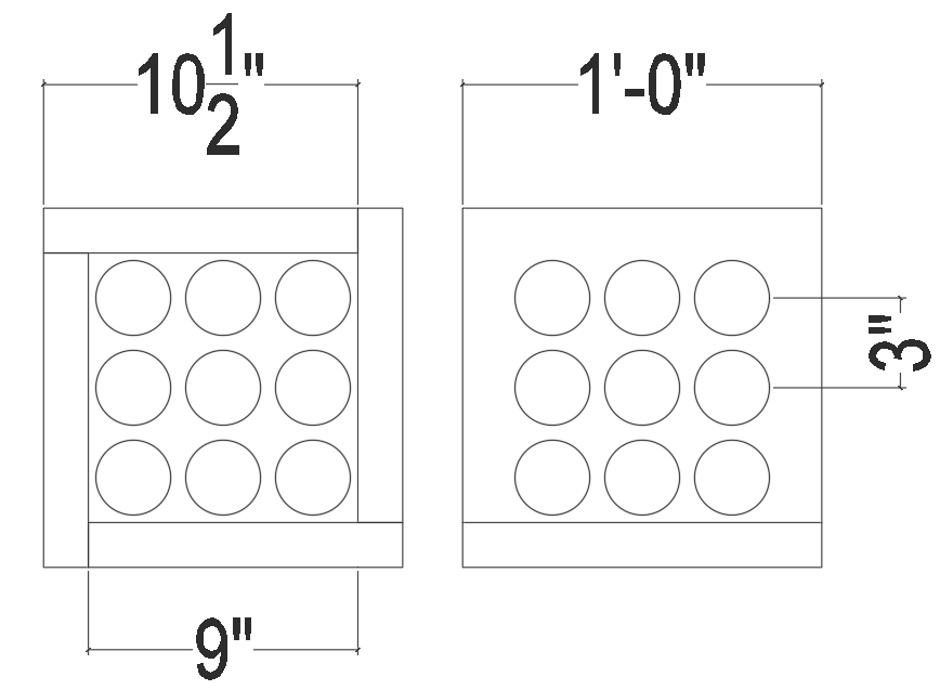
Hanging it from a corner is easiest and looks nicest. You will want to use a dimmer to avoid it being over bright.
Greek Chandelier
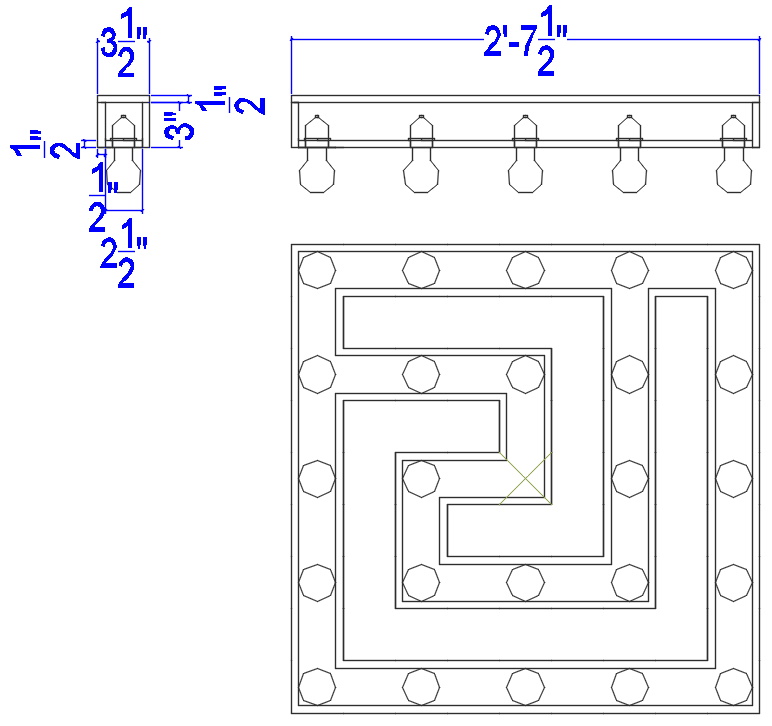
You need 24 bulbs in a wooden frame. The wooden frame forms the Greek pattern. Obviously other patterns are possible.
Round Wood Chandelier
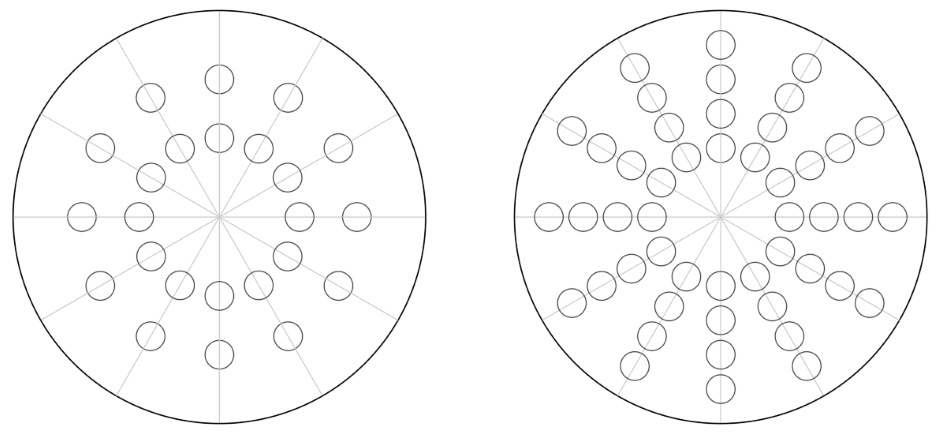
Cut two 1" cross slices from a 3' diameter tree and one 2" slice. The lights from a light string are mounted through holes in the bottom piece. The top piece is to cover the wiring. Hollow out the center from the middle piece so the it forms an edge. Glue the three bits together. Hang using three adjustable wires. Use polar coordinates when marking out as this gives multiples of 24. Can either do 24 lights or 48 lights.
Dining Table light
There is an array of lights that shine downwards and a separate array that shines up. Use two independent wall dimmers that separately control the amount of light that goes up and down.
The light assembly can be adjusted with shims within the rectangular outer surround to get the down-light to just shine on the table area.
Rectangle box that hangs from 4 wires in the corners.
Use two light strings in a rectangular wood box. Box should be smaller than the table size by about 10.5" all round so that it can be hung low without people hitting their heads. Hang it with 4 wires to bolts in drilled holes in ceiling above. In my case, there is no problem drilling any number of holes in the concrete floor above because the raised wood floor and the ceiling panels between the beams will hide used holes and old holes. You can't really make the holes until you have finalized the siting of the table. Make it 1'9" x 4'3" for my dining room tables that are 3'6" x 6'. Use 1.5" wood throughout to give it some heft.
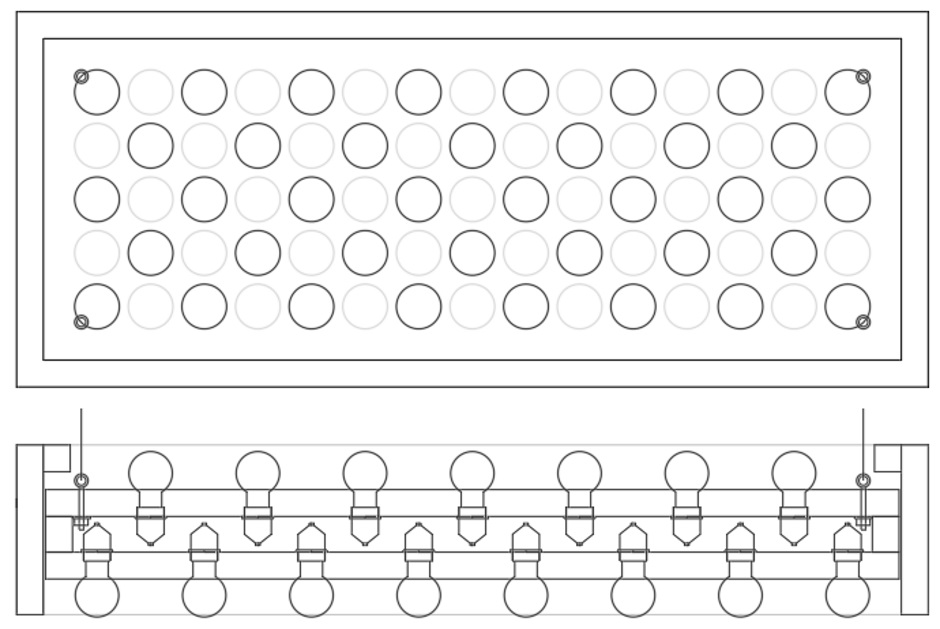
Extend the wood down round the outside to create an edge so that the diners are not dazzled. You want the edge as little as possible, but just enough. It depends a bit on the particular bulbs being used and also at what height the light is hung. The edge must not cause a shadow on the table. The solution is to make the lip adjustable. Just add the appropriate shims under the top lip. It is the inner assembly (that has the lights) that is hung from the ceiling. The edge rectangle is hung off the light assembly.
There are hooks on the ends of the 4 ceiling wires that hook onto the ring eyelets on the light assembly. Fine adjustment to get the light assembly level is done by moving a cable clamp on the cable after it goes through the ring eyelet.
The wires in the corner are all 3 wire electrical cords and all look the same. Chose cords that are able to handle the weight and don't stretch. Only two of the corner wires are actually used to provide power (one for the down lights and one for the up lights.
Kitchen Island Light Unit
Above the kitchen island there is a large kitchen cabinet assembly the same size as the cabinet carcass used for the island with lights round the edge on the inside. The lights are every 3".
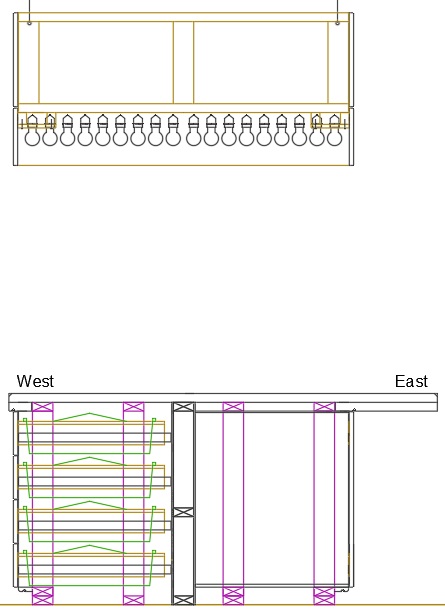
Another possibility is to use an array of low profile LED "downlight" modules, but that does require a lot of wiring. The advantage is that you want the lighting as low profile as possible so you do not hit your head and can still reach the cabinets.
Another possibility is a huge number of stick-on LED strips (once they become more consistent and reliable). These can do different colors for parties.
Wall hung strip down light
This is 24 of the 1W lights from a string in a tight row shielded by a plank of wood in-front so you can't see the bulbs when viewed from eye height. Hang it onto screw heads screwed into wall tie holes in the concrete wall.
Wood beam lights
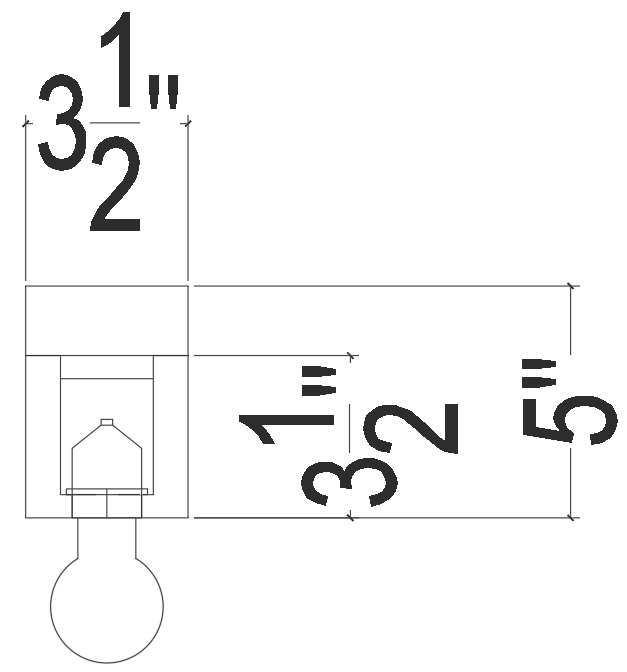
On the sawmill, cut a beam that is 5-1/8" x 3-5/8". Then on the sawmill, cut off 1-1/2" from the top. Then on the sawmill, cut the remaining beam in half to make two haves that are 1-3/4" wide. On a table saw, cut out the center where the bulbs go. Glue on a 2-1/2" x 1/2" locator strip to the top cap. Glue the two halves together. Drill holes for the bulb holders.
Chandeliers using Xmas style small LED light strings
I'm not a big fan of this style, but is can make an old style detailed sparkling chandeleier.
Hung strings and ornaments
Make a horizontal pattern of 2-by wood and hang lots of LEDs and lots of glass ornaments.
Search on Amazon for "Chandelier". LED clear glass tubes and clear glass globes are particularly good.
Terrarium
A terrarium is a clear globe and can be filled with small LED lights.
Getting clear acrylic is best as less danger if it falls...
LED tubes
Want warm light, black wire, and LEDs that can dim
Also other colors (when sited together can create white light of the desired warmth).
Need to be able to turn off the light flashing/moving.
Clear glass balls
Glass beads
https://smile.amazon.com/dp/B00J1YOWP0/ref=pd_luc_rh_sbs_03_04_t_img_lh?_encoding=UTF8&psc=1
Beads by the roll
Pendants
Hanging wire
Curtain rings
Small mirror tiles
Eg 1" square glued back to back.
Mirror ball
Could position a mirror ball in the center.
LED strip accent lighting
Warm white
Colored
Light strings in eves
Install lots of LED bulbs (ie light strings) in the eves, pointing down the walls. 1W warm bulbs are the best choice for most of the year. Ideally they would be color changing LED bulbs so that they can do colored lights during the holidays.
Stair rail and landing rail lights
In the metal railings on the underside of the top bar put LED lights. Could be individual lights or a stick on strip. Best to make them 12 volt as the railings are metal.
Other ideas
Could make a panel of wood proud of an internal wall wood surface (like a hung picture) and make light that shines out round the edges. Could be a canvas picture instead of a wood panel.


