


Home Site Map - Techniques - Plot Infrastructure -
Tiny House
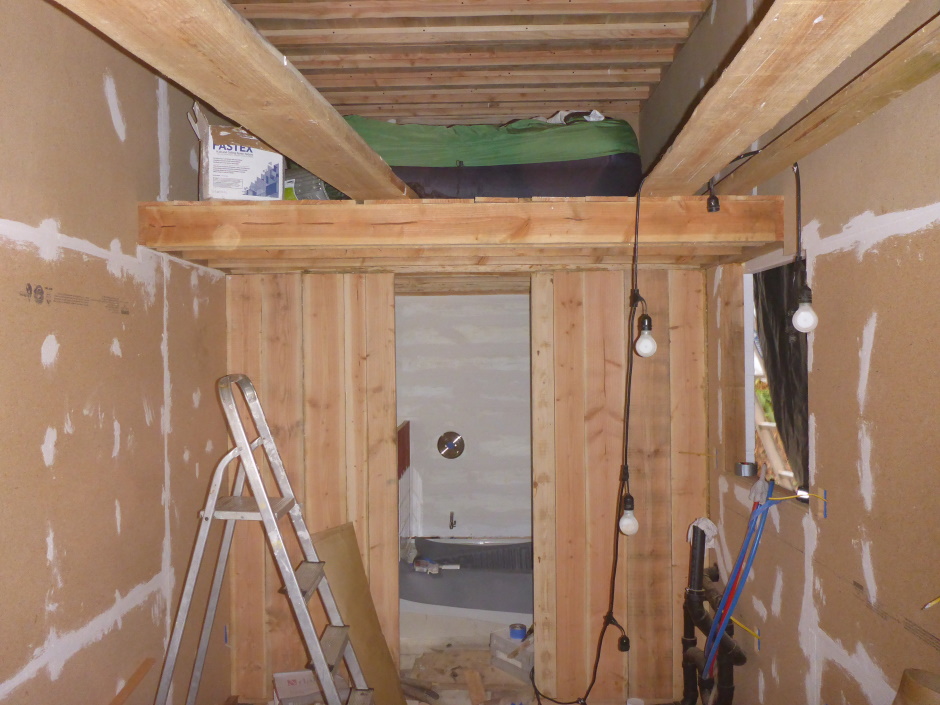
![]() A self contained full house for use on your property or on vacation.
A self contained full house for use on your property or on vacation.
Size constraints
My definition of a "Tiny House" is that it is less than 400sqft and is mobile conforming to highway regulations. The importance of being under 400sqft is that it is able to take advantage of the relaxations in IRC 2018 building code regarding such things as head heights and stairs/ladders.
In most U.S. states highway regulations dictate a max size of 13'6" tall (from road surface), 8'6" wide, and less than 40' long. In Washington State, Oregon, Idaho, Montana, Nevada, Utah, Wyoming, Utah, New Mexico, and Texas the allowed height is 14 feet. In California and Arizona 14' is only allowed on designated roads. Colorado allows 14'6". Personally I think it is best to stick to a height from the road surface of 13'6" so that you can drive anywhere in the USA without worrying about it.
In eg WA State you are allowed an extra 2" of width on each side for safety equipment such as lights.
https://drivinglaws.aaa.com/tag/trailer-dimensions/
http://www.eyershitch.com/california-towing-laws.html
I recommend making it 23.5 feet long so that overall it is 200 sqft. 200sqft is King County WA max sqft without permit (not that this really matters given that it is on wheels). Keeping below 200 sqft may make it easier in case of neighbor disputes. More important is that this is a sensible length to make it towable.
Use a 26' long trailer to allow an extra 3'+ box at the front for outside services and a 1' rear stoop lip.
Trailer axles must be rated to take the weight. The weight will be something like 10,000 pounds so use a 26' trailer with twin axles to give 14,000 pound rating.
Trailers over 80 inches in width need to have amber reflectors on each side and front, and red reflectors in the rear. I recommend having lots of orange lights to make the trailer very visible to other road users.
Note that once you have parked the Tiny House on a plot the highway height and width restrictions do not apply. When parked you can raise the roof (assuming the design allows for this) and can add a surrounding deck with awning.
Building code
This relates to the rules you should follow when designing and building your Tiny House. Convincing your local zoning and building authority that you have built it right can affect whether they let you live in it. As you do not need a building permit for something on wheels they will not actually come and inspect it. so it can be difficult to convince them that you have followed building code. I recommend taking lots of pictures during the construction so you have something to show them. Even if you never plan to tell anyone about your Tiny House, I recommend that you follow building code because that makes the house safer.
IRC 2018 Tiny House Appendix V
International Building Code has been around for a long time and is typically what applies when building a regular large house. The problem is that some of the code is not practical to do for a Tiny House. The good news is that in the 2018 version of IRC (thanks to lots of good work done by members of the Tiny House community) they have introduced an appendix modifier for Tiny Houses. If your house is less than 400sqft then you get to use the more relaxed rules.
Ceiling height
6'8" minimum ceiling height for main floor.
Ceiling heights in lofts are permitted to be less than 6 feet 8 inches.
Stairs / ladders
Tread depth and riser height shall be calculated in accordance
with one of the following
formulas:
1. The tread
depth shall be 20 inches (508 mm) minus 4/3 of the riser height,
or
2. The riser height shall be 15 inches (381 mm)
minus 3/4 of the tread depth.
Eg if the rise is 12" then the tread width should be 4" wide.
Ladders accessing lofts shall have a rung width of not less than 12 inches and 10 inches to 14 inches spacing between rungs. Ladders shall be capable of supporting a 200 pound load on any rung. Rung spacing shall be uniform within 3/8-inch. Ladders shall be installed at 70 to 80 degrees from horizontal.
Bedroom escape
You need an opening window of a size that meets regular IRC egress rules (more than 3'x2').
Fire
Need Smoke detectors and Fire extinguishers.
ANSI A119.5 Recreational Park Trailer Standard 2009 Edition
These are the rules that apply to anything designed to be certified as an RV. This is only important if you want to get an RV loan.
Certification
This potentially has an affect on whether you will be allowed to live in your Tiny House and whether you will be able to finance it. It gives you a certificate from an inspector that you can show to the zoning and building departments and/or the loan officer to prove it has been implemented to proper building code. Currently the only certification available is RV certification. In the future there may be companies that do Tiny House certification per IRC code.
If the manufacturer of the Tiny House is a certified RV builder then you may be able to get an RV loan.
Getting a certificate will cost you money so you should only go through the certification process if you absolutely need to.
Companies that provide RV certification...
RVIA
http://www.rvia.org/?ESID=ANSI
Pacific West
https://www.pacificwesttinyhomes.com/services
Zoning
These are the rules put in place by your local town or county to say what types of houses they will allow on the various plots. They might for example decide that they only want houses that are more than 1200sqft and no more than 5 houses per acre. They tend to do this in order to establish a lucrative tax base. The good news is that many jurisdictions are starting to see Tiny Houses as a way of solving their affordable housing problem.
As a first step, enlightened local authorities are likely to change their zoning rules to allow a tiny house as a second dwelling on a plot with an existing regular house.
You will need to talk with your local zoning department to discuss what's possible.
Financing
RV loan
Needs RV certification.
Eg 15yr RV loan for $90,000.
Rent-to-own
The manufacturer of the Tiny House keeps the legal ownership of the trailer and house and the person living it pays a monthly rent. A contract specifies what proportion of the rent goes towards paying off the price of the home, the timescales, and any clauses associated with contract termination etc. After the price of the home has been paid, the legal ownership of the trailer and house is transferred to the person living in the home.
My philosophies
Make it as simple to build as possible.
Design out air gaps behind outer sheeting both on walls and roof. Air gaps are time consuming to implement and cut down available inside house space.
Avoid angles (other than 90 degrees). Keep it purely rectangular to make it simple to implement.
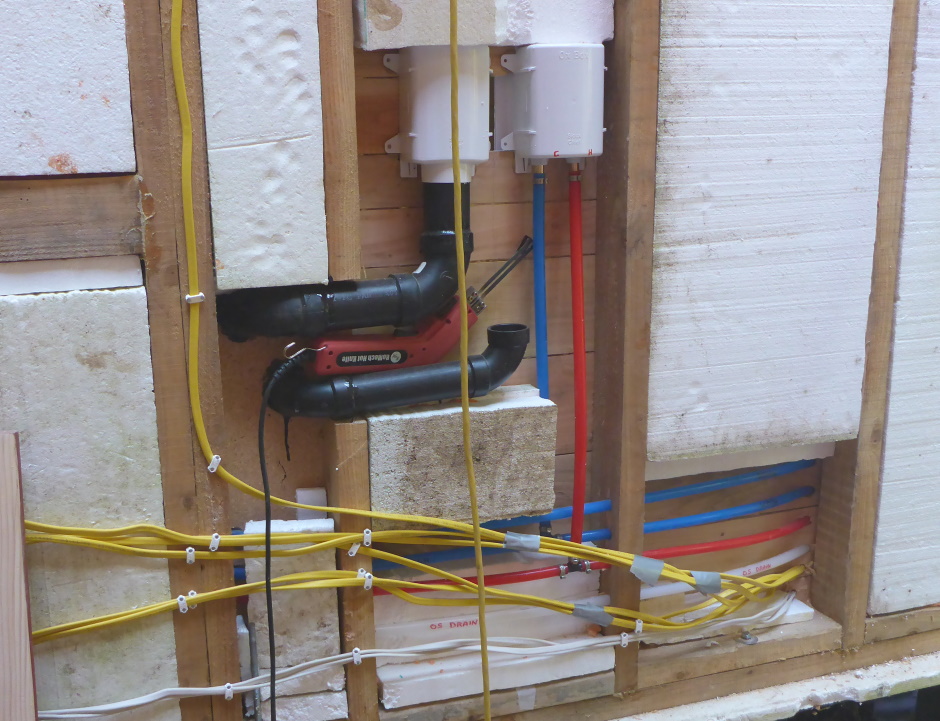
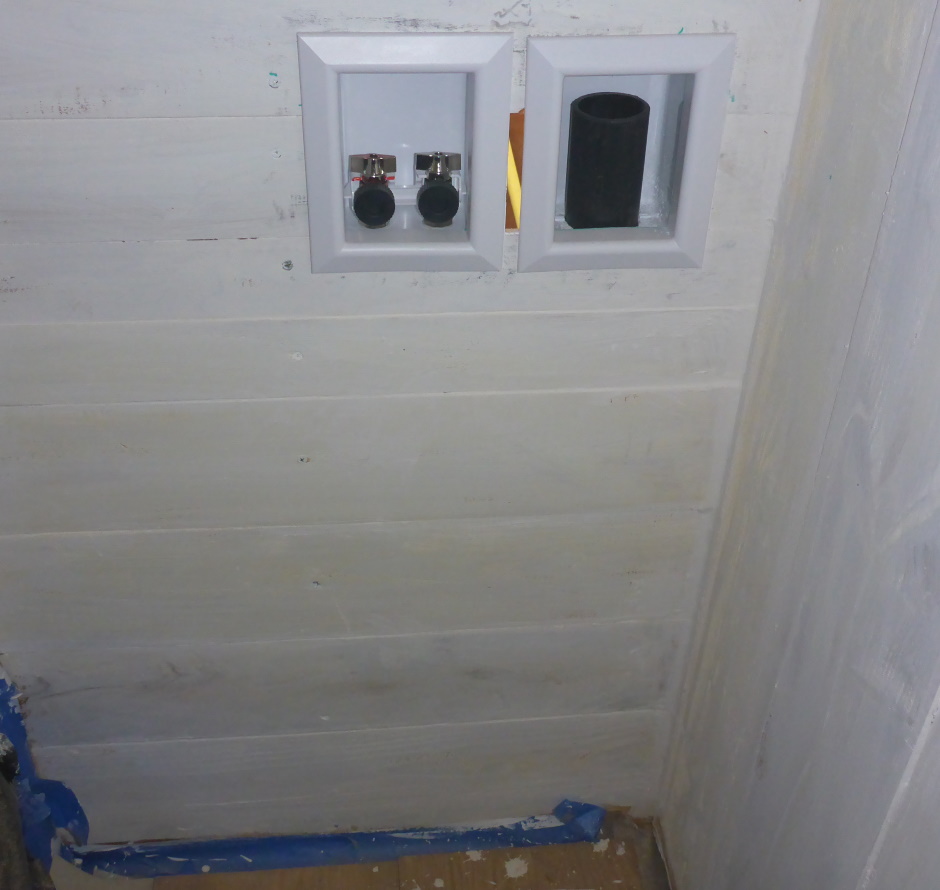
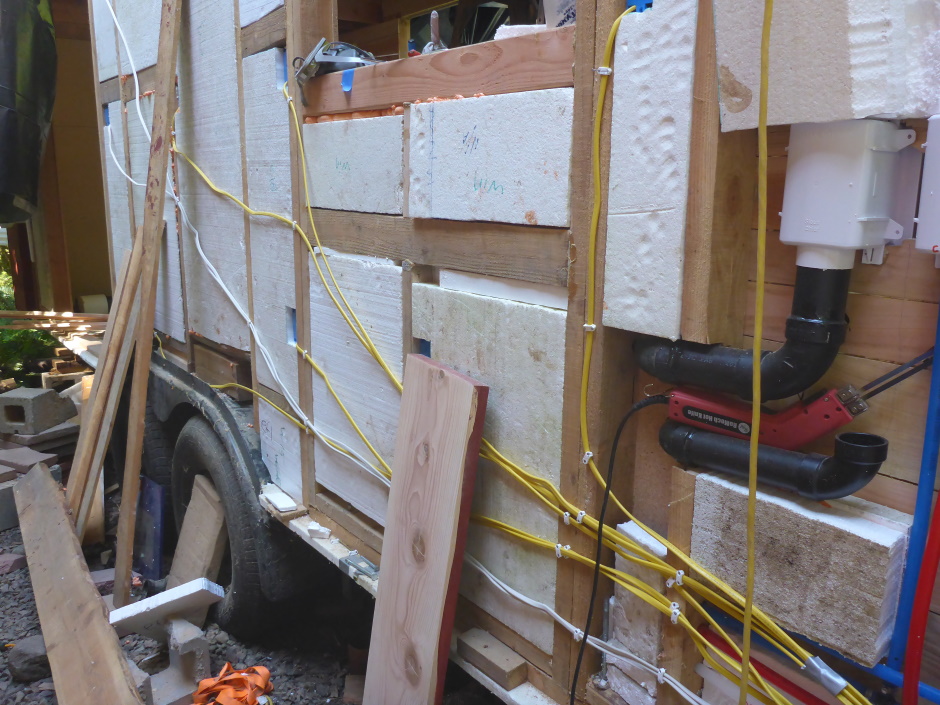
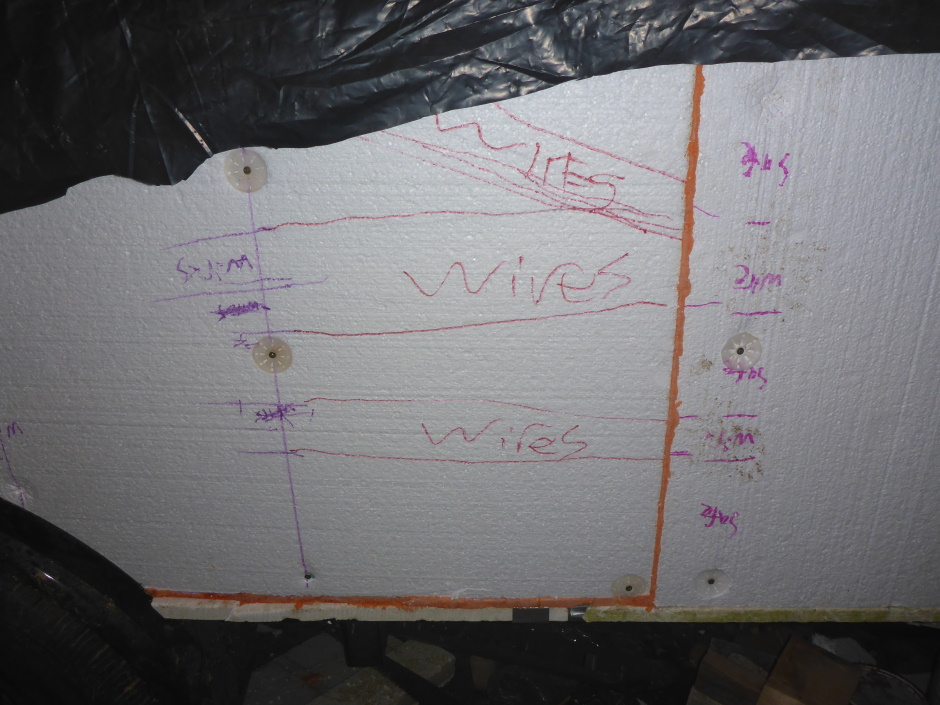
Do all the "internal-to-the-wall" fitting of wires and pipes from the outside. This allows final finishing and rough-in to be done in one step. It does mean you need a dry environment to build the tiny house.
It needs to be energy efficient (ie economical to heat). This is a big difference between an RV and a Tiny House.
You need to meet the highway size regulations when moving the Tiny House, but once parked on a plot you can expand.
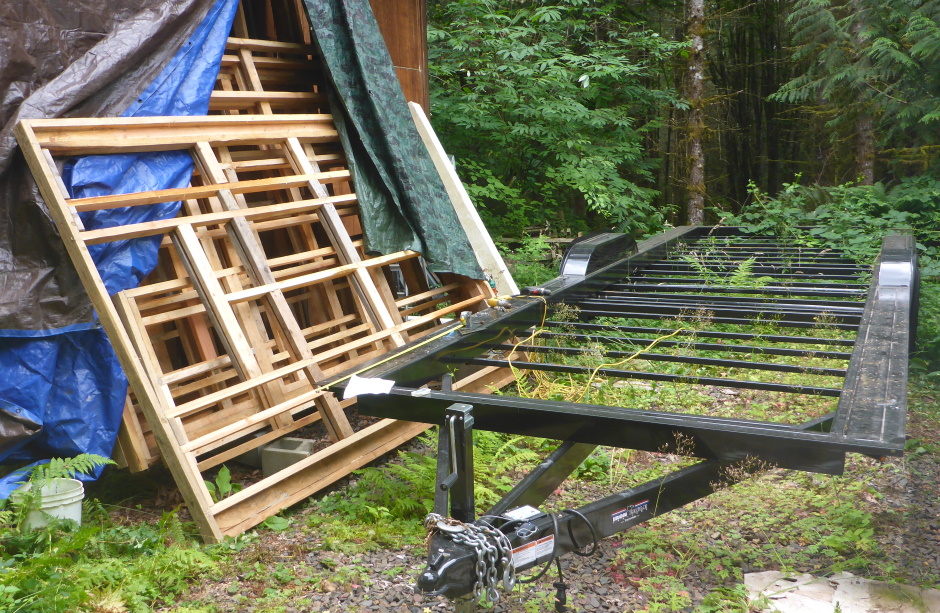
Trailer

Trailer requirements
Basic features
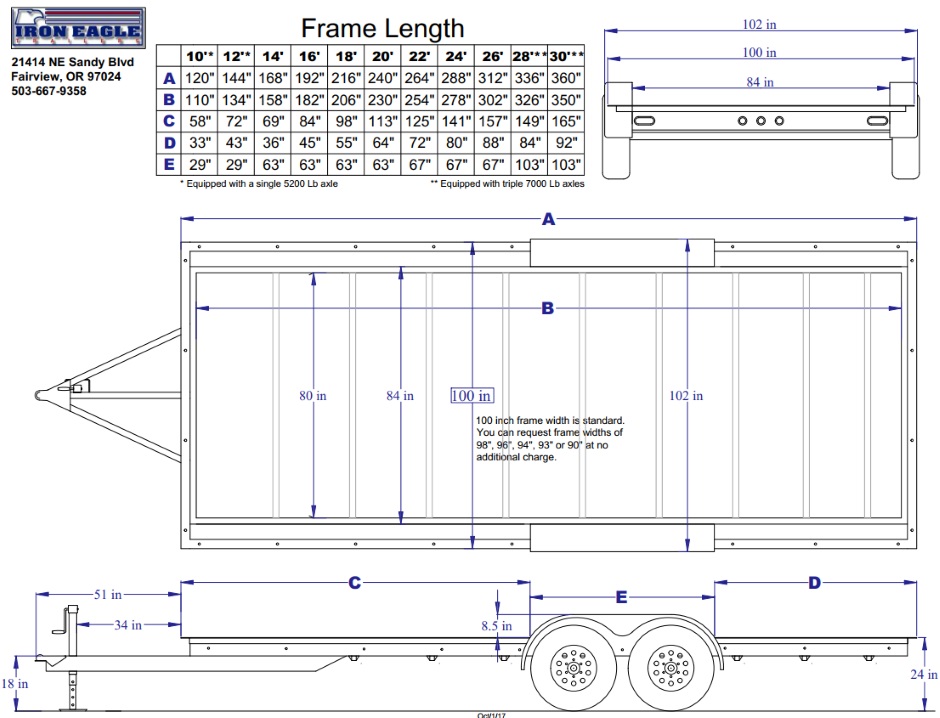
Bed size 8'6" x 26'
Twin axle, 14000 pounds
Cross-member box section steel supports recessed six inches below the top of the frame to accommodate floor insulation without sacrificing any floor height.
Axles positioned significantly forward compared to a typical flatbed trailer.
Maximum legal limit width of 8'-6'' (102'').
All wheel electric brakes.
Steel under wall positions (at least at the sides).
Weight distribution
You want 55-60% of the weight to be in front of the wheels (40-45% behind). In the case of a heavy thing such as a tiny house it is best to make it 55%. You could assume weight distribution is uniform over house area, but depending on your floor plan you may well find more of the weight is towards the front. Need to make some allowance for the utility box as this has heavy items in it. Tongue weight should be 12-15 percent of the loaded trailer weight, ie 1,200 - 1,500 pounds.
Customizing
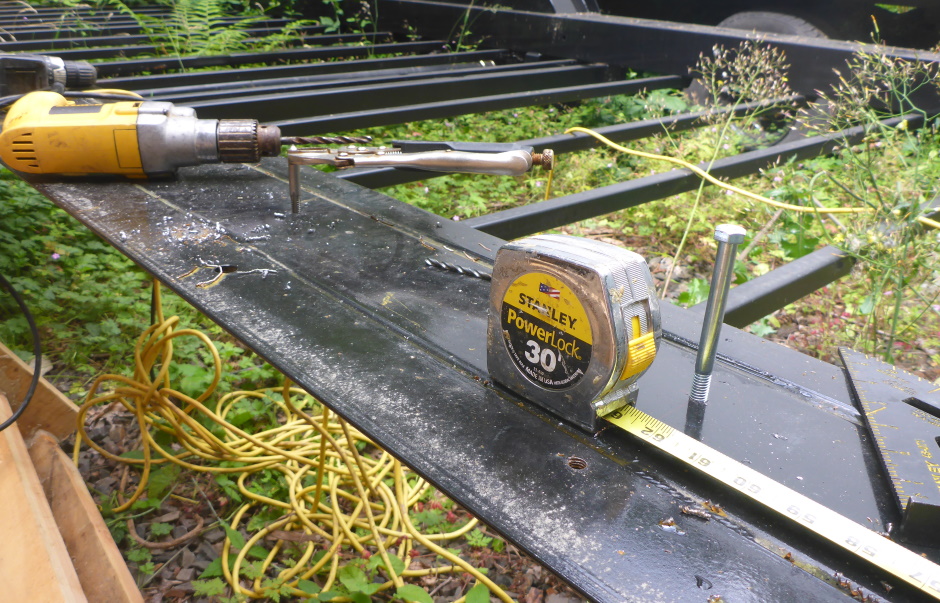
You could get the trailer manufacturer to add custom features such as metal shelf underneath for batteries and sewage tanks, but this can be logistically difficult and expensive, so it is probably better done with wood framing under the floor fixed with tapped threaded bolt holes onto the trailer steel.
Trailer wheels
16" 235/80 R16 10 ply Radial.
Wheel size 16". Tire dimensions 8" wide, 30" diameter (2'6").
Trailer brakes
If a trailer is longer than 15 feet or weighs more than 1500 lbs., it must, by law, come equipped with a brake system (ie electric brakes on all the wheels).
Towing vehicle requirements
This applies to the Iron Eagle trailer (and probably the others).
Vehicle with towing package rated for both the total trailer
weight (10,000 lb) and the tongue weight (1,500 lb). This
equates to a "1 ton" truck.
2-5/16″ hitch ball diameter
with a 1″ (or larger) shank.
2″ square receiver mounted on the tow
vehicle, set so that the ball is 18″ off the ground.
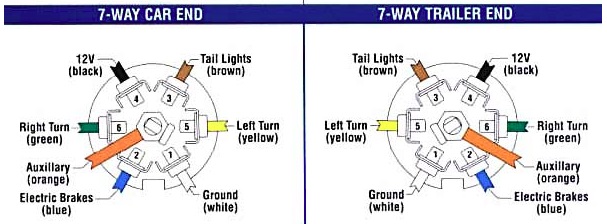
7 pin
round connector wiring harness for trailer lights and brakes.
Brake controller installed in the tow vehicle.
A big SUV (preferably diesel) is a good towing vehicle choice.
Pick something that is at least capable of towing 5,000 lbs.
Lower lbs capability typically equates to a less pleasant towing
experience, but a better miles per gallon when not towing.
In preferred order my choices are...
Chevrolet Tahoe 8,600 lbs
https://en.wikipedia.org/wiki/Chevrolet_Tahoe
Diesel V8 was available beginning in 1994
Chevrolet Suburban 8,300 (Longer Tahoe)
GMC Yukon
8,500 lbs (rebadged Chevy Tahoe)
Ford
Excursion 11,000 lbs
Ford Expedition 9,200 lbs
Toyota Sequoia 7,400 lbs
Toyota Highlander
Dodge Durango
6,200 lbs
Jeep Grand Cherokee
7,400 lbs
Nissan Armada
Brake control
The trailer brakes are activated electronically by the use of a brake control box mounted under the dash in the tow vehicle. There is additional wiring involved in tying your braking system and battery power to the rear plug, which activates the trailer brakes when you depress your brake pedal. The brake control box regulates the amount of voltage going back into the plug. The brake control box also allows you to activate the trailer brakes by hand in emergency situations, or when you simply want extra braking action independently of your putting your foot on your brakes. The law states that if you are towing a trailer equipped with electric brakes, you must have a brake control unit installed and working in your tow vehicle.

https://www.amazon.com/dp/B000P17NXQ/ref=psdc_15737671_t3_B0072UGXSY $123
Trailer suppliers
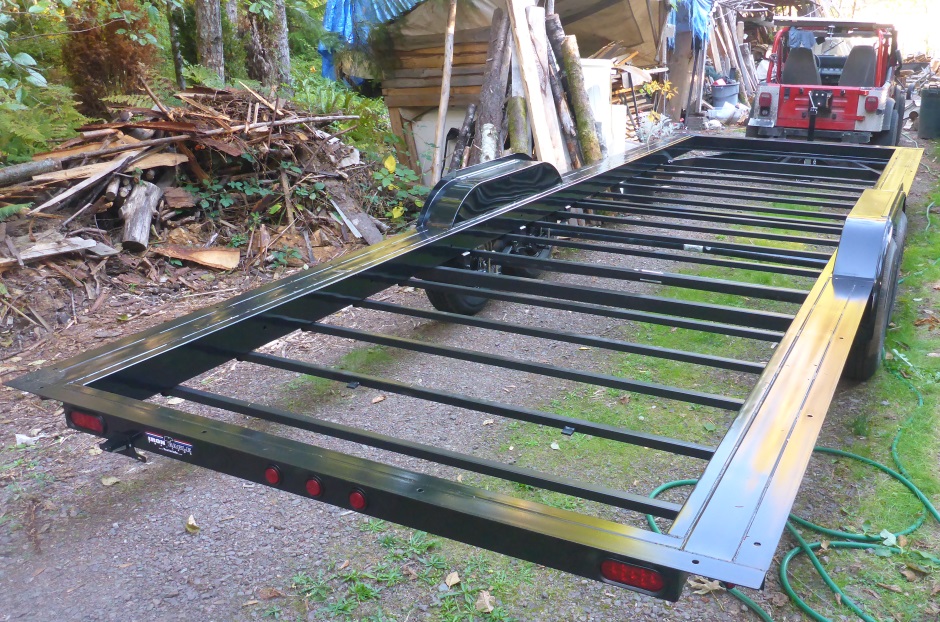
Iron Eagle (Portland)
Iron Eagle is my chosen supplier.
http://ironeagletinyhousetrailer.com/tinyhomes/
https://padtinyhouses.com/trailer-designed-for-your-tiny-house/
https://www.facebook.com/pages/Iron-Eagle-Trailers/355801427787400
21414 NE Sandy Blvd, Fairview OR 97204
503-667-9358
Owner: Rob Mandzij
https://www.youtube.com/watch?v=Raonw6HcrVQ&index=1&list=PLlUOuqspk4WHMgqUdRB387FgQKqO4OsBs
https://www.youtube.com/watch?v=GzsnMsxsfRU
https://www.tinynestproject.com/werecommend/
Ask for the Tiny Nest discount to GET $50 OFF an Iron Eagle Trailer.
Options required...
26' twin axle 14000 pound capability.
Wheel assembly 17" forward of standard position.
Steel floor
cross members under the floor area that are 16" on center (where
possible).
Front facing jack
on tongue.
2″ flashing fin around the fenders (close to outside).
Useful options rejected because of cost...
Galvanized steel bed flashing (22 Gauge) (.0336") (1/32") .
Rectangular front bump-out of 20"x60" for utility box.
Four corner leveling jacks.
Trailers Unlimited / Bend Trailers
https://bendtrailers.com/iron-eagle-steel-frame-8-1-2-x-26-14k-tandem-axle-pad-trailer-pad-14k26ee/ $4,510.00
These guys are just distributors for Iron Eagle trailers, but have a good price.
1223 NE 1st St. Bend, OR 97701
Phone: 541-318-8171
Monday - Friday 8:00 AM to 5:00 PM Saturday 9:00 AM to 4:00 PM
Trail Dust Trailers
https://www.traildusttrailers.com/
29300 SE Haley Rd Boring, Or. 97009 (Just off HWY-26)
503-328-8140
Mon - Fri: 9:00am - 4:30pm Saturday: 9:00am - 3:00pm
Trailer Rep
http://trailerrep.com/index.php/component/content/article/1-articles/8-flatbed-trailers.html
Rochester, WA (South of Olympia)
WA sales tax
PJ Trailers
https://www.pjtrailers.com/trailers/b5-5-inch-channel-buggy-hauler
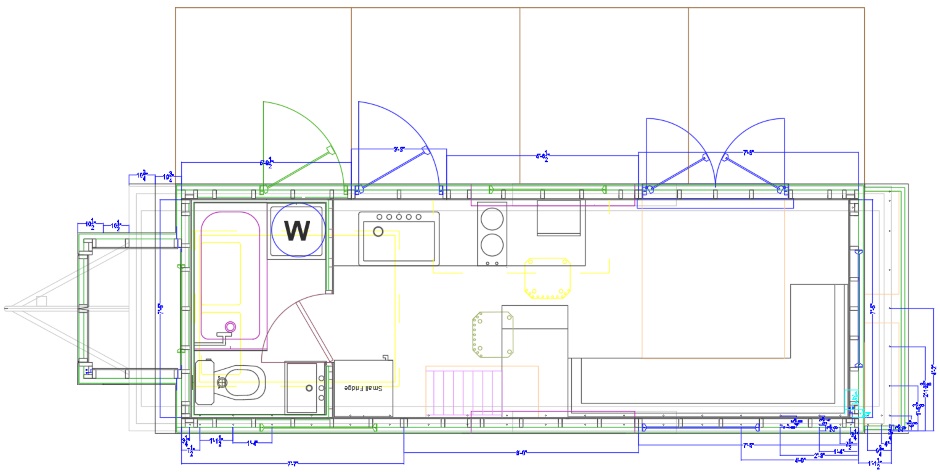
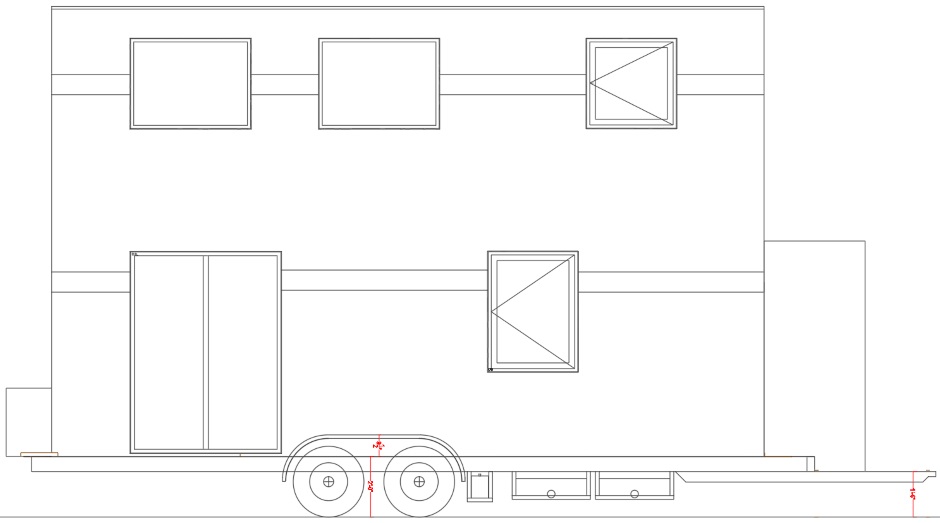
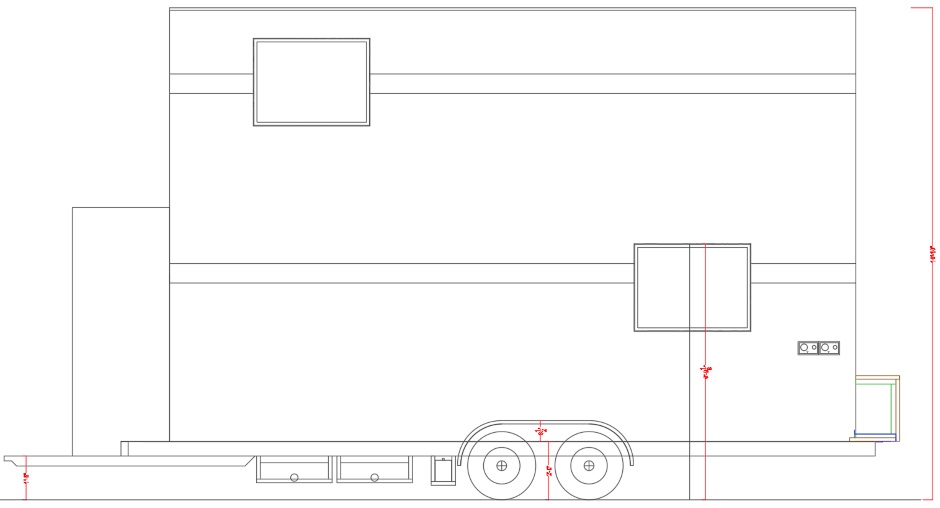
The design
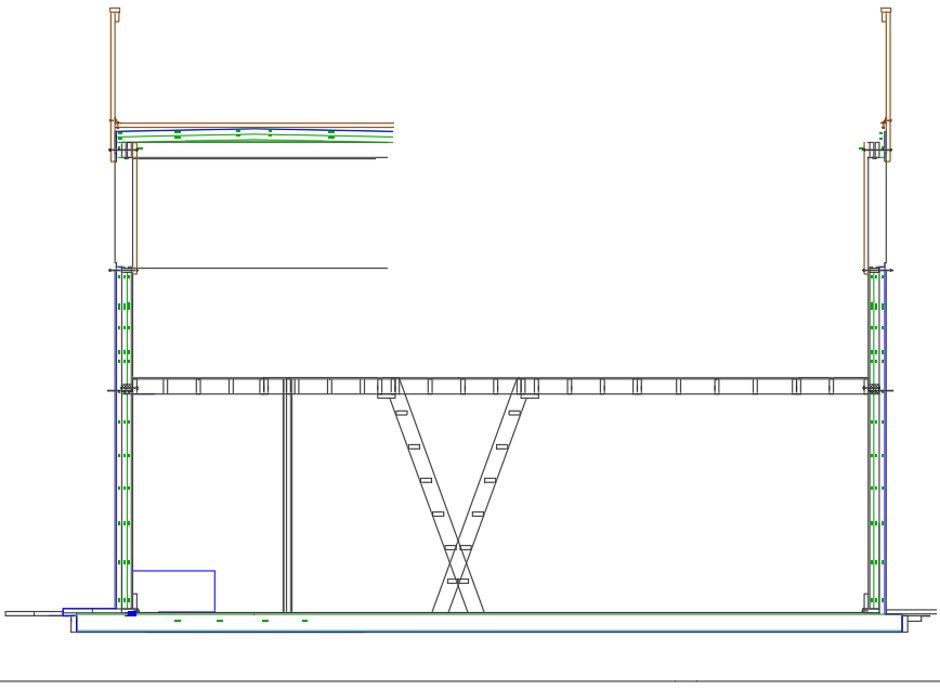
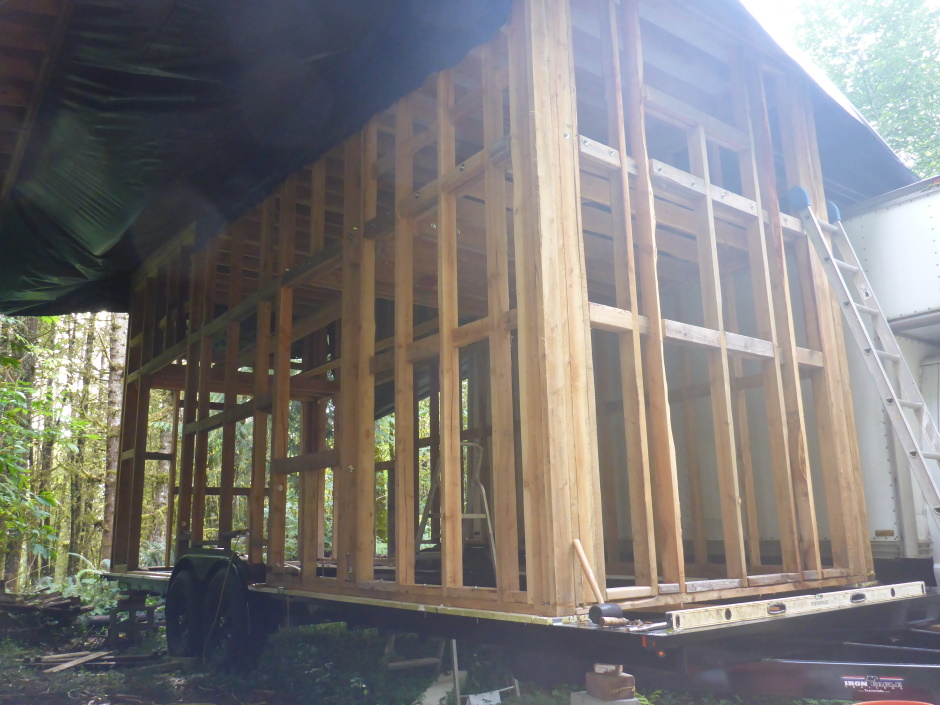
The actual house needs to be a flat roofed rectangular box in order to maximize the space allowed by the highway regulations. This is also easier to implement. Even though a rectangular box isn't visually appealing, you can add awnings when the house is parked to somewhat give the more pleasing look of a sloped roof.
A key feature of the design is the ability to jack-up the entire roof when the Tiny House is installed on a plot. This takes the upstairs ceiling height that is 3'4" when on the highway, up to 6'8" when parked. After the roof has been raised, extra 3'4" tall wall sections are added. They locate using a keyway and then bolted 2x4 wood straps hold the roof securely onto the now higher walls. Flashing tape to the self adhesive membrane is used on the outside on the joins and extra vinyl siding is screwed on. Note that it takes a full day of work to install the Tiny House on a plot, so if travelling round the county you typically leave the roof in the low position and tolerate the low ceiling height in the bedroom.
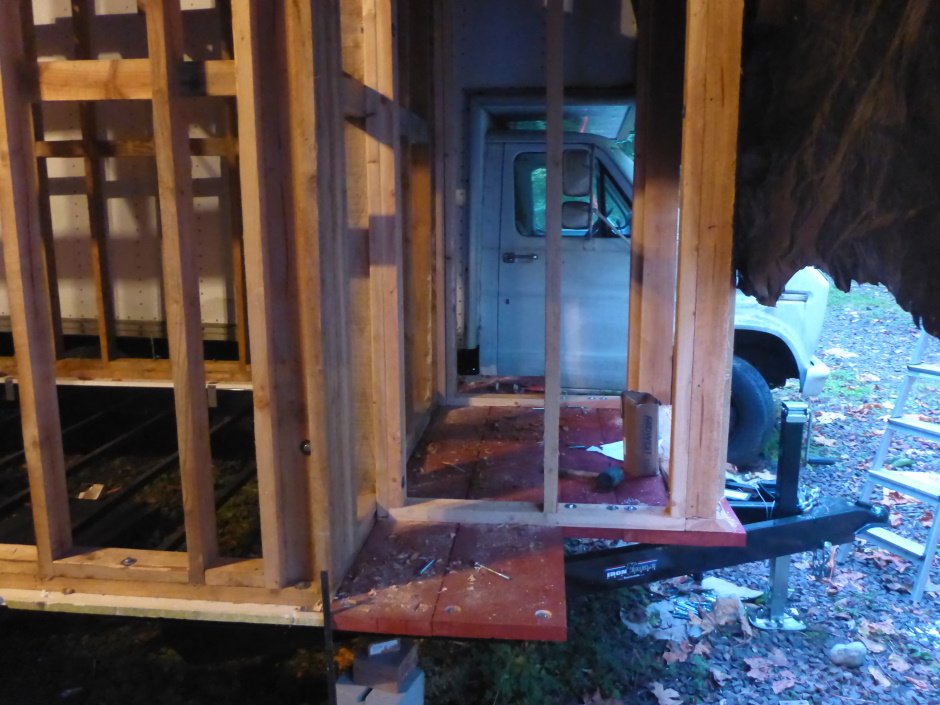
Even though the Tiny House is 23' 6" long to make the footprint 199.75 sqft, it is actually built on a 26' trailer. At the front this provides lots of space for a big utility box and provides a 1 foot lip at the back for water tanks and supporting things strapped to the back when on the highway (eg a bike or house panels).
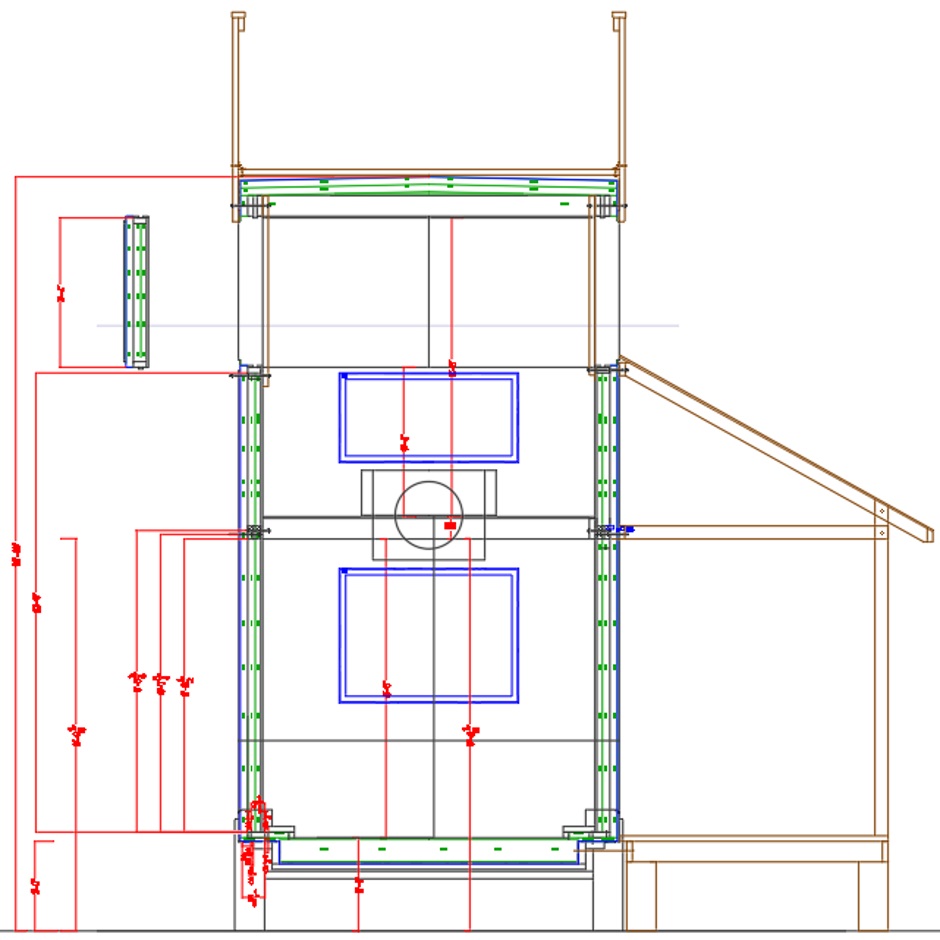
Structure
Dimensions
Exterior walls are 6.5" thick.
Interior walls are 3.25" thick.
Need to ensure no overhangs (eg windows or window trim) exceed the maximum 8.5 foot width.
Floor
Framing
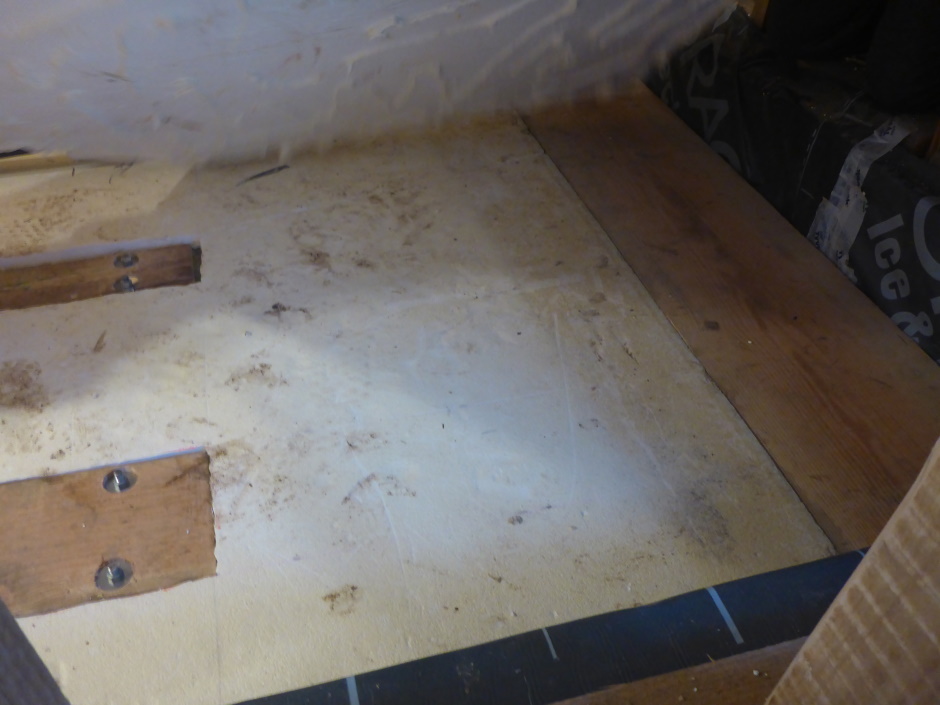
Can avoid doing wood floor framing and just rely on the 6" EPS to take the people weight. The trailer should have steel cross bars underneath at 16" on center. There is half inch particleboard above and below the 6" EPS to spread the load and provide a ridged floor.
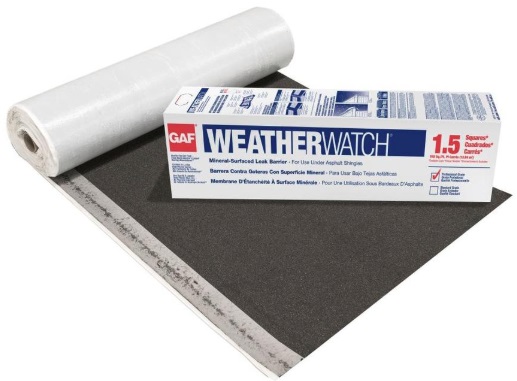
Before the EPS, cover the underside of 1/2" particleboard with self adhesive ice & water shield, leaving a couple of inches free round the outside. Lay it into the floor recess. Seal round the edges and between wrapped sheets with flashing tape to make a continuous water barrier.


For further protection on the trailer underside you can optionally add a layer of fly mesh, but I regard this as overkill and overly expensive. The fly mesh is wide enough to not need any joins.
Use foam adhesive on the bottom particleboard when adding the 6" EPS. Glue on the top layer of plywood with foam adhesive. This makes a SIP-like assembly with added I-beam-like rigidity.
Waterproof flooring
Particularly in the bathroom it is good to have waterproof flooring rather than just plywood.

Armstrong Flooring Pickwick Landing I 12-ft W x Cut-to-Length Bear Path Oak Dark Brown Wood-look Low-Gloss Finish Sheet Vinyl
https://www.lowes.com/pd/Armstrong-Flooring-Pickwick-Landing-I-12-ft-W-x-Cut-to-Length-Bear-Path-Oak-Dark-Brown-Wood-look-Low-Gloss-Finish-Sheet-Vinyl/999978490 $0.89 per sqft 12' wide $10.68 / Linear Ft
Alternatively you can lay laminate wood flooring (but you will loose 3/8" of head height relative to vinyl) eg...
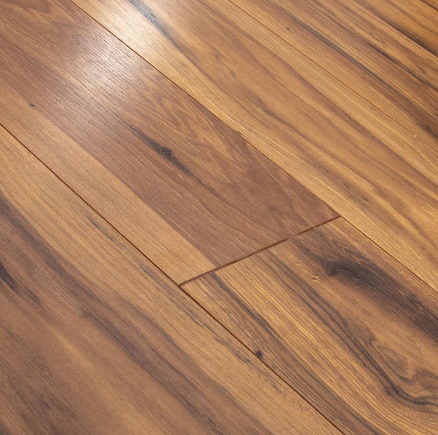
Do not fix down the flooring until the plywood and EPS underneath is completely dry.
Optionally put in a floor drain with a U bend but then out to fresh air. The U bend stops there being an air leak into the building enclosure. I regard the floor drain as being unnecessary.
Could decide to do the entire Tiny House floor. Use rugs on top of vinyl eg in living room.
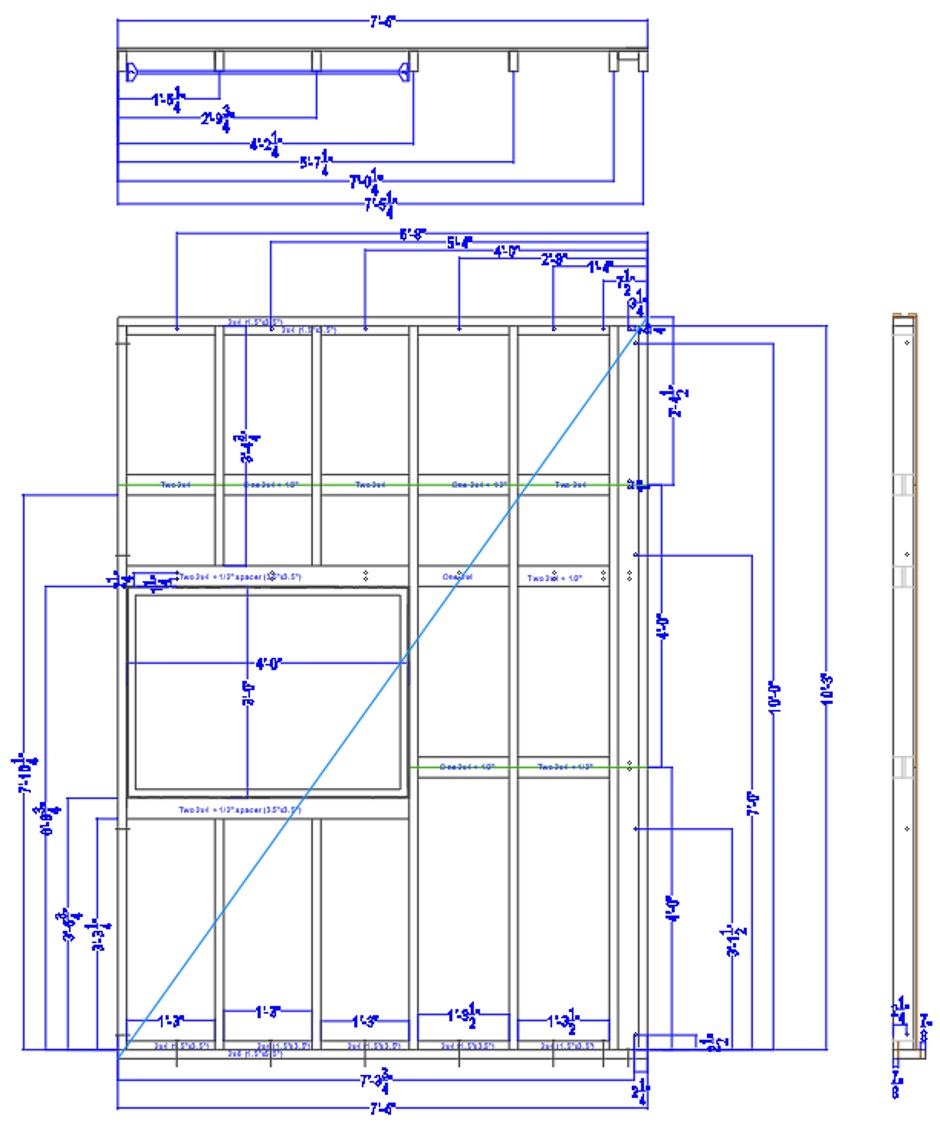
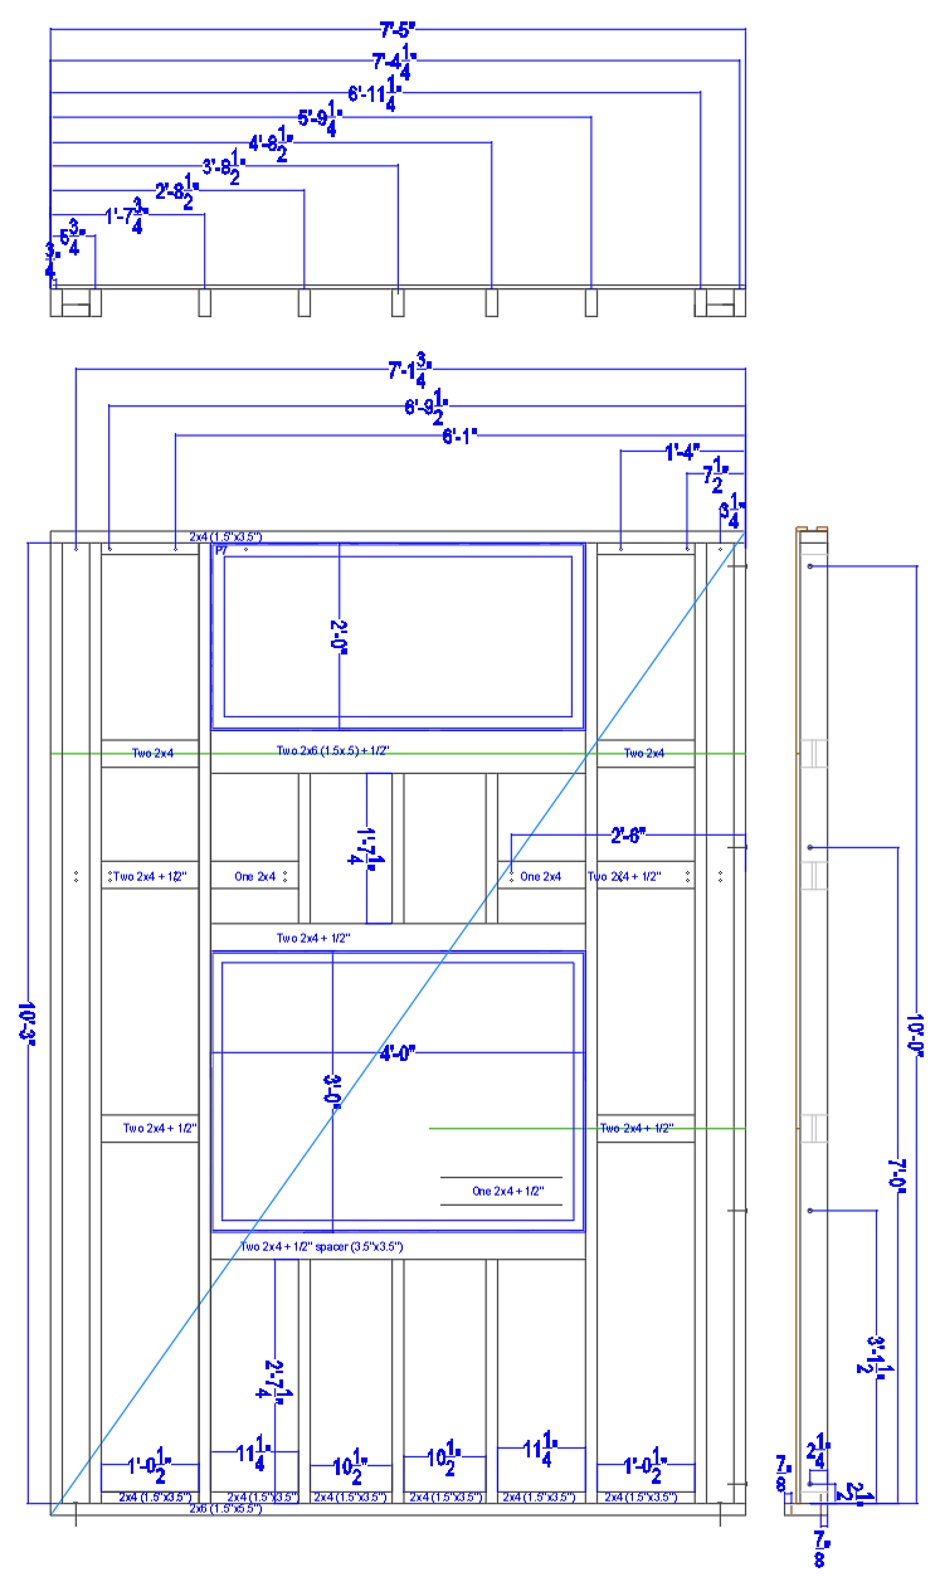
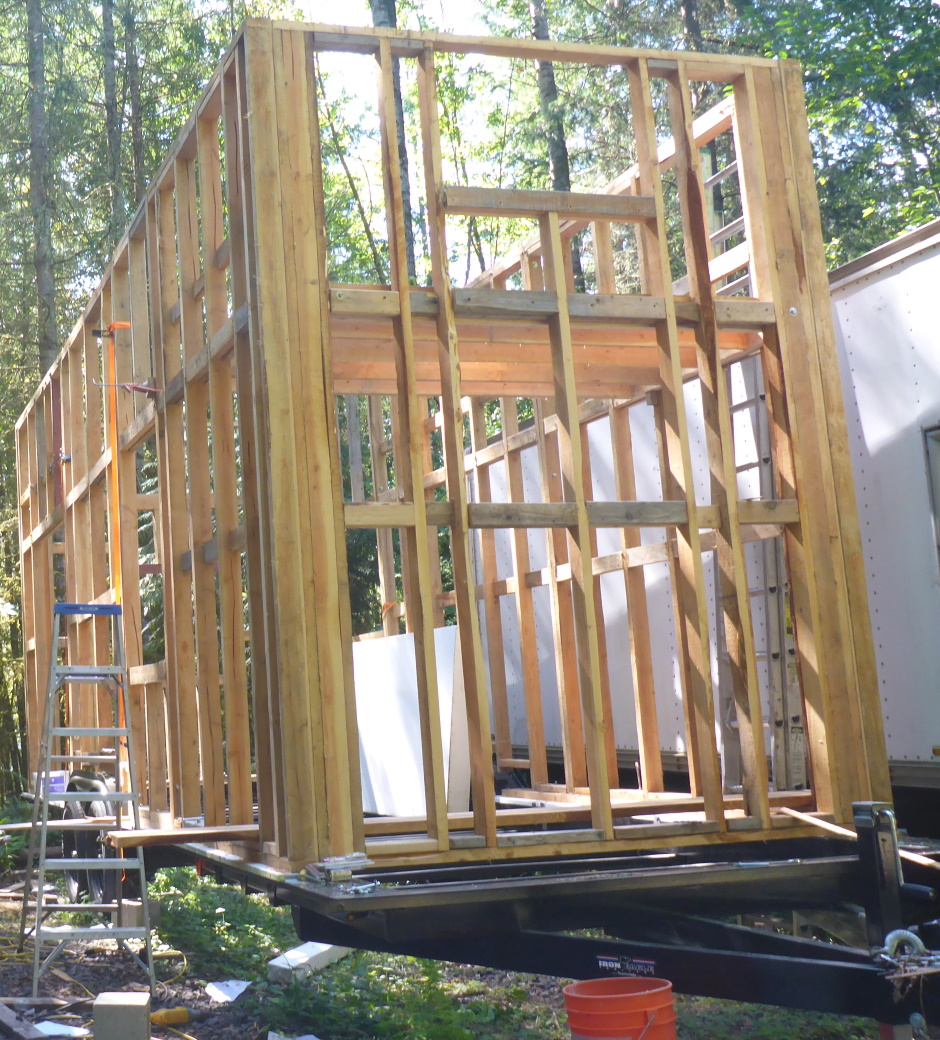
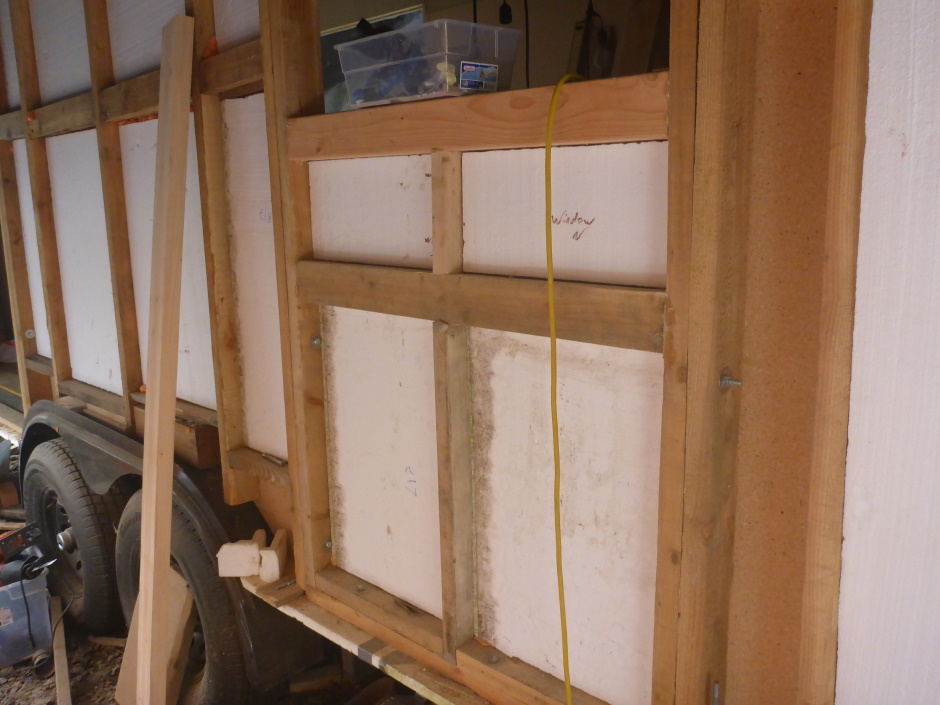
Walls
Framing
2x4 framing.
Frame for rough opening size of windows.
Glue and screw all joints (use PL-Premium).
Use interior 1/2" formaldehyde-free particle board to provide shear. Thoroughly glue (and screw) the particleboard to the 2x4 framing (on the inside).
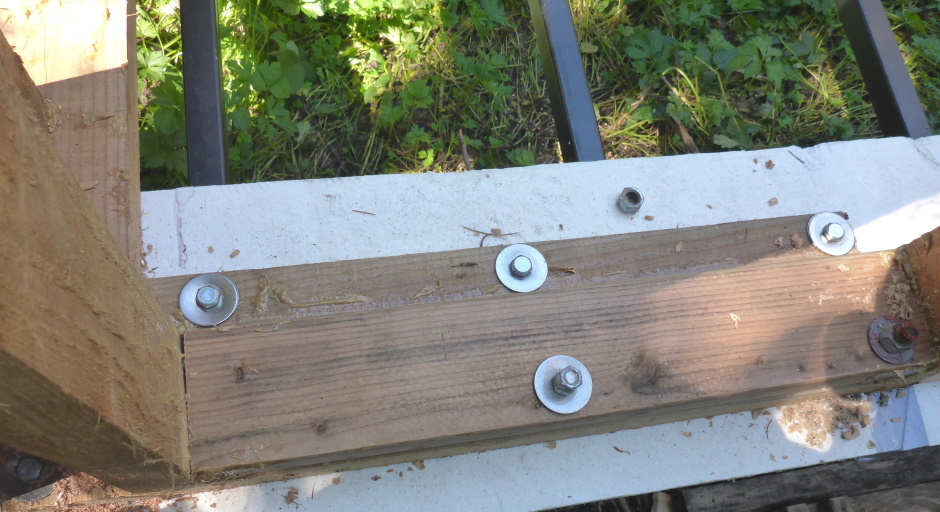
2x6 wall bottom plate over 1" 40psi EPS. The 2x6 bottom plate is part of the pre-built wall assemblies.
Don't use sill wall plate under the door as want to avoid a trip hazard and need the full height.
Bolt 2x6 wall bottom plate through to trailer steel using the holes in the steel lip and additional holes into tapped steel trailer box section.
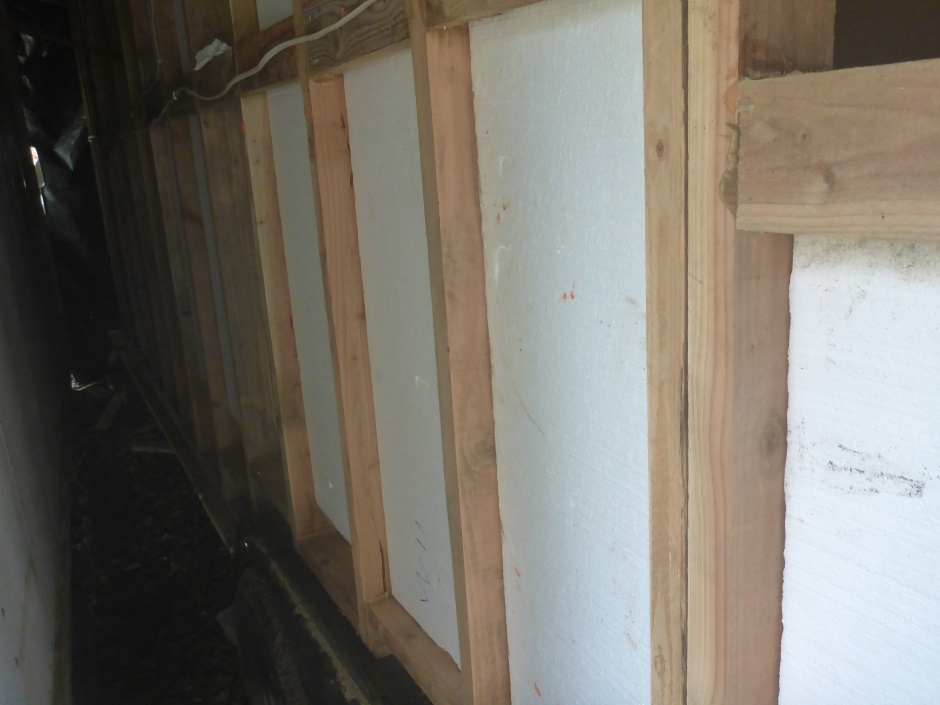
Insulation
2" + 1.5" EPS as batts. Use foam gap filler to seal it into the cavity. Sealing is important to stop air bypassing the insulation round the edges.
Extra 2" of 15psi EPS on outside of 2x4 structure. Glue it on with foam adhesive.
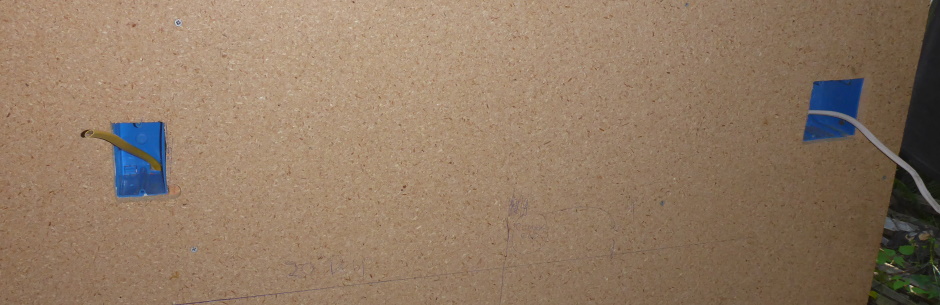
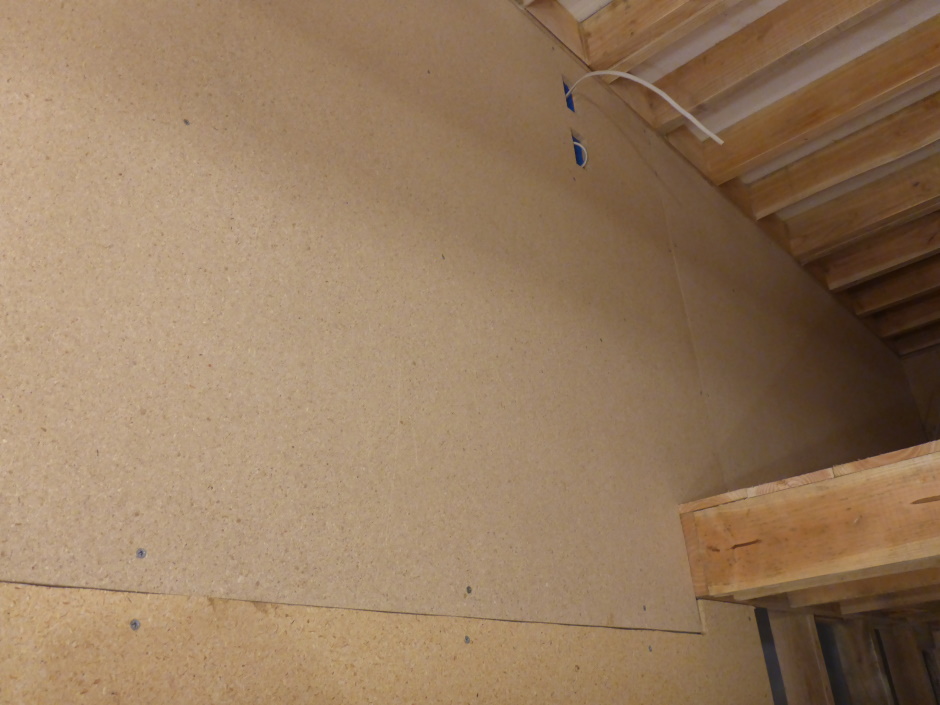
All the insulation is added from the outside after wires and pipes have been installed.
Inside
On inside use half inch formaldehyde-free particleboard fixed with 2" screws. Need the particleboard to handle sheer. Glue the particleboard on to increase the shear handling capability. The particleboard has a smooth surface and when painted will be the interior finish. Using particleboard is better than using plywood because it is dimensionally better, has a smooth surface finish, and does not have formaldehyde (formaldehyde is a carcinogen). Buy the 1/2" particleboard from Lowes for about $18 for a 4'x8' sheet.
Outside
The only materials that can rot are the wood framing and the inside particleboard. They are on the inside and are kept warm and dry. It can dry to the inside and outside.
The outer siding is vinyl and will not rot. It sheds rain. Rain shedding is particularly important as the Tiny House width restriction means the roof cannot provide an overhang.
Put Tyvek or 6mil polyethylene sheet over the wall EPS (under the vinyl siding) to make it rain-proof. The self-adhesive thin roofing felt goes down the wall about 6" and sticks on top of the Tyvek or Polyethylene.
The seams should be taped with Tyvek tape.
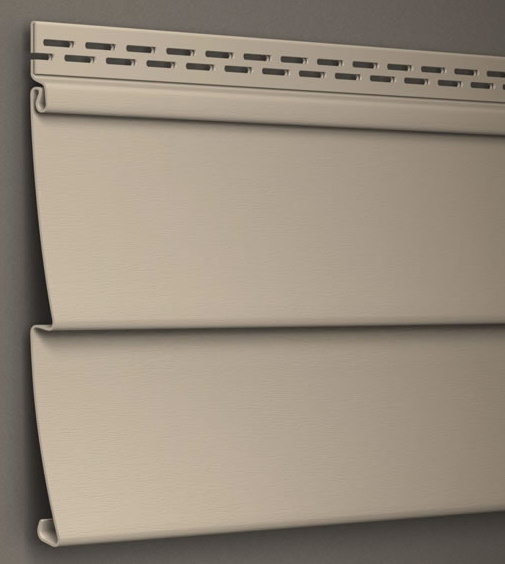
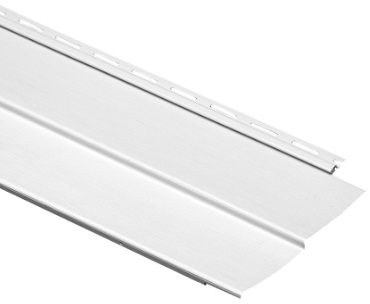
On outside use vinyl siding.
Alside Supply Center
6701 South Glacier Street Tukwila, WA
98188
425.291.9161 800.778.2323
Fax 425.291.9165
https://www.alside.com/products/siding/vinyl-siding/
https://www.alside.com/products/siding/vinyl-siding/horizontal-siding/odyssey-plus/
Need 1/2" Clapboard. Personally I like "Fired Brick" color.
http://www.durabuiltbuildingproducts.com/pdfs/installationguide.pdf
Need to check actual highest point thickness (needs to be less than half an inch).
Ideally buy brown colored siding. A couple of white (or other color) horizontal go faster stripes might be good.
Could even use brick style vinyl siding...
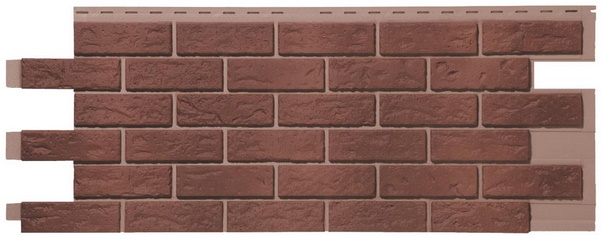
https://www.homedepot.com/p/Novik-Stone-HL-18-5-in-x-48-in-Hand-Laid-Brick-in-Red-Used-Blend-46-sq-ft-per-Box-Vinyl-Siding-100050001/308658049 $174 for 46 sqft
Attach using 3.5" wood screws through the polyethylene and EPS into the wood studs. No air gap.
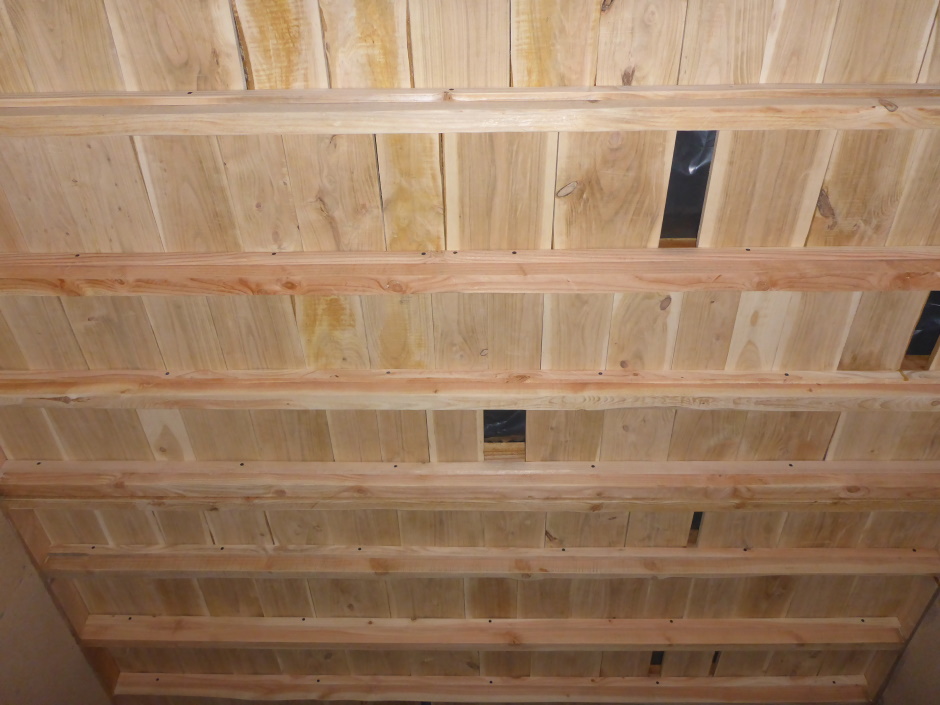
Roof and roof decking
Roof insulation (EPS) on the outside of the roof. 4" on outside, plus 6" EPS as batts between beams.
The EPS is installed to give a 1" slope from the ridge center to the sides to aid water runoff.
Wood plank deck over self-adhesive thin roofing felt covered EPS. For added confidence that no water will get in, use self adhesive ice & water shield over the EPS under the self-adhesive thin roofing felt . Both membranes go along the length of the roof. Start at the outside edges (to account for water runoff direction from the roof center ridge). Stagger the joins.
 +
+
The wood deck keeps UV off the self-adhesive membrane. The roofing felt without the wood deck is fine for a year or more of road travel.
Railings round the outside of the deck are attached to the wood deck. The whole assembly is attached to bolts at the top of the walls.
The roof deck would be great when visiting outdoor events to get a good view (but it does take a while to assemble).
Use external ladders to get to the roof deck. The best approach is one ladder to the top of the utility front bump-out and then another ladder from there to the roof.
The roof on the front bump-out utility shed is done the same way.
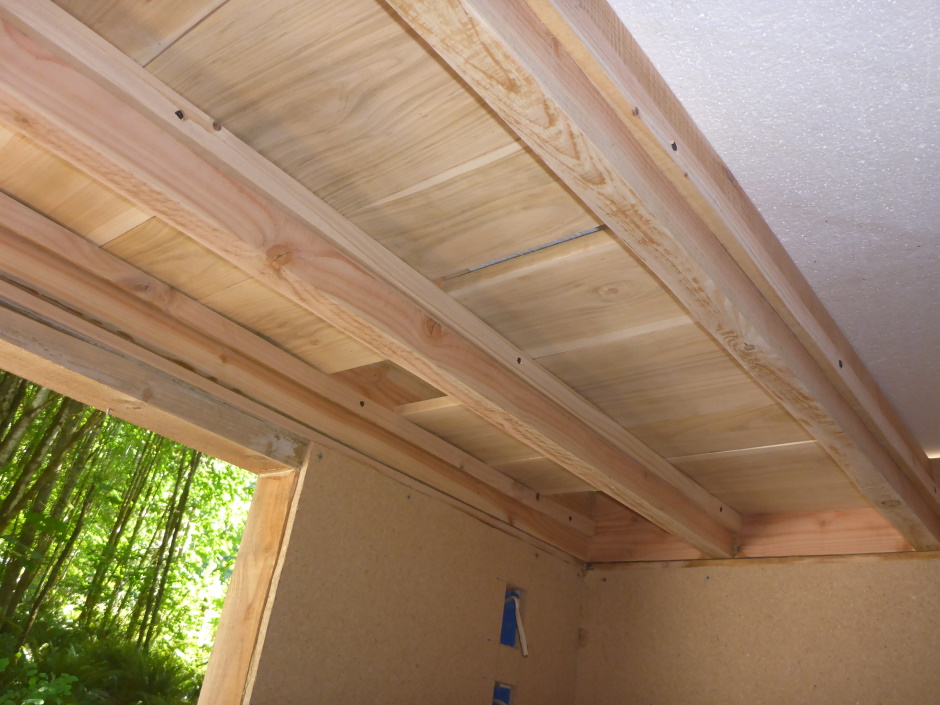
Framing
Ceiling framed using 2x6s.
Half inch wood eg particleboard on underside of ceiling beams. The particleboard prevents shear and skewing of the top of the house. The force of walking on the roof is transmitted through the EPS to the underside 1/2" wood (which is screwed and glued to the 2x6s).
The roof needs to be made in 8'x4' sections (or less) and the sections get bolted together, so this means there are two sistered 2x6s at the joins.
Insulation
Use 6" EPS batts between 2x6 ceiling joists. Use foam gap filler to seal round the edges. Carve the edges down by 0.5" to provide some water run-off. At the edge, this gets it down to the 5.5" of the 2x6 lumber.
Also put roof insulation (2" x 2" = 4" EPS) on the outside of the roof. Stagger the joints. Pad in steps at the roof ridge with half inch EPS to complete the run-off slope.
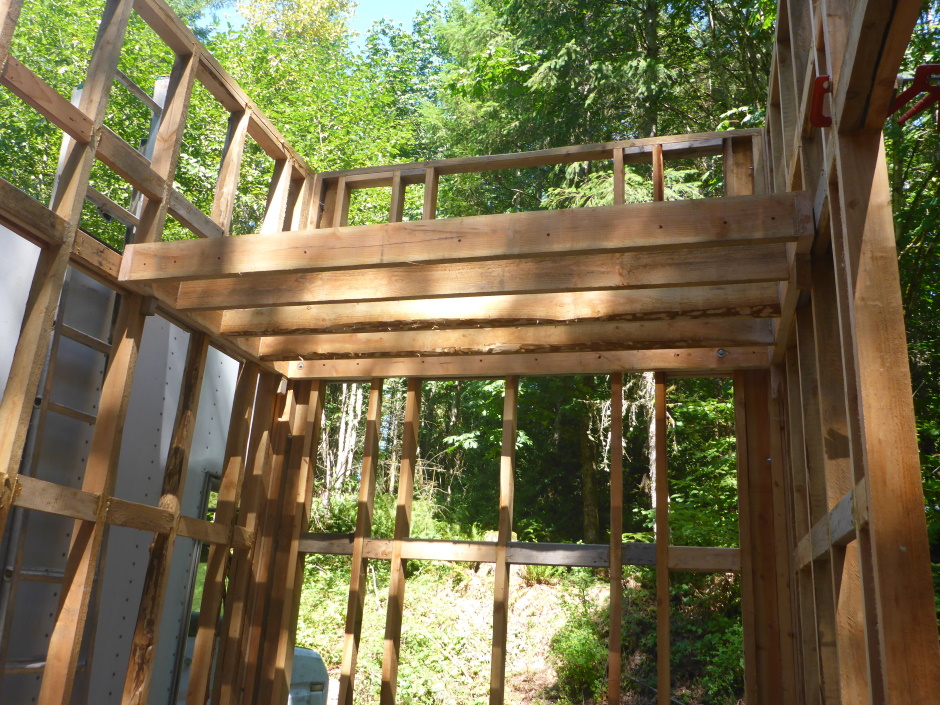
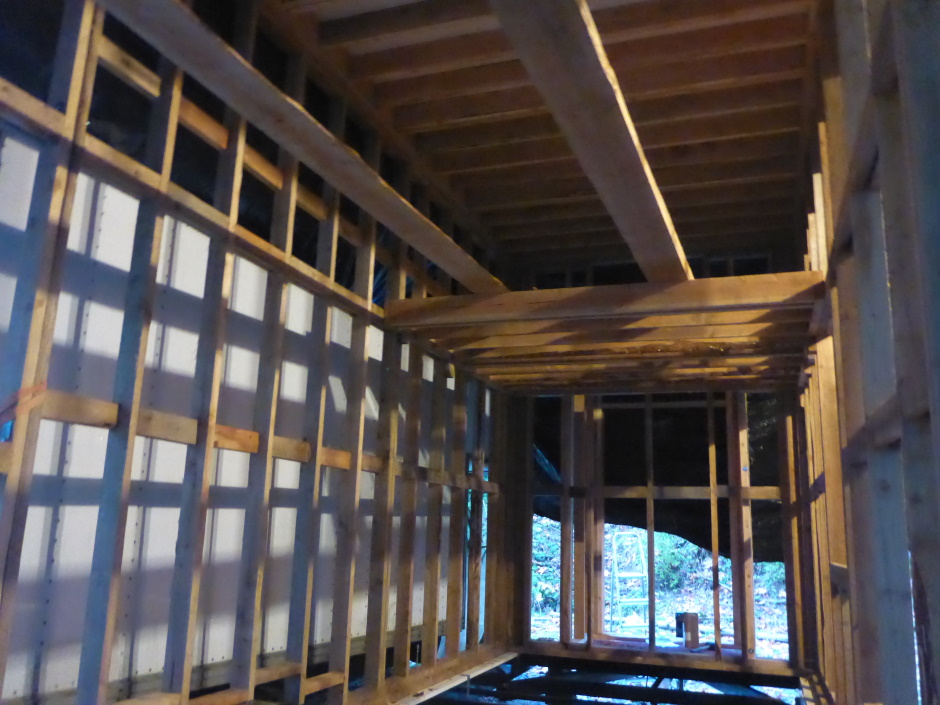
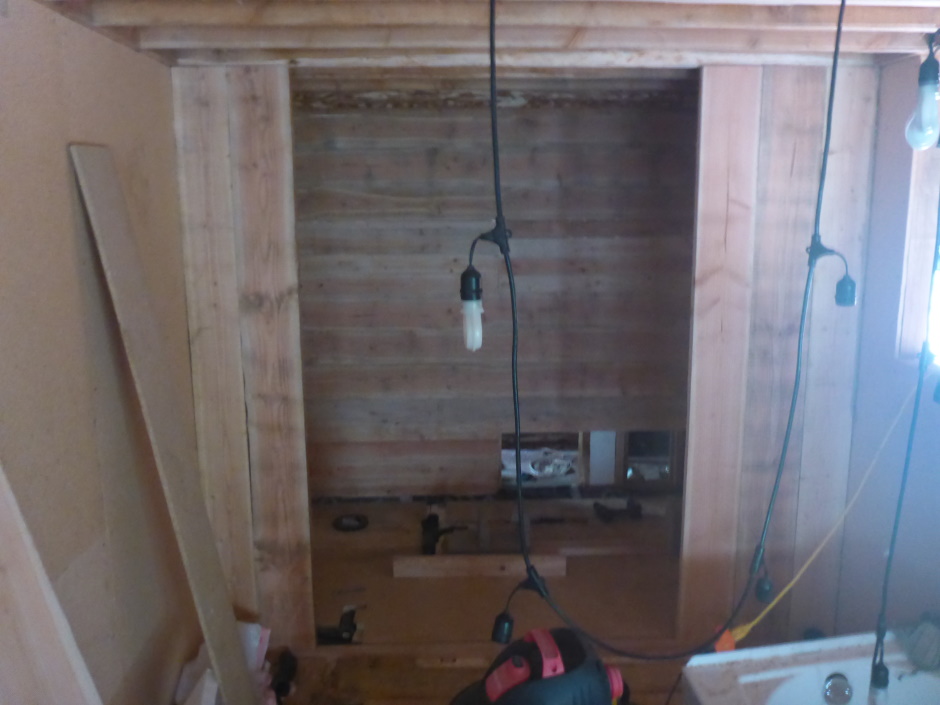
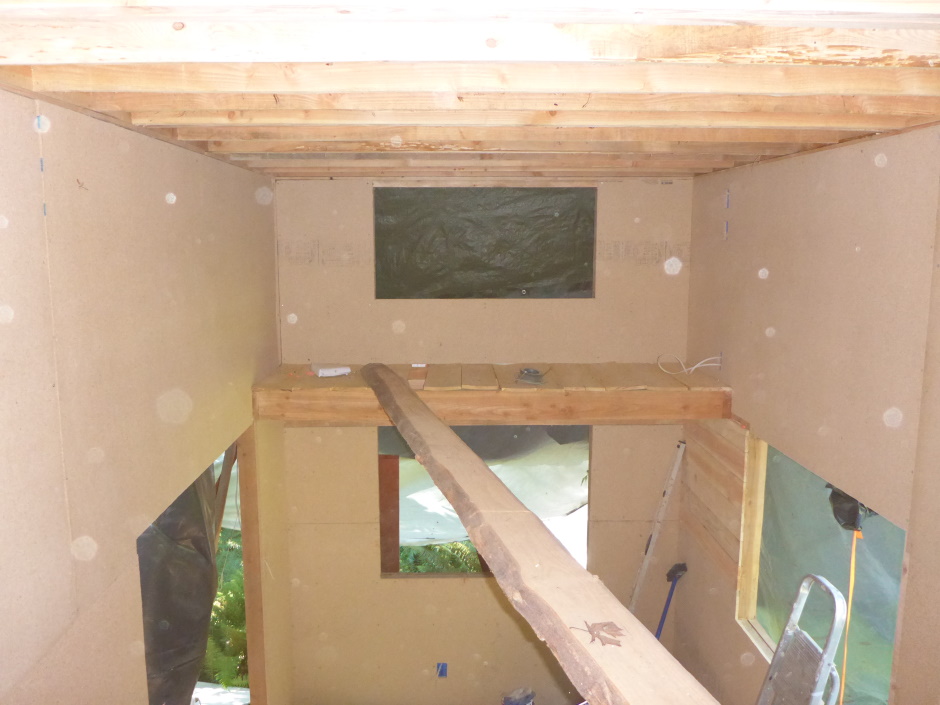
Mezzanine
This is the bedroom floor and upstairs office floor.
Made using 2x6 beams 12" on center with 1/2" plywood above. It needs to be made in 8'x4' sections (or less) and the sections get bolted together, so this means there are two sistered 2x6s at the joins. The sections are bolted together with 3/8" bolts and bolted to the walls.
Use 1/2" particleboard (like on the walls) for the flooring surface.
Internal walls
Use 2x4s on-flat for internal wall framing.
Put sound insulation (EPS) inside internal walls. Inside cavity use 1.5" EPS.
Use 1/2" particleboard on "bathroom outside" of internal walls.
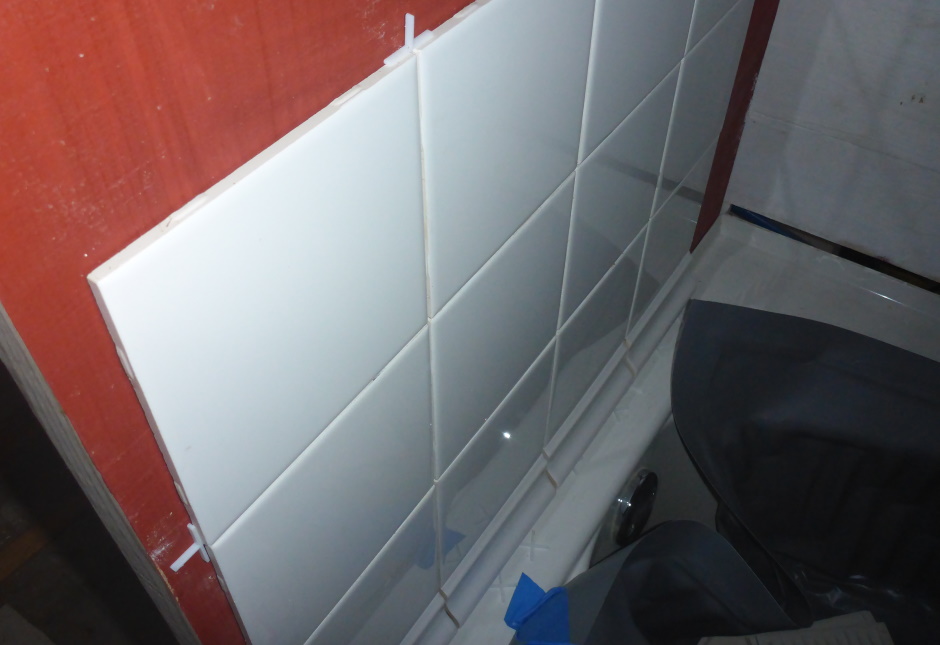
On the inside, where tiles are required, use 6mil polyethylene sheet to stop any water getting to the wood, then 1" 40psi EPS screwed on, then porcelain tiles glued on with foam adhesive. Grout the tiles (ideally with epoxy grout).
A wall with tiles on one side has a 3.25" wall thickness.
Stairs
Need a custom made ladder. Make the ladder movable and hookable to either side of the opening in the mezzanine. This allows for some variety of furniture positioning in the kitchen area.
Can be eg 12.25" between 4" rungs. The rungs are horizontal (ie angled relative to the side beams).
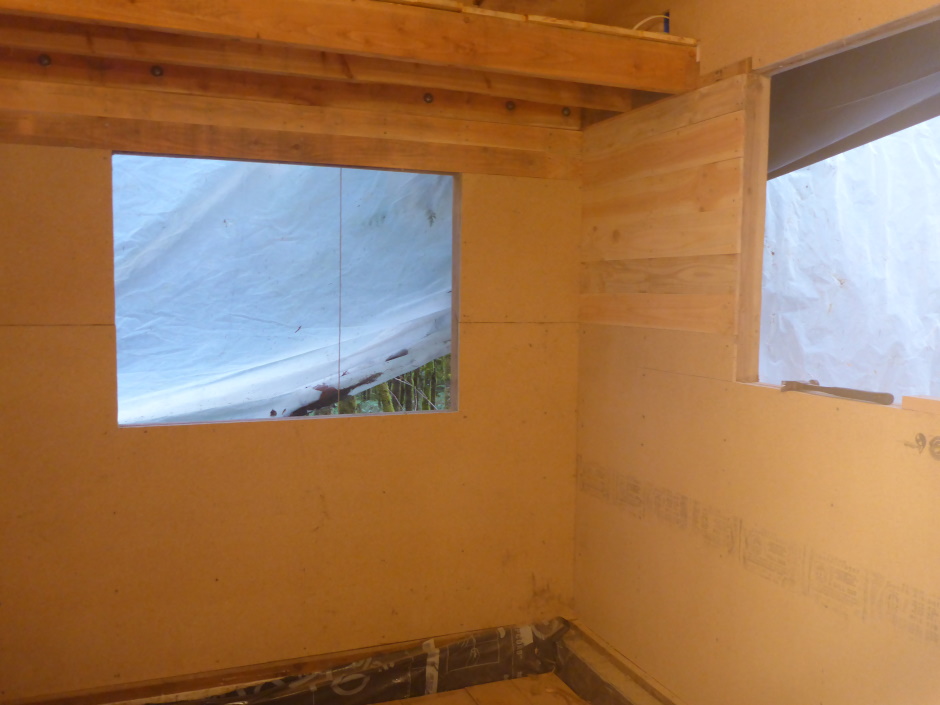
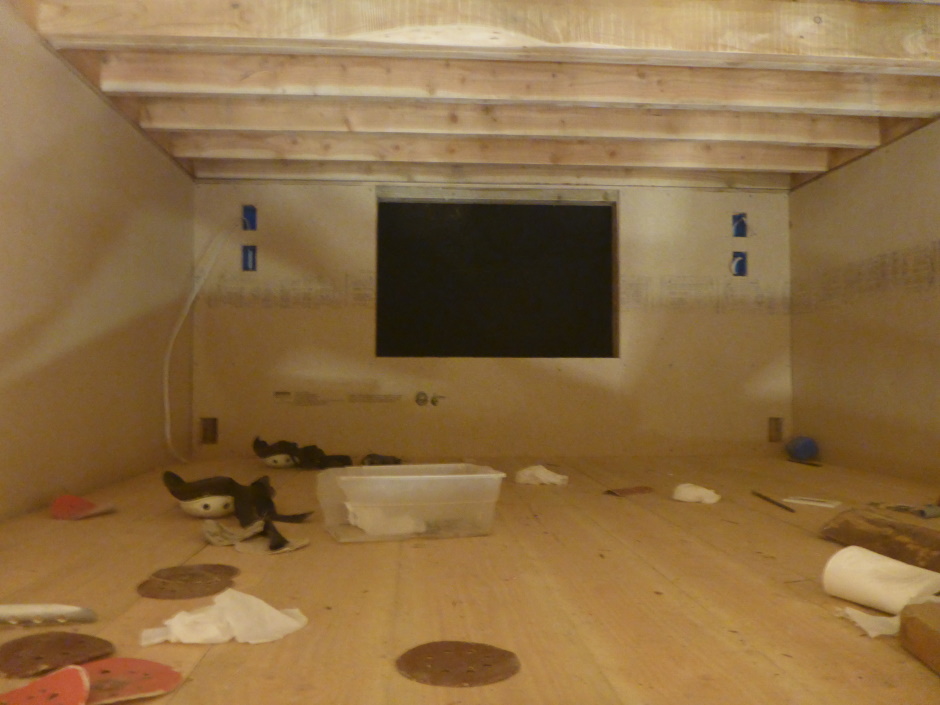
Windows
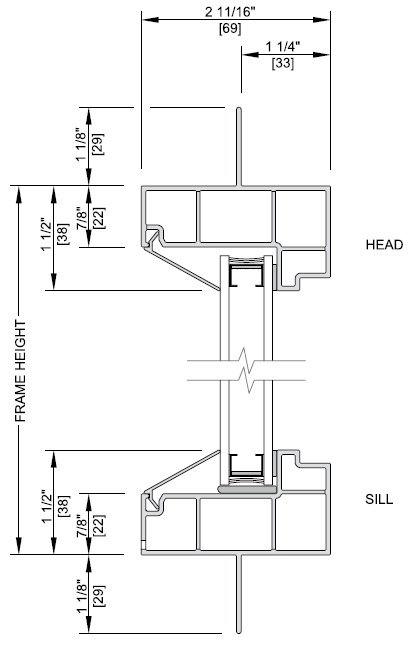
Use argon filled double glazed windows with vinyl frames with nail fins. Use Lowes Thermastar windows that are made by Pela. The different sizes will need to be ordered from the Lowes window desk with a 3 week lead time.
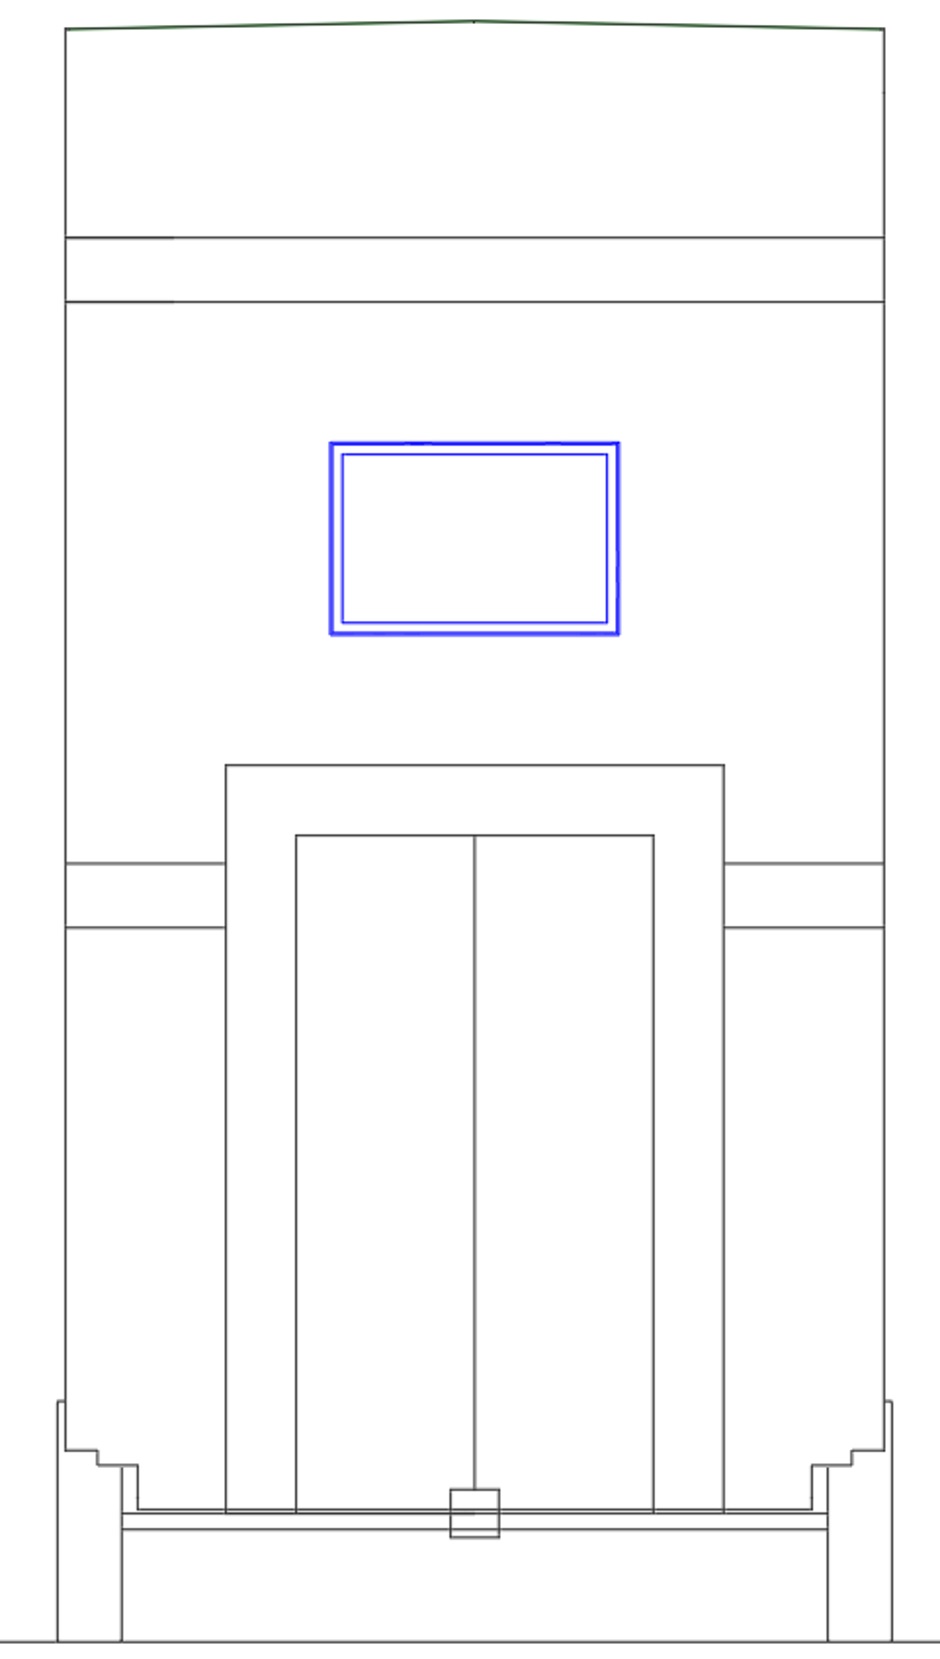
In the bedroom there needs to be an egress opening window with an opening size of at least 5.7 square feet. The minimum egress window opening height is 24” high. The minimum egress window opening is 20” wide. This is to allow you to escape from a fire that starts downstairs.
Put a casement window in the bedroom that is 36" high and 36" wide.

Use 1.5" flat-headed "lath" screws for window nail fin so no danger of being sucked out while towing.
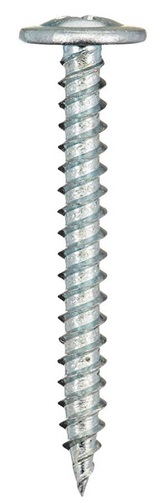
https://smile.amazon.com/gp/product/B003W934QS/ref=ox_sc_saved_title_1?smid=ATVPDKIKX0DER&psc=1
It is also good to use washers with the screws to allow some slip movement.
Door
Only one door is needed and this can be a patio door.
Use 5' wide French doors in living room even though expensive. Outswing doors are $100 more expensive than inswing. Out swing doors are good as they get tighter as the wind blows, compressing the seal, but inswing works better with a flyscreen. Installing a fly screen on an outswing door is slightly more difficult, but a magnetic curtain type works ok.

https://www.doorclearancecenter.com/french-doors/full-lite-steel-patio-prehung-double-door.html $419 + $100/$200 shipping + tax

JELD-WEN 59.5-in x 78.5625-in Clear Glass Left-Hand Outswing
Primed Fiberglass French Patio Door
Low-E glass 60" x 80" (5' x 6'8")
Jam depth 4-9/16"
Rough opening height is actually 79.1875
so add a 3/4" high foot plate.
The fiberglass door comes primed but needs to be painted yourself. You also need to add door knobs and locking mechanism.
The out-swing Jeld-Wen doors have the hinges on the outside and it is possible to remove the hinge pins, so this is a bit of a security issue. Worth investigating some hinge modifications, eg gluing in the pins.
Need to use a magnetic curtain fly screen that can be fixed on the inside.
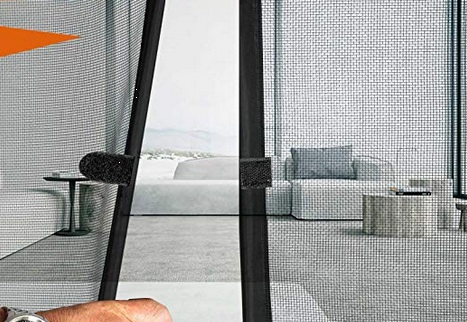
https://www.amazon.com/gp/product/B07CLGC3V7/ref=ox_sc_act_title_1?smid=A12FJVTLVM8HOE&psc=1 $35
Permanent option full
Use outswing fiberglass French door
Permanent option cheap
Use a sliding vinyl door
Utility box
Power bulge box on front with services. The utility box is not optional but many of the things inside are optional eg...
Electrical Breaker box
One or more batteries
with battery charger and 115V inverter.
Propane tanks (Two for ping-pong) (option).
Electrical generator (propane capable)
(option).
HRV (option).
Rear lip box
This is on the 1 foot wide lip provided by using a trailer that is longer than the actual house. It has an enclosure for installing water tanks (option), water pumps (option), and an anti-frost heating mat (option).
An insulated wooden box is implemented that is 8' 6" wide, 1' 6" deep, and 2' 3" high. It is not fully waterproof.
The inside of the 2-by box is lined with 2" EPS. The top and side assembly lifts off. The bottom is 2-by with 2" of EPS. The bottom can be wrapped in ice and water shield or just painted. The bottom plate is not optional but the cover assembly is optional. The wooden cover box needs to be well painted to stop the weather rotting it.
It is good to put a window box (optional) on top of the box when parked on a plot. When on the road, cargo can be put on top of the box and tied to the house rear wall using the provided bolt attachments.
Option full
Box as described.
Option cheap
Just the wooden waterproofed rear lip.
Awnings
There is no roof overhang, so above doors and opening windows it is good to provide awnings to allow them to be open when it's raining.
A sloped awning has a big influence on how good the Tiny House will look when parked. It looks like a sloping roof.
Awnings need to be easy to fit and easy to remove for towing.
Awning sections need to be small enough to allow them to be easily packed and transported when on the road.
Make the awning the full length of the house. Often there will only be an awning on the south side over a deck. About 30 degrees and a decent way out to form a covered porch for outdoor living. Roof sections need to have one dimension less than 6'6" so they can go inside the Tiny House for travelling.
Make them using plywood on a 2x4 frame. Cover the awning sections in self adhesive roofing or 6 mil polyethylene with 1/2" thick wood planking on top to keep the UV off the polyethylene. Use flashing tape between the sections.
Typically there is no awning on the north side or at the ends of the trailer, but this is theoretically possible.
Option full
Four section awning along the whole south side.
Option medium
Just a 6' wide awning above the patio door.
Option cheap
No awning.
Decks (ground level)
Remove-able and stow-able.
Fix horizontally to trailer to stop them moving laterally, but support with all round legs.
Ideally whole length of the house (typically just the south side) to a width of 6' foot.
The deck also hides and protects the wheels. This is important to make the Tiny House visually appealing (ie look like a permanent building rather than a trailer) and it also stops UV from wrecking the tires.
Typically there is no deck on the north side or at the ends of the trailer, but this is theoretically possible.
Option full
Four section deck along the whole south side.
Option medium
Just do a 6'x6' deck section outside the patio door.
Option cheap
Use a few cinder blocks or a wooden step outside the door to provide a just about workable step up the 2' to the patio doors.
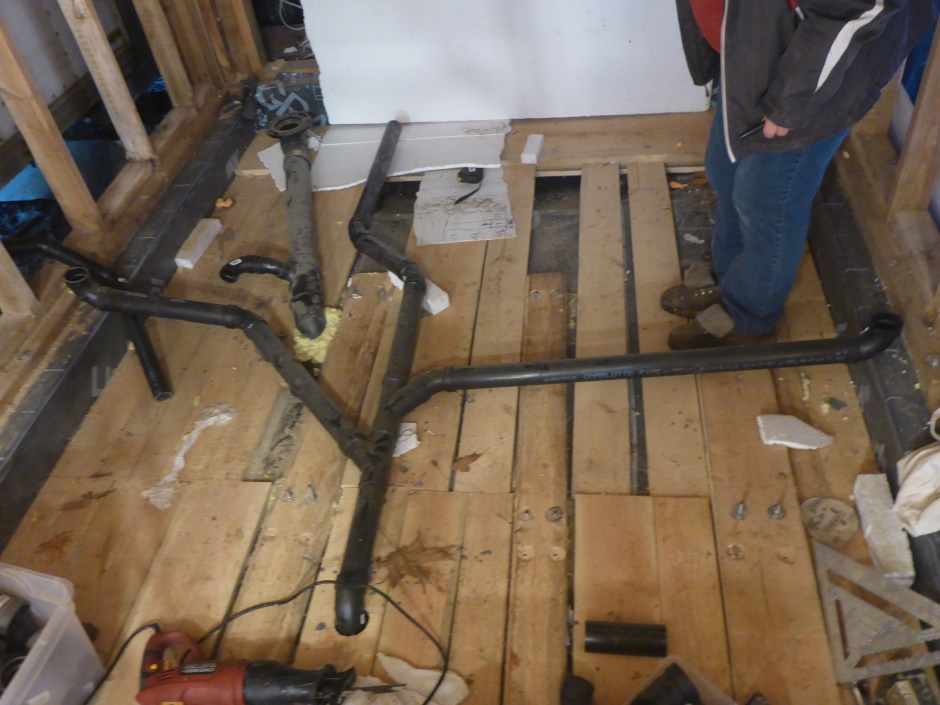
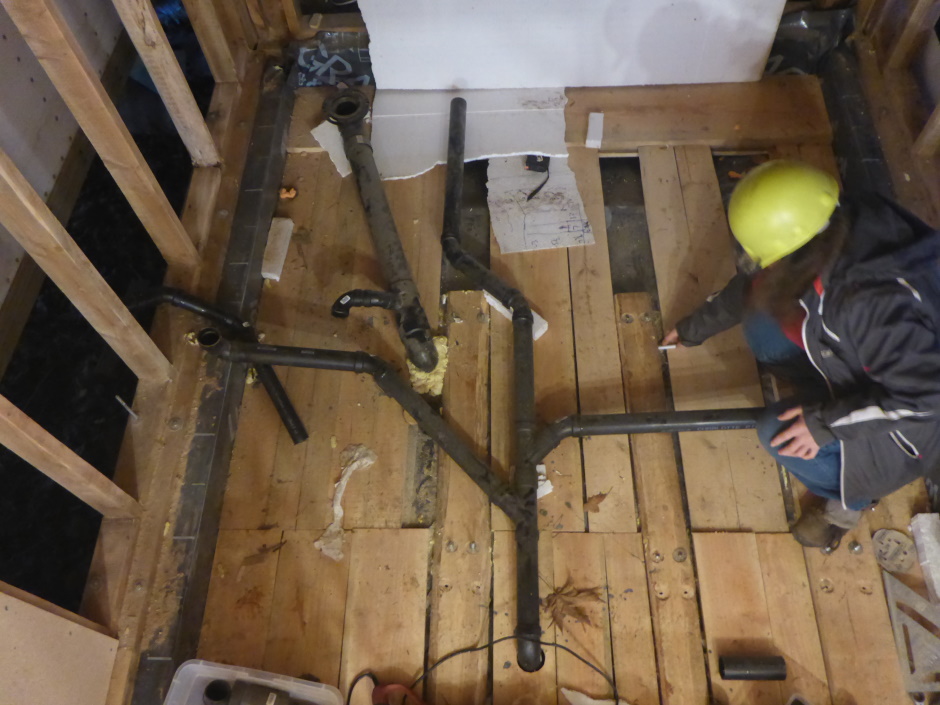
Drain Waste Vent
Toilet Sewage
Collect sewage (RV style) in a tank mounted under trailer. Use an RV machinating sewage pump to empty tank via a garden hose into a septic tank or other fixed sewer system.
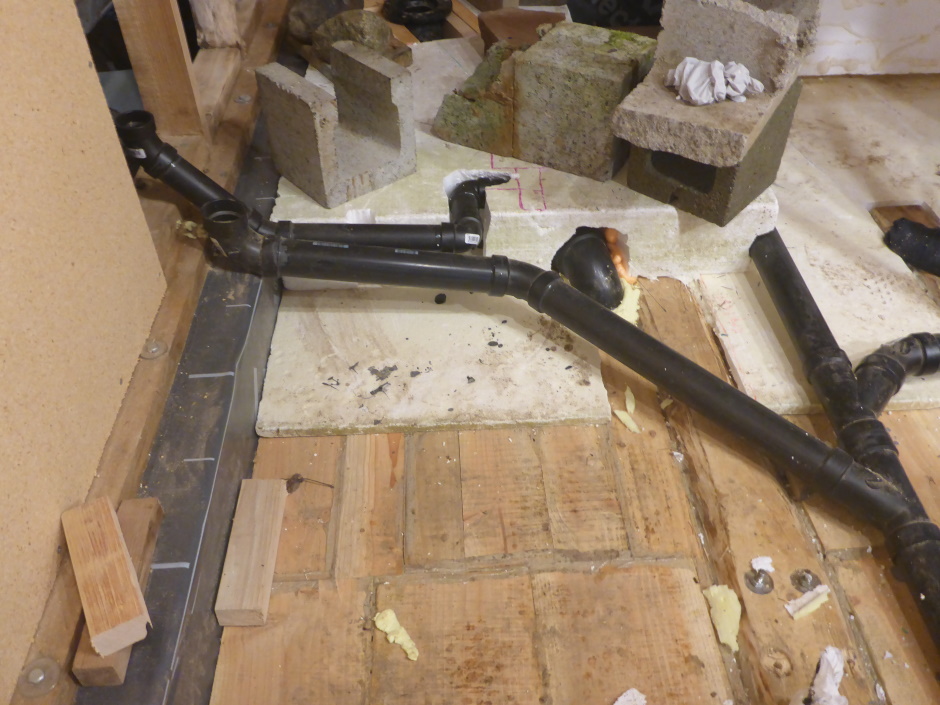
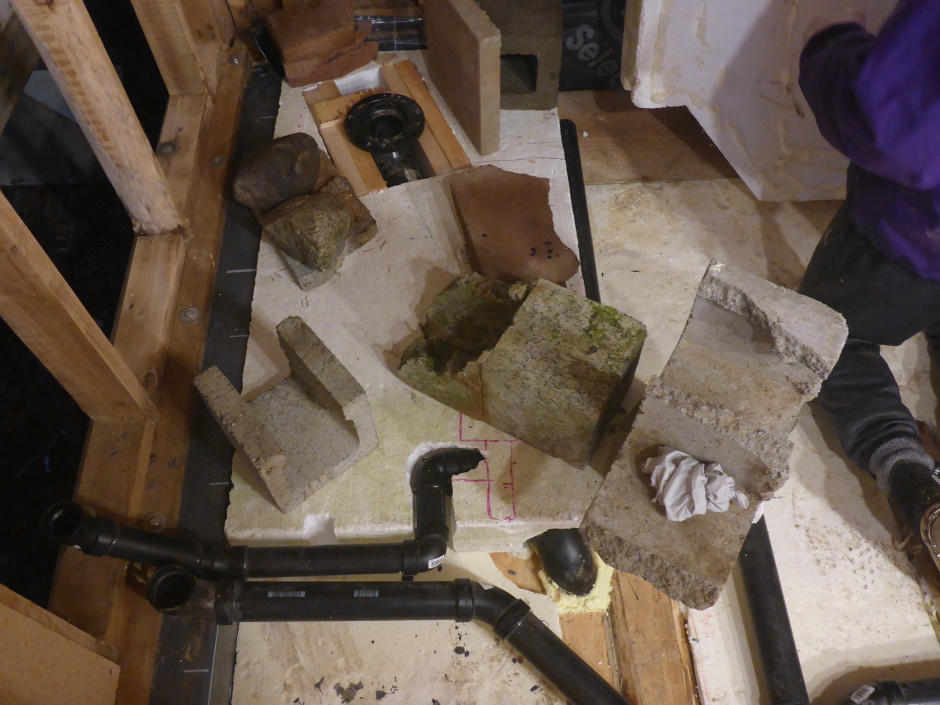
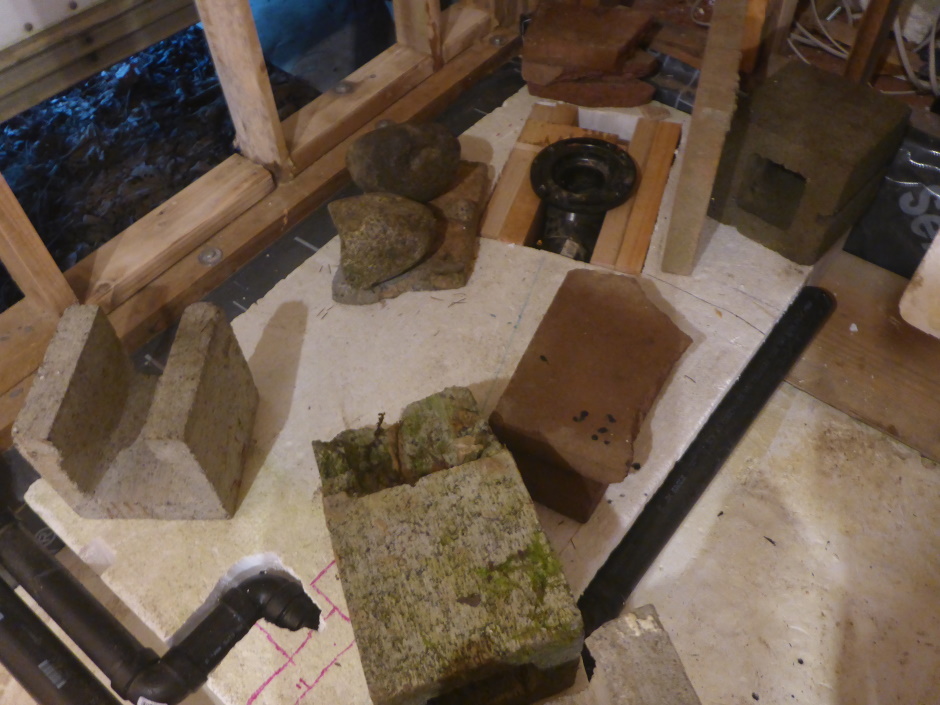
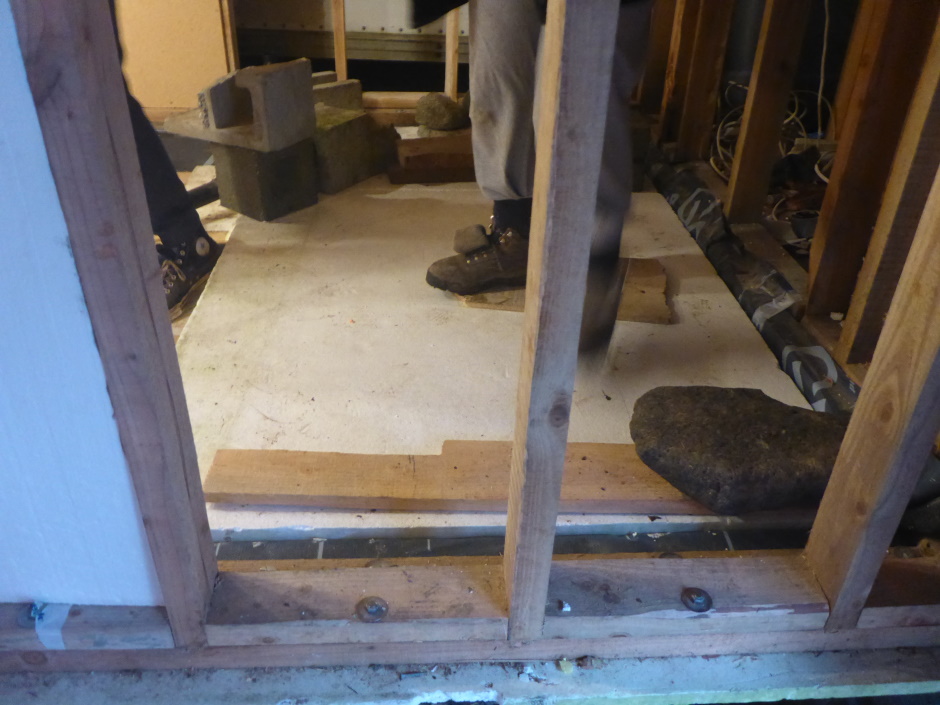
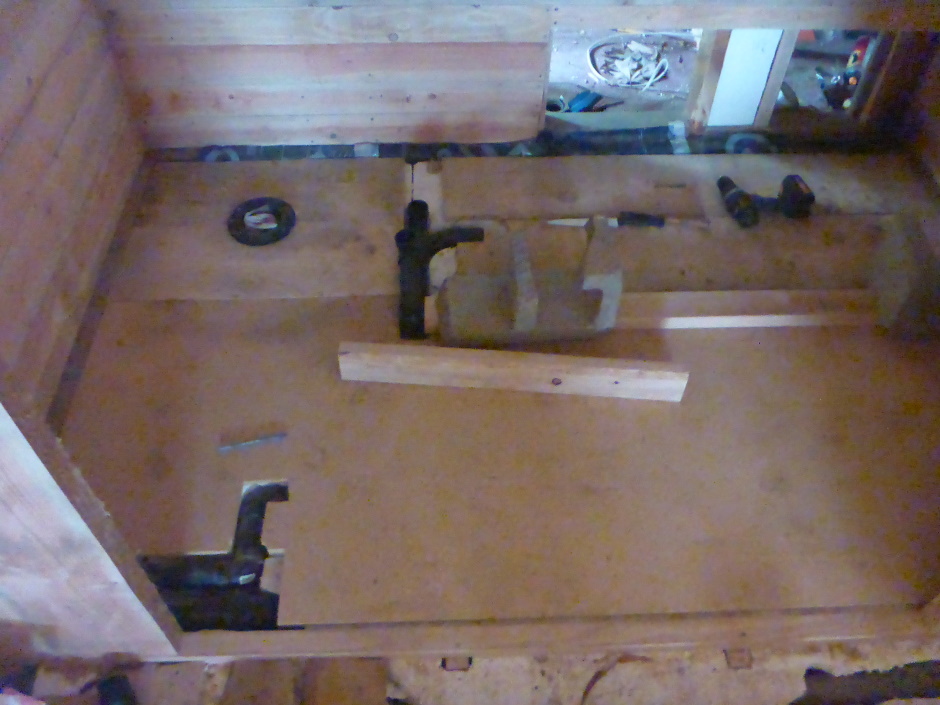
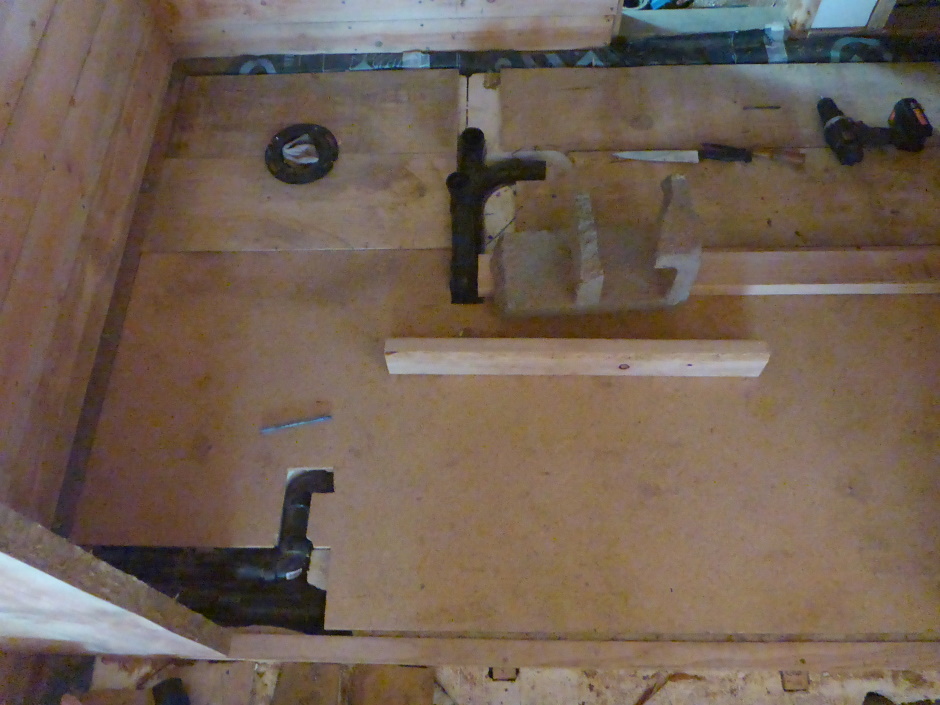
This is just for the toilet, ie the only input to the tank is the outlet from the single toilet. It is 3" ABS into the top of the tank. Even though there is no other input, it is necessary to provide a vent. Use a 3" 45 degree ABS toilet flange that connects via a 45 degree to a 3" Sani-T with a 1.5" side port. A 1.5" vent pipe goes up the back wall and then out of the back wall about half way up. It does not go all the way up to the deck so that you don't get the smell when on the roof deck. To connect to the tank, use a 90 degree female to male and a grommet into a hole cut in the top of the tank.
The distance between the top of the flange and top of the tank is fairly small (6" EPS + 0.5" bottom particleboard + 0.5" top particleboard + 1.5" cross-members = 8.5"). The tank is not directly under the toilet due to trailer tow hitch steel, which is why it is typically necessary to have some horizontal (slightly sloped) 3" pipe. The Sani-T is also horizontal.
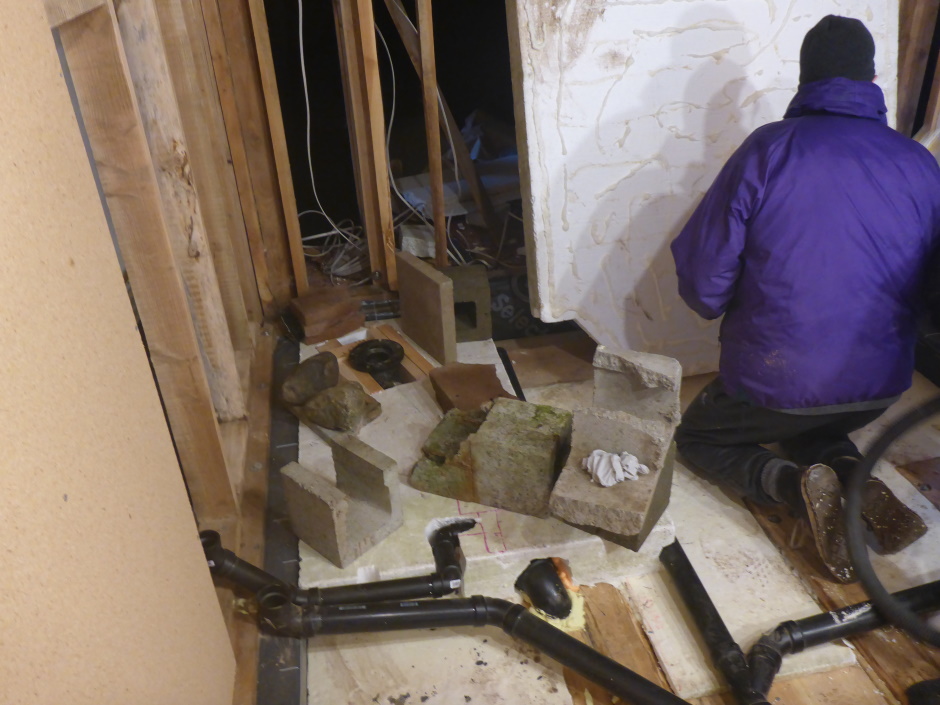
When mounting the tank you need to ensure there is room for the machinating pump. The tank is installed on a wooden shelf that is attached to the underside of the trailer using 3/8" threaded rod into tapped holes in the trailer steel. The wood shelf should be done to also accommodate a second tank (for the gray water).
Having a "black water" sewage tank and a machinating pump is not optional.
Tank
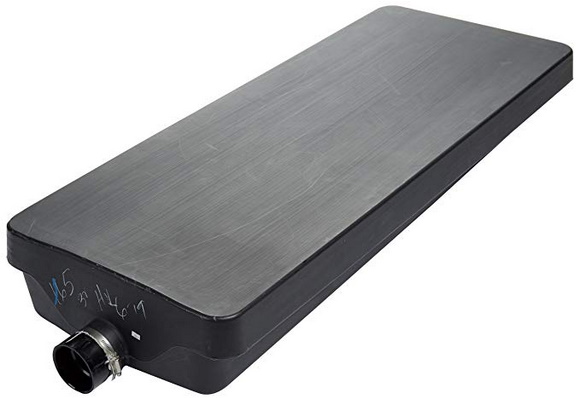 24" Width x 63" Length x 7" Height , 3" coupling
Unlike in the picture, the exit pipe is on the side.
Alpha Systems (VB24637HL 24" x 63" x 7" Holding Tank
https://smile.amazon.com/gp/product/B00J9C6GDU/ref=ppx_yo_dt_b_asin_title_o02_s00?ie=UTF8&psc=1 $111.75
Sewage pump
Pump needs to be machinate type to use a 3/4" garden hose pipe.
Pump needs to be able to pump up hill with a good head.
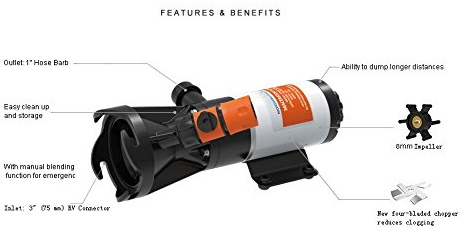
https://smile.amazon.com/gp/product/B078CZHRBK/ref=ox_sc_saved_title_5?smid=A3UK2WDWT8B7Q9&psc=1 12V. $149
https://www.dyersonline.com/amfile/file/download/file/188/product/889/
Note that the pump is limited on the head and distance, so if the Tiny House is not this near to the plot's septic tank then it will be necessary to install a separate pump tank on the plot with a separate large pump. Looks like it can only do 125' horizontal and 4 feet elevation. Best to use 1" white PVC pipe.
Gray water
Water from the bath, sink, and washing machine is not too dirty so can be drained directly into the surrounding land. You would not want to have to keep emptying the sewage tank because it has filled with bath water.
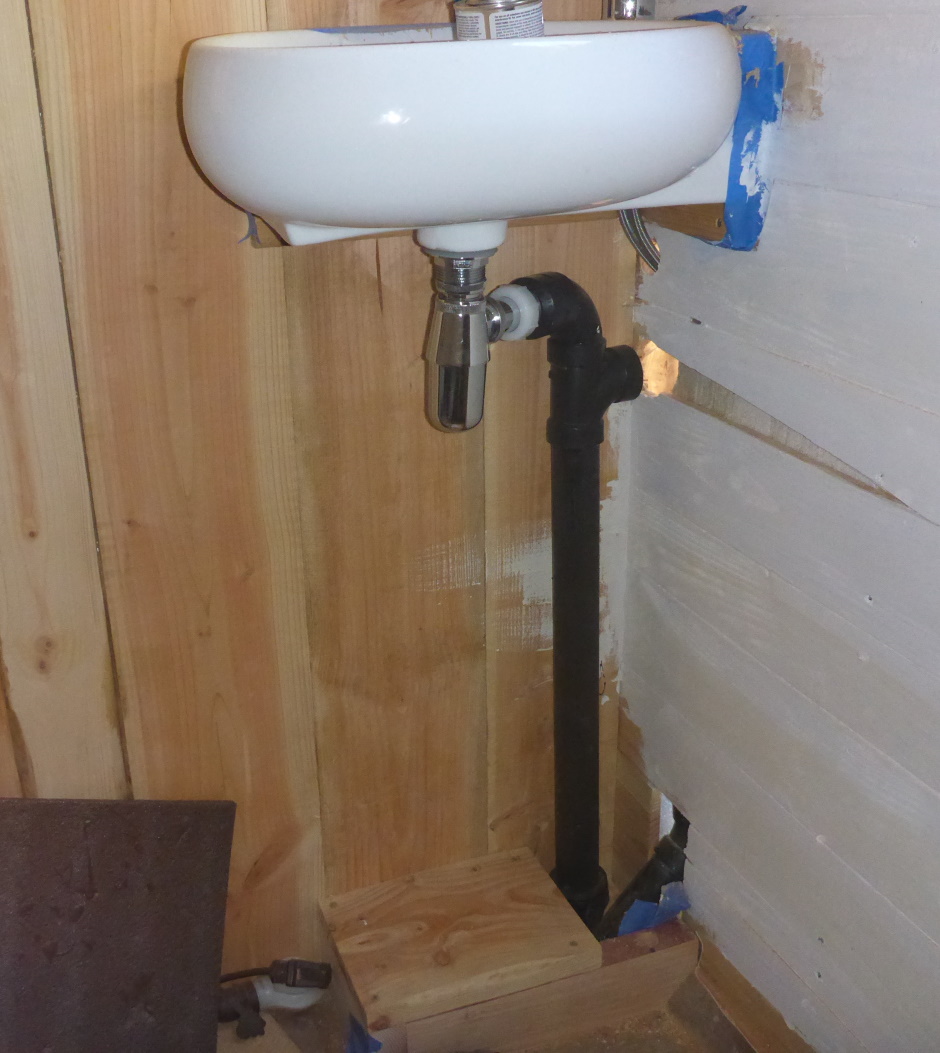
Ideally it is best to have a buffer tank between the 1.5" ABS pipe from the bath/sink and the 3/4" outlet hose. The tank is a second sewer tank under the trailer. A faucet on the 3/4" garden hose outlet allows the bath/sink to be drained while in a public parking lot without leaving an embarrassing water pool. It also allows the bath to drain more quickly. Controlling the amount an outlet valve is turned on allows the drainage rate from the tank into soil to be controlled. Use only bio-degradable soap to avoid contaminating the soil.
The gray water tank also needs a vent on the input. This is done with a 1.5" Sani-T that connects to a vent pipe up the wall.
Option full
Use a second tank for gray water.
Option cheap
Just connect the 1.5" ABS to a 3/4" male hose connector and attach a hose to the garden.
Water
The water tanks are on the back lip of the trailer. A wooden box with 2" of EPS insulation covers them to keep the UV off, stop it freezing, and make it look nice. The wood box also allows things to be stored/transported above. On-top is also a good place for a flower window box.
Ideally it is good to have one tank for high quality drinking water and one for lower quality washing water. A pressure pump is needed on each tank to get the water to the faucets. The high quality drinking water tank is connected to a dedicated drinking water faucet in the kitchen. Optionally a reverse osmosis filter can be used on this dedicated drinking water faucet.
The tanks can be gravity filled using the two external "gravity" ports (open external air vent when filling). Alternatively a high pressure water hose can be attached to the "city hoop-up" external port and in this case the tanks are completely bypassed. Check valves are used and the switching to pressurized "city" water is automatic because the city water has a higher pressure than produced by the pressure pump. The tanks can be drained (when not used and/or when travelling by opening the rear box and opening the drain plugs on the tanks.
Pressurized cold water from the washing water tank (either from the city or from the pump) is also fed to the hot water tank heater.
Arguably you could have a third tank for toilet flushing water but it is not worth implementing. If you are short on water then either don't flush the toilet or tip in a bucket of rain water or water from the grey water outlet. Assuming no third tank, connect the toilet tank to the pressurized washing water tank.
A separate additional tank is useful for collecting waste water from the optional osmosis filter.
It is worth putting a heating pad under the tanks that can be turned on when the temperature outside is below freezing.
The pressure pumps can be mounted between the tanks in the rear stoop box.

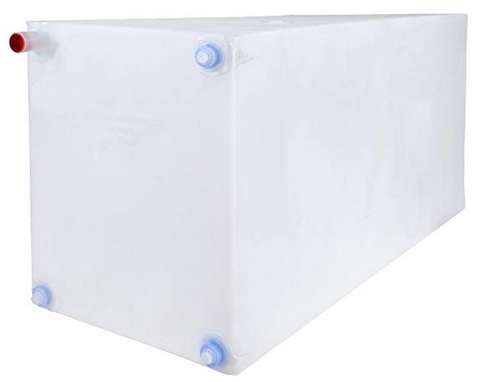
Tanks
Using rectangular tanks is best as they take up less space.

https://smile.amazon.com/gp/product/B007MSLP7A/ref=ox_sc_saved_title_2?smid=ANNYFJC2Y5PU4&psc=1 $90 + $33 + tax = $135, 46 gallon
42” Longest Length (not including fittings) x 14” x 18”
Other lesser possibilities...
 2'10" long x 1'6" high x 1' wide, 30 gallon
https://www.ebay.com/itm/33-GALLON-Fresh-Water-Tank-New-NSF-food-truck-holding-wash-tiny-concession-rv/190721617428 $88 + $0 + tax
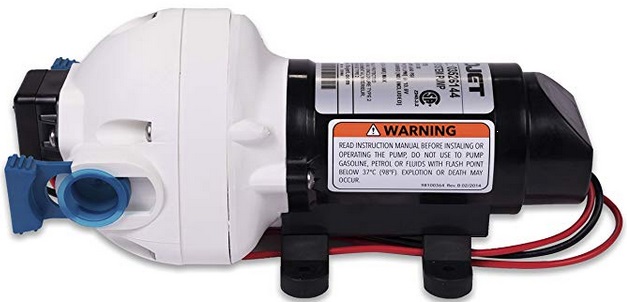
Pressure pumps
These have a pressure switch internally. They automatically turn on if the pressure on the output drops below about 50psi. They are 12VDC so need to be powered from the battery and battery charger.
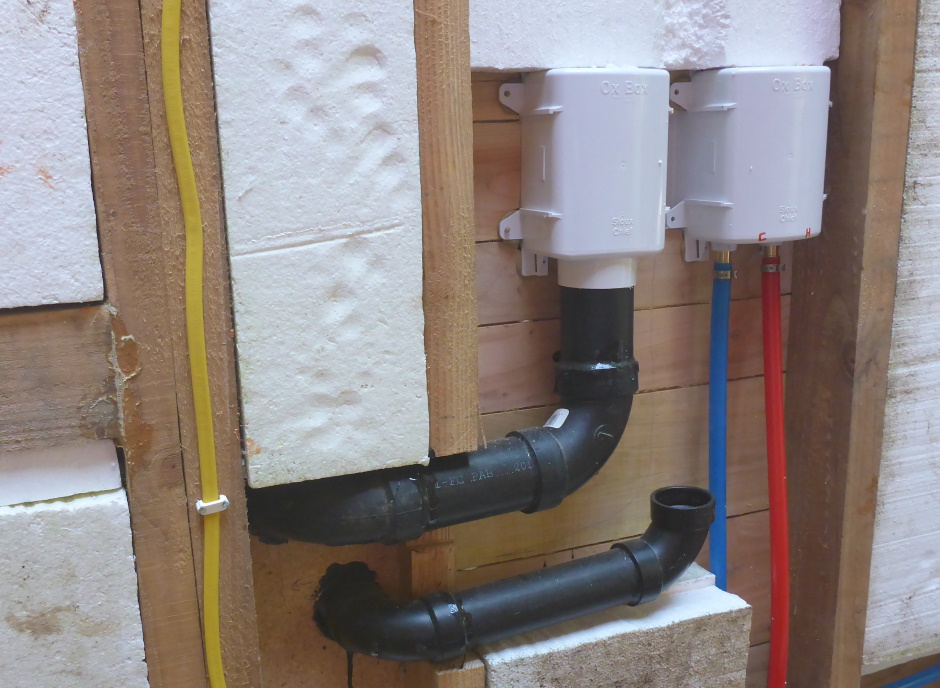
External ports
Two of these plate assemblies are required. They are mounted on the back wall near the rear of the Tiny House. They need to be about a foot higher than the top of the tanks. The two plates give two gravity ports, one for each tank. Pressurized city water needs to be provided to both pressure ports so you will need to use a Y hose arrangement.
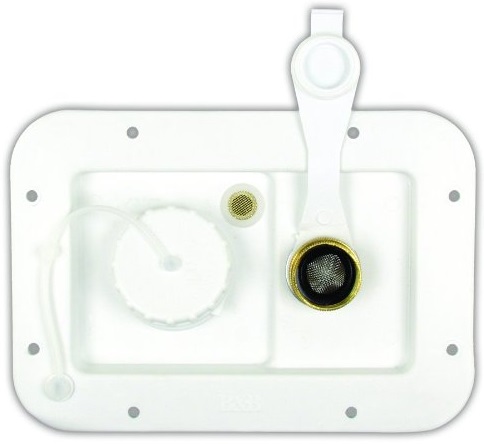
https://smile.amazon.com/dp/B000BGJW5M/ref=dp_cerb_1 $18
Mesh filter
It is worth using a mesh filter on the low pressure fill ports.
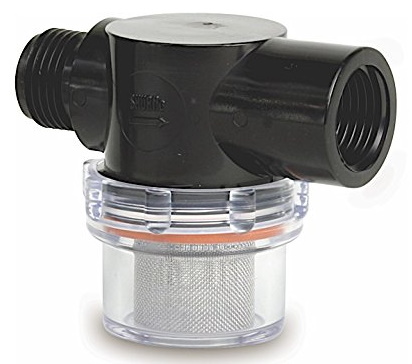
https://smile.amazon.com/gp/product/B000V2W0GE/ref=ox_sc_saved_title_9?smid=A2NRXN1T0QA1KQ&psc=1 $8.95
They need to be accessible in the rear lip box.
Check Valves
Just need two as there are already check valves in the inlet plate assemblies.

Heating pad
Use two in very cold climates, but one is ok for normal cold.
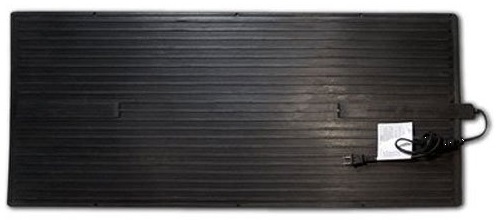
https://smile.amazon.com/gp/product/B0013V1PYA/ref=oh_aui_search_detailpage?ie=UTF8&th=1 $45
Reverse Osmosis filter
Use $100 Reverse Osmosis Water Filter to provide drinking water.
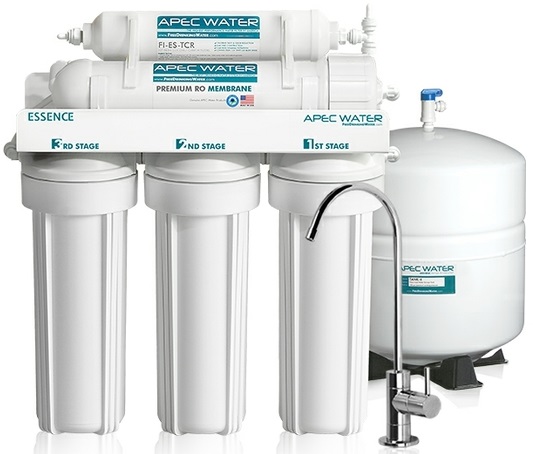
More than one water faucet on kitchen sink - one with drinking water and a mixing faucet with washing water.
I prefer to use a dispenser that can do both ice cold and hot water (but this is very much a luxury item)...
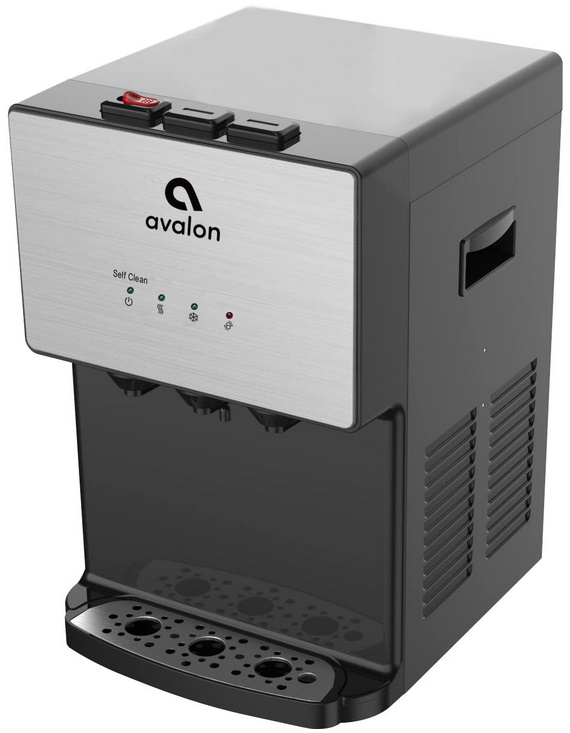
https://smile.amazon.com/gp/product/B079VHRG56/ref=ox_sc_act_title_1?smid=ATVPDKIKX0DER&th=1 $282.56
Option full
Two tanks with two pressure pumps and the necessary check valves and one heating pad, with a dedicated kitchen drinking water faucet, plus a reverse osmosis filter.
Option reasonable
Two tanks with two pressure pumps and the necessary check valves and one heating pad.
Option medium
One tank with one pressure pump, check valves, and one heat pad).
Option cheap
No tanks and no pumps, so just use city water.
Hot water
Small electric water heater tank, eg 40 gallons. The electric power available is not sufficient for an electric instant hot water heater. A propane heater would be a possible choice but is not my choice because of the hassle of frequently changing propane tanks.
 49.75-in H x 20.5-in diameter
It would be more efficient to use a heat pump unit, but that is too expensive.
The water heater will need to be retrofitted with 115V elements (rather than the 230V elements it comes with), but this is easy and cheap to do.
You need to have a 115V switch so you can turn off power to the water heater when you are short on power eg when running from an inverter from 12V batteries.
Site the tank within the Tiny House thermal envelope so that escaping heat helps heat the house. It can be sited in the front shed assuming the shed is within the thermal envelope.
The cold water comes from the pump pressurized washing water supply. It can be sited downstairs because the water is pressurized.
Electricity
230VAC, 115VAC, 12VDC
Use a 230V feed, ie L1 and L2. It is best to think of this as two 115V 50A feeds. It is best to avoid using any 230V equipment or else you will loose the ability to fully function when there is only a 30A 115V RV hookup available.
If you connect (via connector adapters) to a 30A RV hookup or domestic 115V then the one Live you get will connect to both of the Live pins on the 50A RV connector.
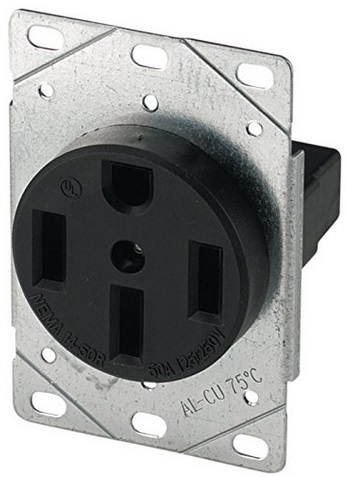
The connection on the Tiny House is a 50A 230V RV connector (NEMA 14-50). The half round or U is the ground, the one directly below it is the WHITE Neutral, and the other two black wires that are 180 degrees out of phase with each other are the L1 and L2 Live HOT 115-volt feeds.
Because the entire Tiny House is "plugged in", it is not necessary to use a Transfer Panel such as is used for wiring a backup generator to a regular house. Instead you can simply unplug the house from utility power and instead plug it into a generator or offline solar system. There is no danger of feeding power into the utility lines. Inside the Tiny House you can use a standard inexpensive Lug Panel (without a whole house power switch because the Tiny House can just be unplugged).
Even though you may not in practice need 2 x 50 amps, it is still much better to use a 50A RV connection because that provides two Live connections (L1 and L2). On the big "mother house" in who's plot you are parked you could well decide to install a NEMA 14-50 socket but only feed it with a Dual 20A breaker. If the breaker is only 20A then you can use a cheaper 12AWG 4 wire cord to your Tiny House.
https://smile.amazon.com/gp/product/B000GATCE4/ref=ox_sc_saved_title_6?smid=ATVPDKIKX0DER&psc=1 $6.80
Tiny House power inlet
The Tiny House plugs in so rather than using a hard to find expensive flanged inlet connector it is best to just use a short cord with a molded on plug. Using an actual plug avoids needing extension cords that have sockets with long bodies. The cord dangles down for about a foot under the trailer (under the front utility box) so you will want to plug it into the solar/inverter socket when on the road. The other end of the eg 6 foot cable connects to the service input of your main load lug center panel (aka breaker box) inside the Tiny House utility box.
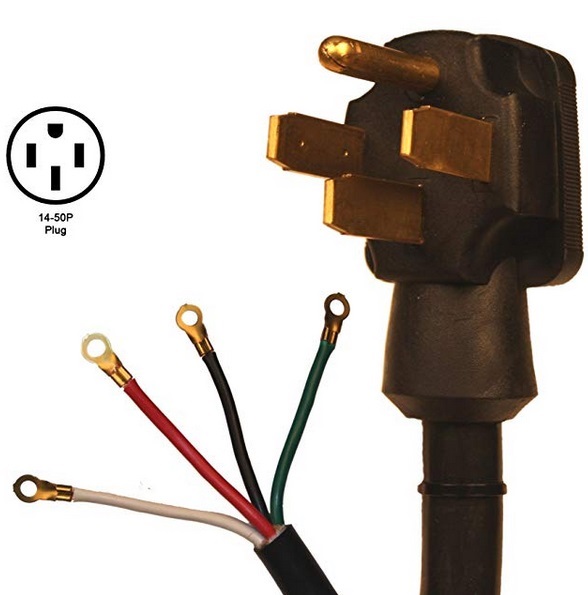
https://smile.amazon.com/gp/product/B0002YURAW/ref=ox_sc_act_title_1?smid=ATVPDKIKX0DER&th=1 $23.27
Hookup options
Various things can connect to the NEMA 14-50 plug on the Tiny House
50A RV hookup
Use an RV 50A NEMA 14-50 female to NEMA 14-50 male extension cord of whatever length (eg 30 feet) is needed to reach from under the utility box to the hookup socket at the camp site. 50A extension cords are expensive, ie more than $100.
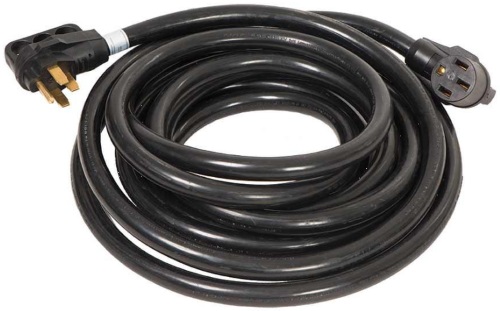
As the 50A service in an RV park has a 50A breaker you need to use 50A cable. You can use smaller gauge wire if the source has a smaller breaker (eg 12AWG from a 20A breaker).
30A RV hookup
If there is only a 30A 115V RV hookup available then use an adapter on the end of your 50A extension cord.
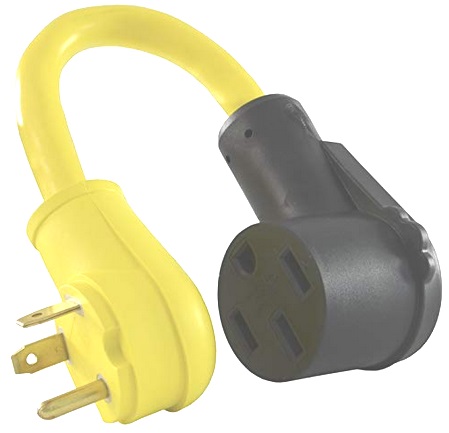
https://www.amazon.com/Conntek-14370-Standard-Straight-Connector/dp/B003PY60J8 $17.28
15A Domestic hookup
If there is only a 15A 115V domestic hookup available then use an adapter on the end of your 50A extension cord.

You can either use this on the end of your 50A extension cord or use it on the Tiny House plug and then use a regular domestic extension cord.
Generator
Store the generator in the front services box. Use a propane capable generator (that can also run on regular car gas if necessary).
Can be lifted and wheeled to a more remote location to reduce noise. A removable ramp to the utility box is useful. Need to provide a long propane hose to avoid having to lift out the propane tanks.
The generator should be one that gives 230V (ie both L1 and L2) as this will give you much more power.

The generator will have either an L14-20 or an L14-30 female socket. You will need a 30 foot cord that goes from this to a NEMA 14-50 male for the Tiny House. If you already have a 30 foot 50A RV cable then use a short adapter cable at the generator end.
Solar (Offline) / Inverter
The offline solar rig is typically just 115V at 15A. Even so, it is still good to use a 50A RV socket so you have somewhere to plug the Tiny House power cord while travelling. Connect the L1 and L2 pins together.
Solar details are here .
The offline solar rig uses batteries in the utility box. It uses batteries and an inverter to make 115V.

Even if you don't have any solar panels, you should still have one or more batteries with a battery charger from 115V mains power and an inverter to make 115V. This allows you to have offline 115V power during a power outage or when on the road.
Main Panel
There is no need for a whole house cutoff switch as you can just unplug the house, so therefore you only need a "Load Center" breaker box rather than a "Main Panel".
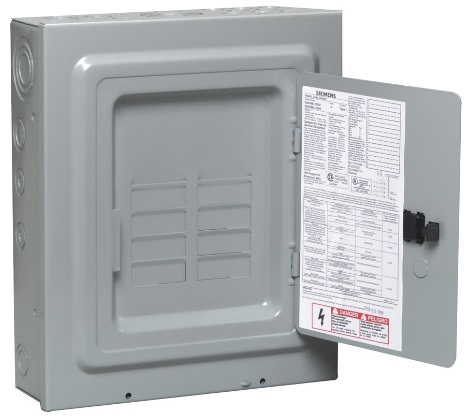
https://www.lowesforpros.com/pd/Siemens-16-Circuit-8-Space-125-Amp-Main-Lug-Load-Center/3127663 $37
All the breakers will be single pole because there will not be any 230V equipment. The water heater will be retrofitted with 115V elements. Ideally you should use combined GFCI + AFCI breakers pretty much everywhere, but they are 10 times the price of regular breakers.
Power monitoring
Worth putting two power meters on the power feed. As well as checking the voltage of the feed is ok, it will also report the power usage. Need one on L1 and one on L2.
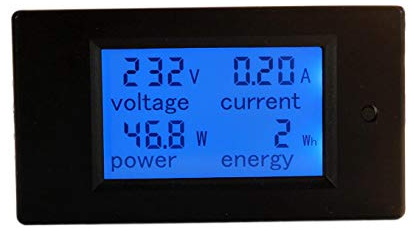
https://smile.amazon.com/gp/product/B01D8G9GPW/ref=ox_sc_saved_title_4?smid=A2EFSDTWMPHWEA&psc=1 $19.98
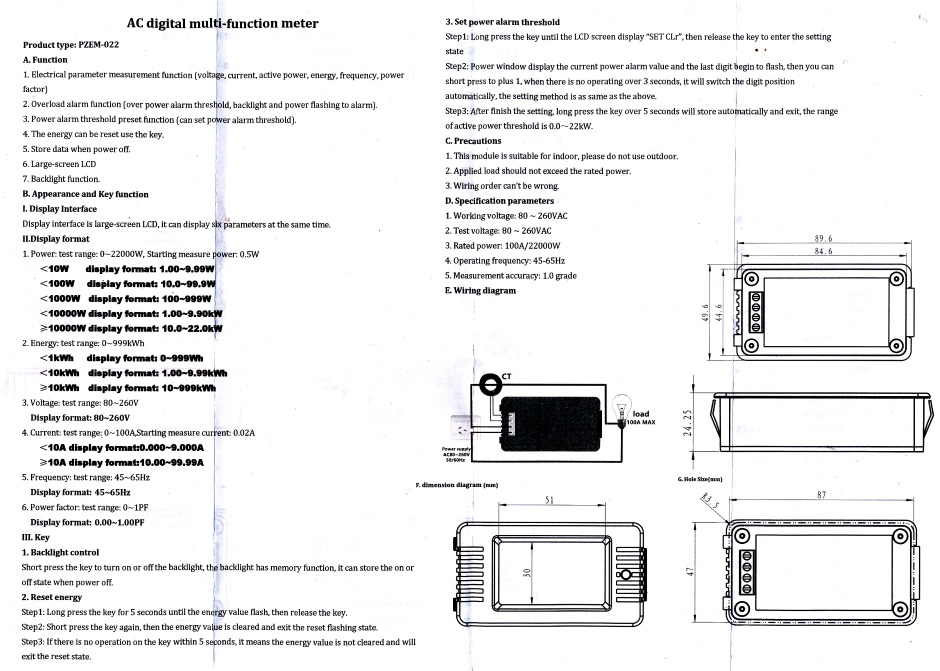


https://smile.amazon.com/dp/B077YJSRXZ/ref=dp_prsubs_3 $13.99
Ideally mount the meters inside the kitchen area on the wall so that they are easily visible.
Also put an LCD temperature display (with a time display) on the wall in the same place.
12VDC
12V DC is needed for the sewage pump, water pumps, and low voltage LED strip lighting. 12V battery power is also used to power an inverter to get 115V when no 115V mains power is available.
You should have a 12V battery connected to the output in order to get a reliable 12V power supply.
Having at least one battery and a battery charger is not optional because 12V is needed for the pumps.
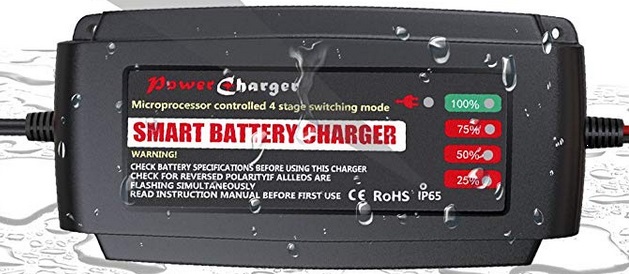
Batteries
Batteries can be mounted in the utility box. Being in the insulated utility box avoids frost and so helps prolong the battery life. You need at least one battery, but more gives you longer offline capability. Alternatively they can also be mounted on the front lip squares at the front of the trailer under insulated wood boxes.
 Length: 12-3/4", Width: 6-3/4", Height: 9-1/2"
Costco deep cycle grp 27 12v battery Interstate 27DC Interstate model SRM-27 Costco Item# 850982. 95 amp-hours.
http://www.interstatebatteries.com/m/category/rv/rv-deep-cycle $80 + tax
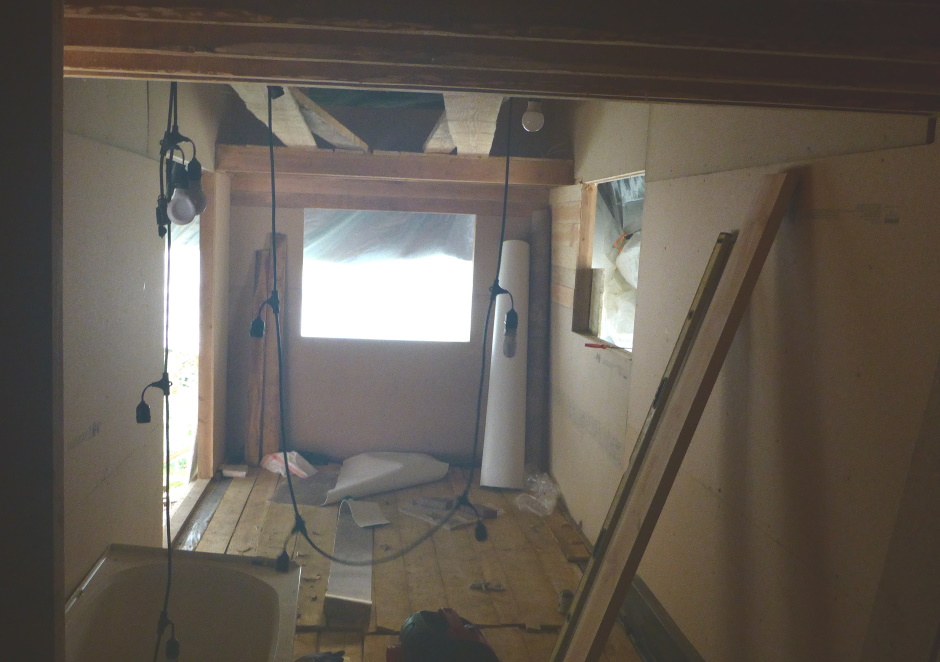
Lighting
All LED.
Mainly 115V regular household LED bulbs. Use light strings.
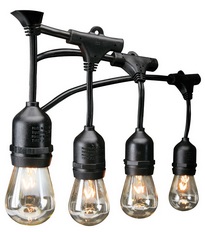
Fix one between each ceiling beam using plastic conduit Us. Add a horizontal 2-by round the outside to form a shelf that hides the sockets and wire.
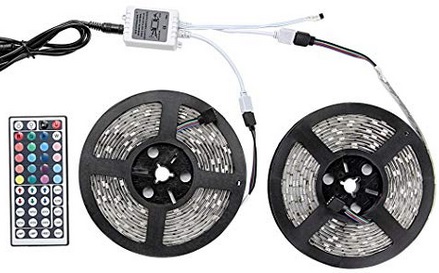
Also do some stick-on strip LED 12V lights. These strips can either be warm white or adjustable multicolor.
When the Tiny House is plugged in to mains power the battery charger will charge one or more batteries that provide the 12V power.
Heating
The Tiny House has well insulated walls, but some heating is required on cold days.
Electric duct-less mini-split
This heat pump device provides heating and cooling.
Ensure it is 115V.
Mount it on the rear end of the Tiny House so it blows into the living room. The cost is around $1,000.
Oil filled radiator
An oil filled electric radiator is a useful local heat source. Use a socket fed from an Insteon switch. Tie this into the Home Control software.
Initial phase
Don't buy the mini-split. Use just an electric oil-filled radiator on the cold days.
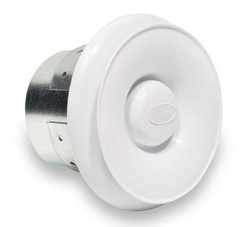
Ventilation (HRV)
Using an HRV will reduce your heating bills and provide good ventilation. It is necessary in a tightly air sealed house. Also it stops moisture from humans causing condensation. Costs about $500 but worth it. Ensure it is 115V.
Sited in the utility box.
Stale air intakes in kitchen and bathroom (at 6' height). The bathroom intake performs the "extractor fan" function. Fresh air vents in the bedroom and living room.
Use 4" flexible ducting. It will not fit in the walls so route it through the back of cabinets.

Fresh air intake is in the utility box wall (south side) and ideally you site the trailer so that this is furthest from the road. Make it possible to fit an external 4" flexible duct hose for when the trailer is the other way round. Put the stale air output on the north side under the utility box.
Initial phase
Make a wooden box with the same dimensions as the HRV. Put a 115V 6" fan inside on the stale air duct. The fan is effectively a bathroom extractor. Fresh air will come in to make up for the air that is extracted. Put a switch (in the kitchen area) on the fan.
Kitchen
Counter and cabinets
Use a 2x4 cabinet frame with a solid wood varnished 1.5" thick countertop. Use purchased kitchen cabinet doors on the front.
Appliances
Get "Apartment size" appliances. They must all be 115V.
Sink
33" counter undermount with a metal front skirt. Use two removable wood plank tops to make additional counter space when the sink is not being used.
Cooktop
Electric. Must be 115V. Induction is best, but certainly needs a wipeable flat surface. Can be a 2 ring unit.

Oven
Small oven eg 24" electric. Ensure it is 115V.
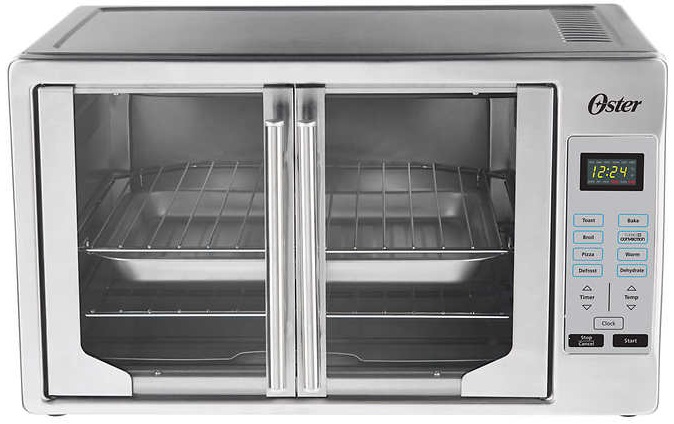 21.65" W x 19.29" D x 12.91" H
https://www.costco.com/Oster-Digital-French-Door-Countertop-Oven.product.100407110.html $139.99
Microwave
Ensure it is 115V. Put it on a wall shelf.

Fridge
Need a good sized freezer as well as a fridge compartment. Must be a regular 115V unit.
Trash can
 16.2" x 10.3" x 33.5" 21 gallon
Put it under a hole in the countertop.
Dishwashing
Don't bother with a Dishwasher. Just use a wall mount plate draining rack on the outside of the bathroom wall. The draining rack will also be the storage for dry plates and cutlery.
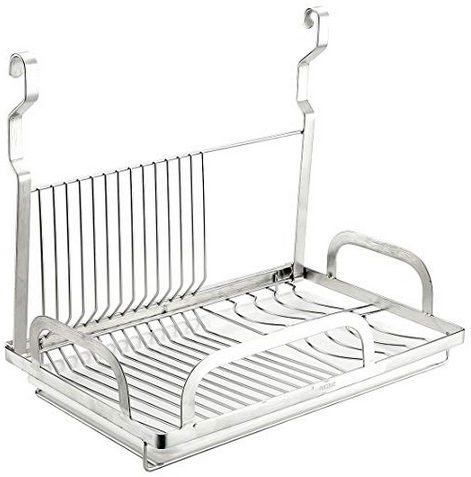 15.63" L, 10.24" W, 13.78" H
Hook it on a longer wall mount bar rail and also hang cups etc on the rail using hooks.
Bathroom
Walls
Line the walls with 1" 40psi EPS. Put 6mil polyethylene under the EPS to keep moisture off the wood studs. Breathing for wood drying is via the stud cavity upwards. Leave a half inch gap in the cavity EPS (1.5" + 1.5") in that area to allow for the drying. Use 2.5" screws with plastic washers. The screws will puncture the 6mil polyethylene but that is unavoidable and tollerable. Tiles glued-on on the inside using foam adhesive. Epoxy grout is best.
No window.
Vent
Install an HRV stale air vent.. The HRV will take care of extracting the hot wet air from the bathroom. Don't need a separate bathroom extractor.
Fixtures
Toilet
AquaSource Henshaw White WaterSense Labeled Elongated Chair Height 2-piece Toilet 12-in Rough-In Size

Lever flush.
Bath tub

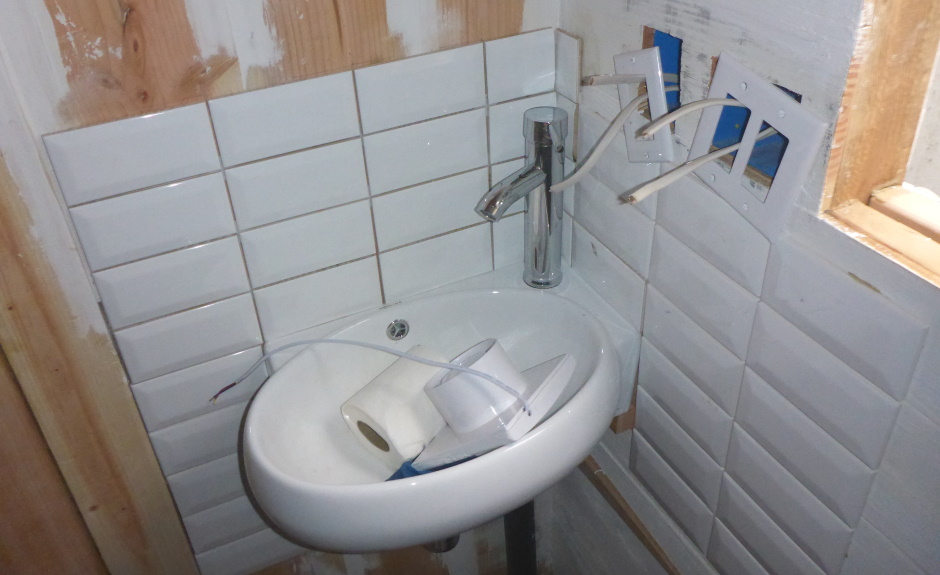
Bathroom sink
Need a "White Wall-Mount Rectangular Bathroom Sink".
Small than Width 22", Depth 17".
Washer and dryer
The washer/dryer sits in the bathroom.
As one unit. Use a condensing dryer, ie vent-less. Ensure it is 115V.
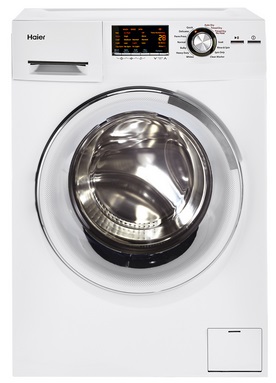 Height 33.5", Width 23.5", Depth 22.5"
https://www.lowes.com/pd/Haier-2-0-cu-ft-Ventless-Combination-Washer-and-Dryer-White/1000196437 $989
Here's a 27" width one...
Initial phase
Don't yet buy the washer/dryer and just use a launderette or hand wash in the kitchen sink.
Furniture and storage
Lots of open front storage under fitted L shaped couch. Use a 2x4 frame for the couch with an open front. Slide in Sterilite storage boxes. Use hang down cloth on the front to hide the boxes. The holes in the front need to be 16.5" wide and 12.5" high. The hole needs to be 24" deep.
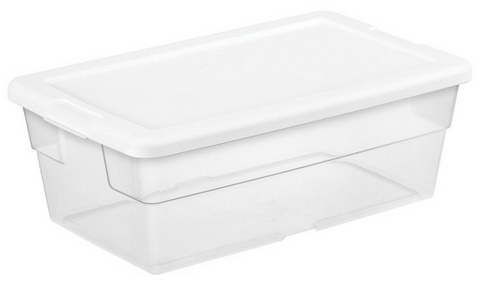
Sterilite 56-qt Basic Clear storage box (sometimes called 66-qt) ($5.47 each) 1659
23" L x 16 1/4" W x 12 3/8" H Comes in pack of 8
https://www.ebay.com/itm/173178869406 $44.79 for 8
Need a dining table with hinged foldable extension.
Security and Home Automation
Security is necessary when left in parking lot while going into town in car or even when parked on a city house plot. Security for a Tiny House is more important than on a regular house.
Use motion sensors on the wall to turn on the alarm. Use a hidden switch (eg under the sink) to turn the motion activated alarm on or off.
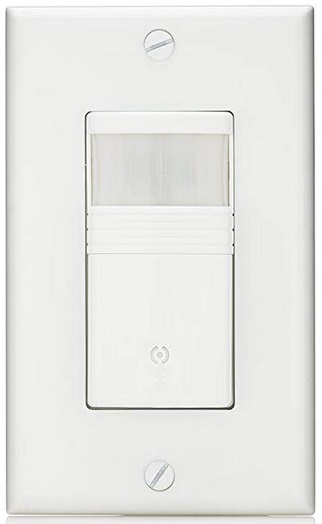
https://smile.amazon.com/gp/product/B01M1C7K82/ref=oh_aui_search_detailpage?ie=UTF8&psc=1
Need a loud siren.

https://smile.amazon.com/gp/product/B0006BCCAE/ref=oh_aui_detailpage_o01_s01?ie=UTF8&psc=1 $12.99
Strong locks on doors.
Possibly window break sensors.
Lights on timers to simulate occupancy. Use Insteon switches.
TV flicker simulator.

Outside motion-activated LED lights. Mount them mainly on the roof deck pointing down. They remove with the roof deck when transporting the Tiny House.

Dummy security cameras fixed to the roof deck pointing at all sides.

Put a warning sticker on all ground level windows and door.

https://smile.amazon.com/Pack-Video-Surveillance-Sign-Waterproof/dp/B019781KF4/ref=pd_sim_421_34
Use custom Home Controller software.
Internet
Cat-6 socket under the utility box.
Wireless router for inside Tiny House. Mount it in utility box.
Also need a cat-6 connected Insteon hub.
Build sequence
Preparation
Do detailed drawings, including details of all the framed panels and window/door openings.
Buy trailer to the above specification.
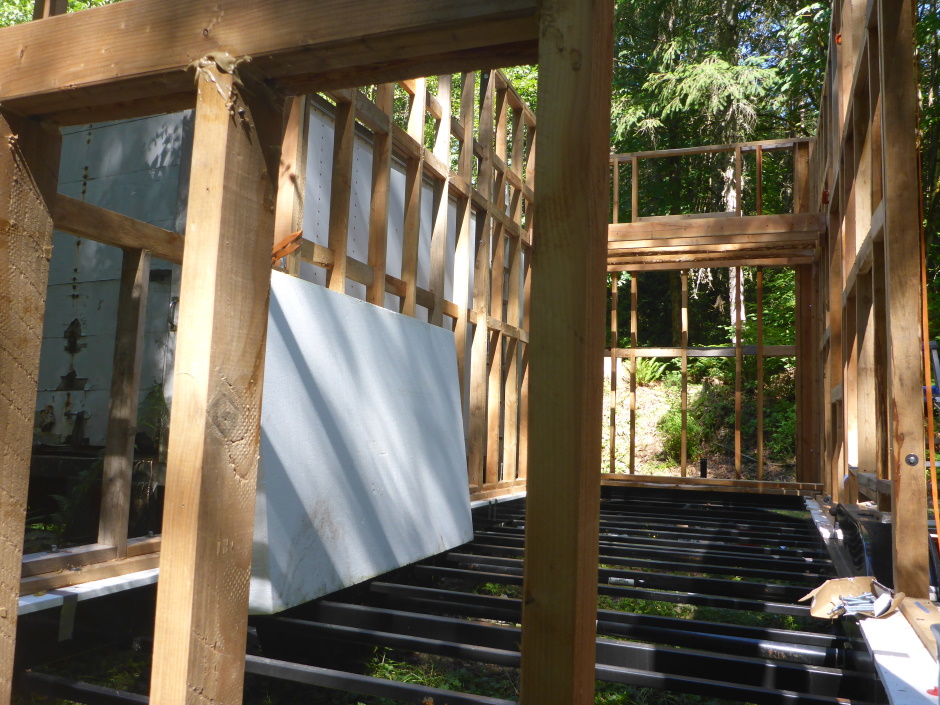
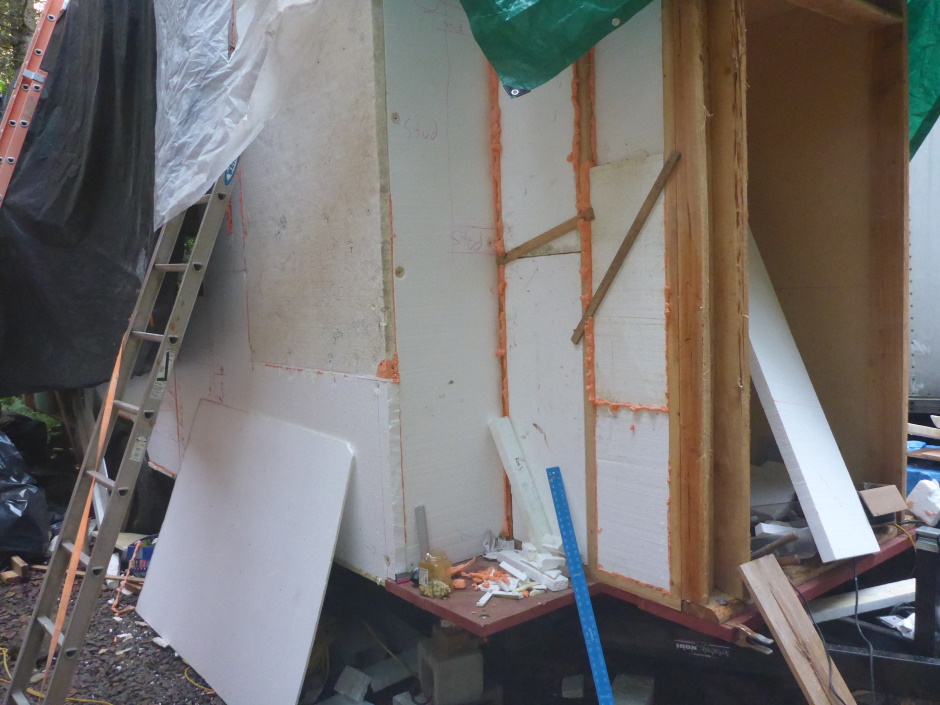
Wall framing
Make the (less than) 8 foot wide 2x4 wall assemblies with horizontal plywood glued and screwed to the inner face. The panels include the rough openings for the windows and doors. Make the assemblies in a dry environment. Everything must be exactly to drawing and exactly square.
Also build the internal wall (framing and glued and screwed plywood on one side).
Roof framing
Make the (less than) 8 foot wide 2x6 roof assemblies with plywood glued and screwed to the top.
Floor
Make and fit the SIP-like flooring.
Fit framed panels
Bolt wall lumber base-plate to trailer on top of 1" high density EPS.
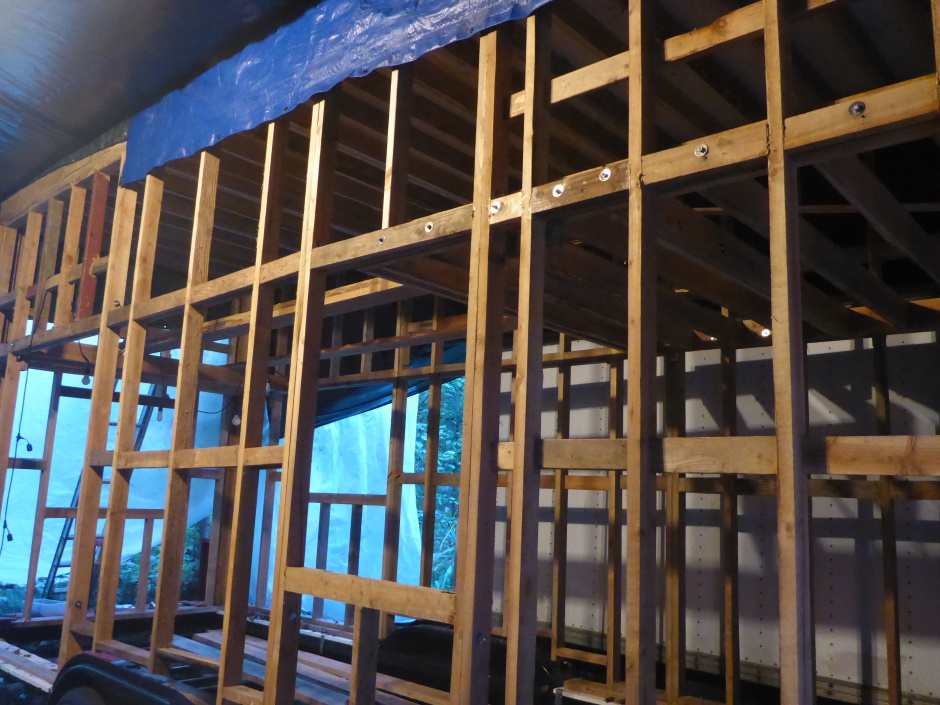
Fit the mezzanine assemblies.
Fit the roof assemblies.
Fit EPS roof insulation.
Waterproof roof
Add roof EPS (both between the beams and on top).
Add self adhesive ice & water shield and self adhesive roofing felt.
Make a tent of 6mil polyethylene sheet over the entire tiny house.
Front Shed
Bathroom and kitchen plumbing
This involves cutting into the flooring SIP.


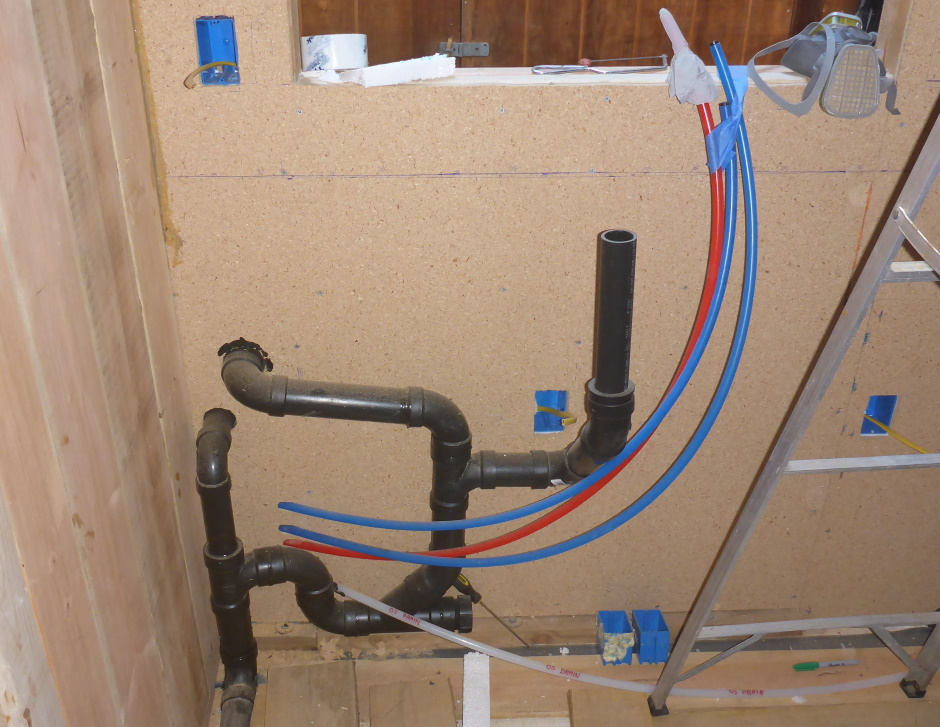
Electrical wiring and fixtures
Rest of the internal infrastructure
Fit wall EPS insulation
Both the 3.5" between the studs and the 2" on the outside.
Particleboard inside
Apply wall polyethylene and vinyl siding
Vinyl flooring
Do not fix down the vinyl flooring until the plywood and EPS underneath is completely dry.