


Home Site Map - Techniques - Structure -
Columns - Square Column Implementation
![]() How to form square concrete columns for decks.
How to form square concrete columns for decks.
Square Deck Columns
The design
In the design of the main house, the basement level columns are square columns. This is typical in Vitruvian and Palladian classical architecture.
Square deck columns are formed using 2x6 lumber formwork. The wooden squares are designed to be removable and reusable. The squares for the deck pillars are the same size as used for later forming the round columns (although in the case of the round columns they are used to brace the EPS forming).
On either side of the porticos, the deck column forming for the first few feet is a narrower variant because it needs to avoid the forming for the footings and also these pillars do not support much weight.
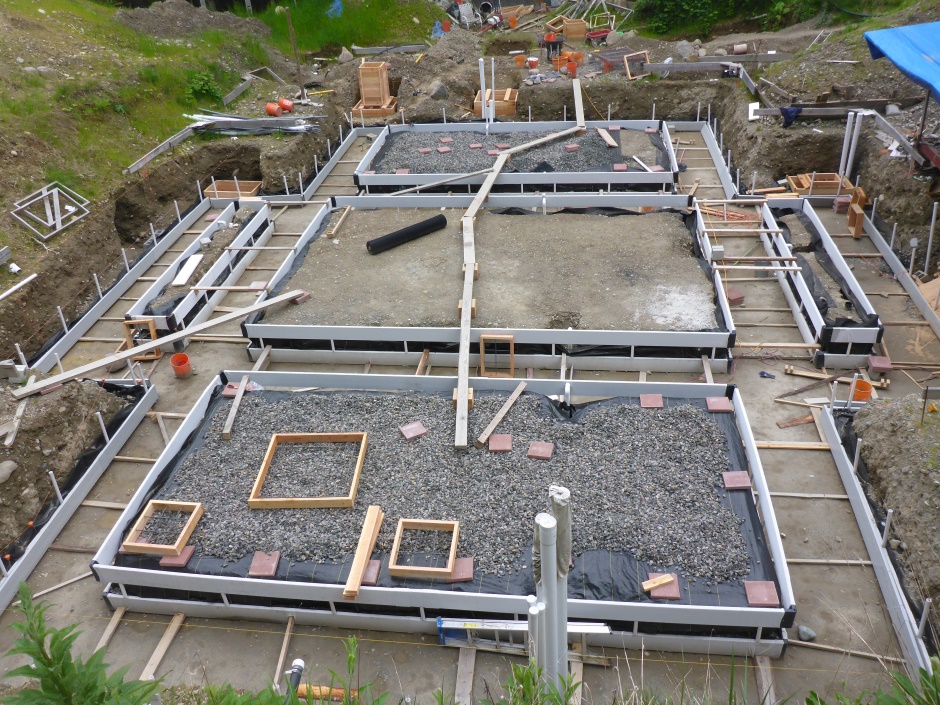
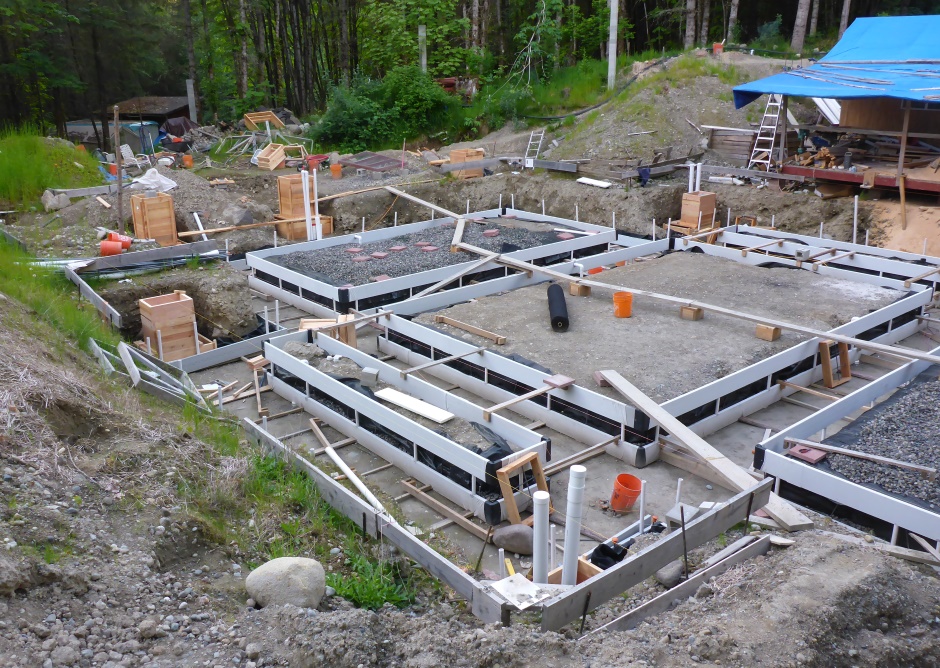
At the initial foundation forming step we only implement the deck columns up to just above grade level. They will have rebar protruding about 3 feet from the top, ready for the later step of implementing the columns up to the top of the basement.
Ideally from a visual perspective it would be good to have the deck columns be 2'6" square (rather than the 2' square done with the poured concrete). It can be decided later (based on visual assessment) whether to increase the size using eg stucco render, stone, or brick cladding.


The deck concrete and the deck column concrete is designed to get wet. It is thermally decoupled and water decoupled from the house concrete (the house concrete is always warm and dry). The footing concrete for the deck columns is poured directly onto the excavated soil.
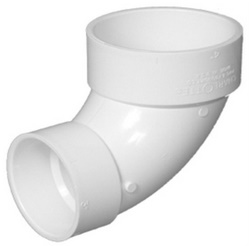
For the above grade part of the column there is a 3" drain pipe in the center of the column to drain away water that lands on the deck. At the bottom of the pipe there is a 90 degree bend that routes the water out the column side to the network of 4" piping that goes to the rain water collection system. The 3" drain pipe is fitted down the center of low cost 8"x8"x8" concrete blocks. The concrete block core also helps reduce the amount of expensive poured concrete required.
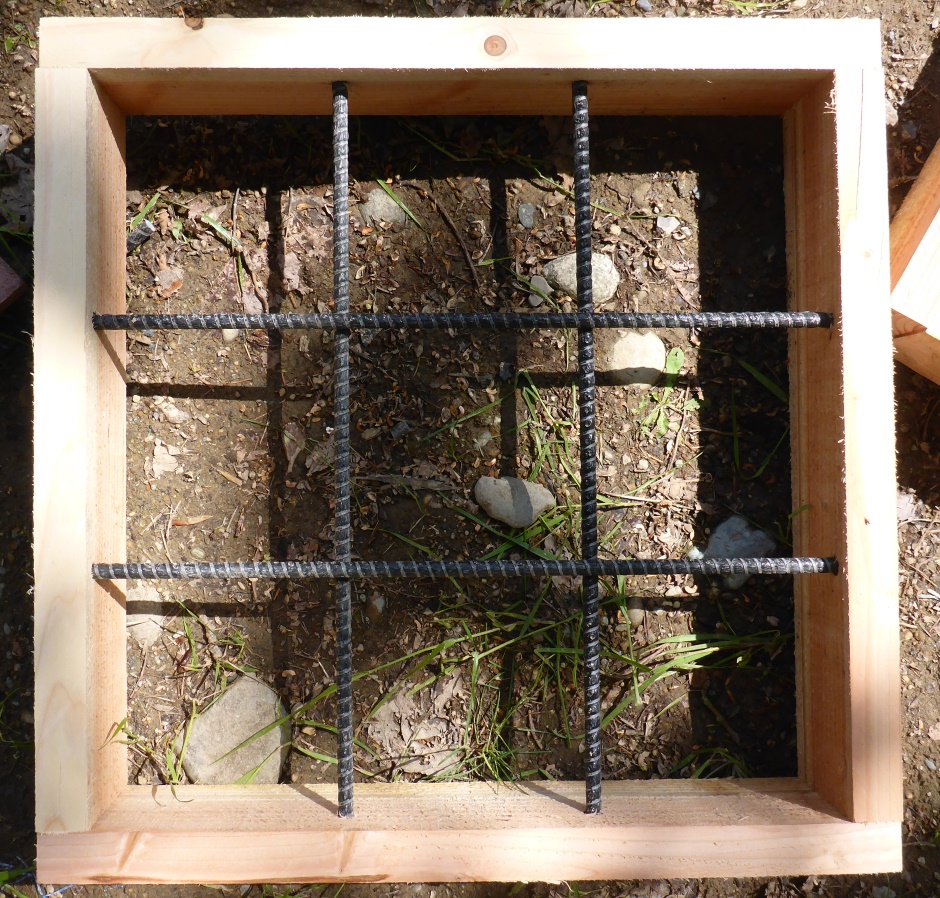
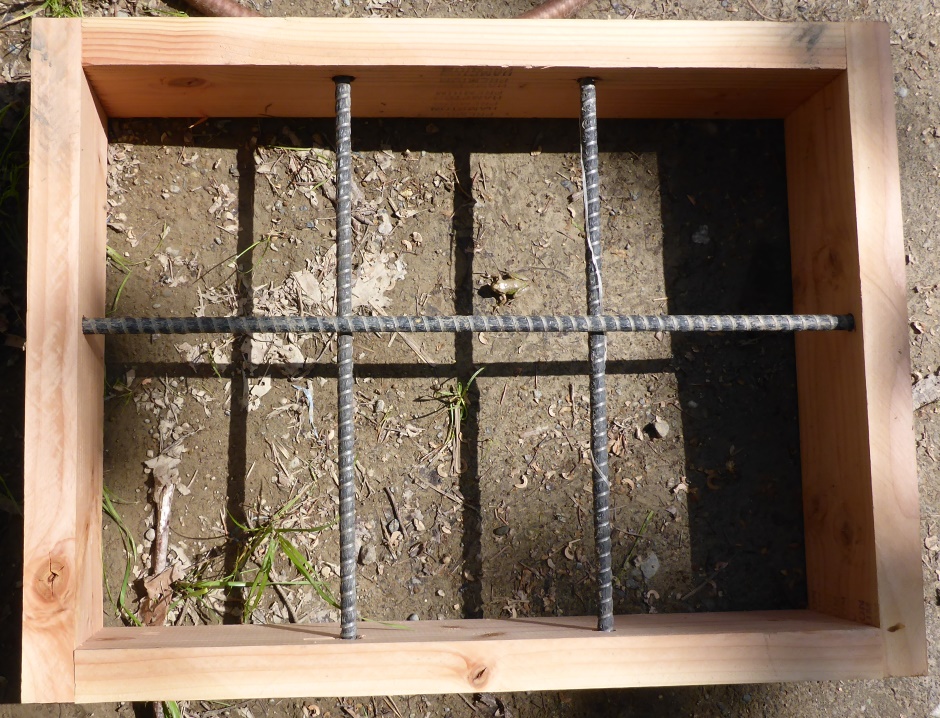
Concrete forming squares for column footing
These have an inside dimension of 3'11" so the outer overlap pieces of 5" wide 2-by are 4'2". You need 4 squares per column.
In the case of 1 out of the 4 squares you need to fit rebar to act as a base for the structural rebar. Measured on the inside of the square you need just over half inch holes 4.75" in from the inside edge. On long side pieces these are 1.5" up from the edge and on the 3'11" shorter pieces these are 1" up from the edge (different so that the lateral rebar bypasses the longitudinal rebar). Fit the rebar and cut it off to the right length (4'2").
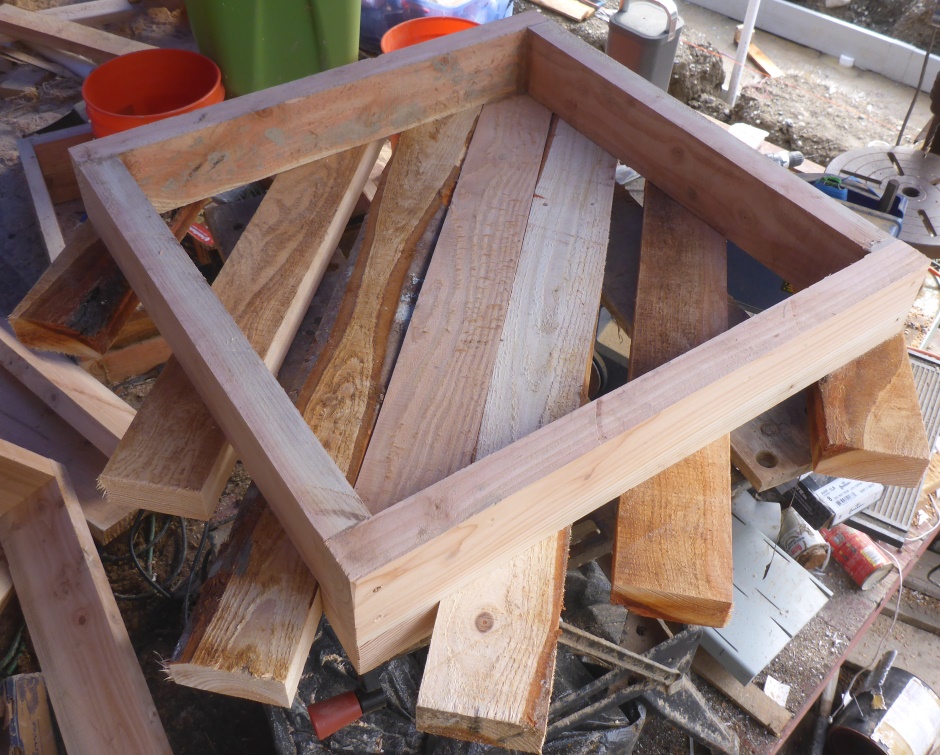
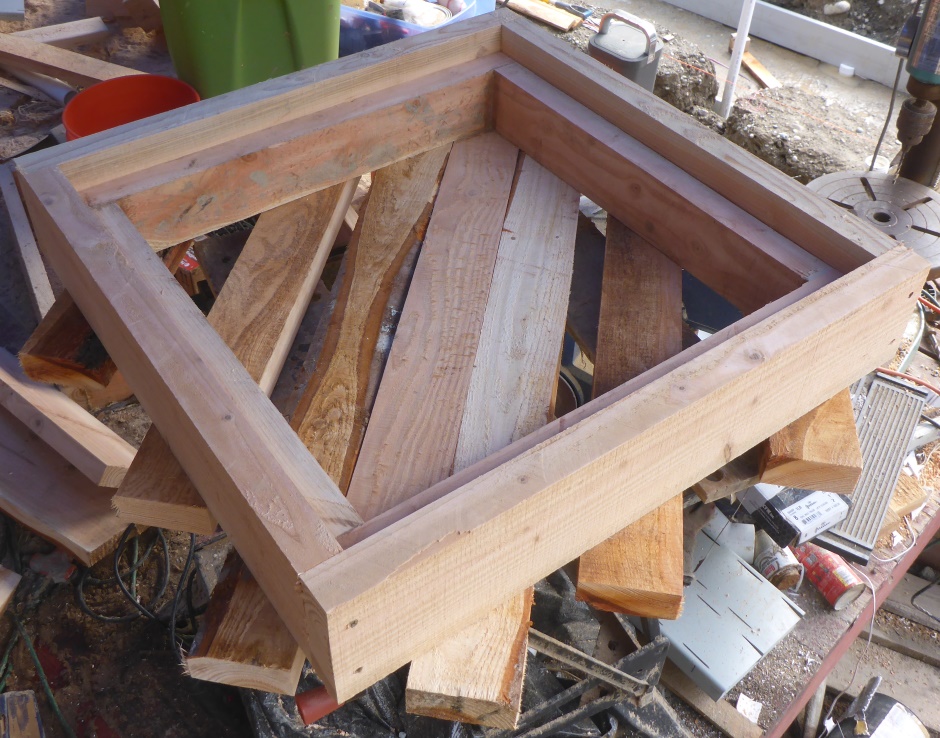
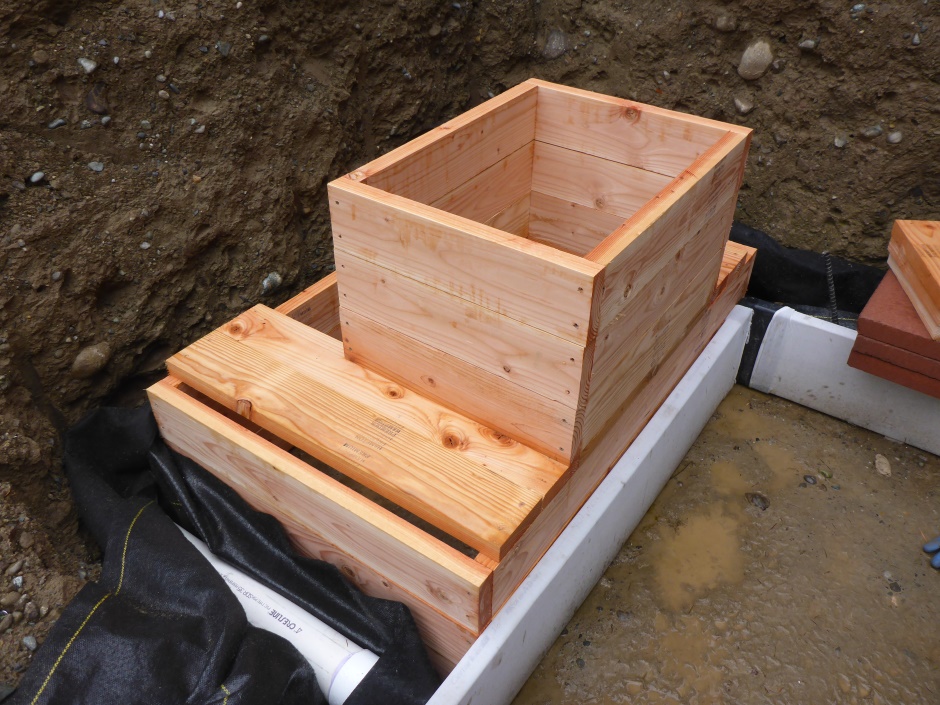
Concrete forming squares for column shaft
You need to make lots of squares from 5" wide 2x6 lumber. These have an inside dimension of 2'x2' so the overlap pieces are 2'3".
The 2x6s are cut down on a table saw to be 5" wide so that the edges are not rounded. Because so many are needed and it is important to achieve dimensional consistency, for the 2'x2' squares, use a jig with a 2'x2' square of 2x4 in the middle and cross pieces of 2x4 to hold it square and support the edges of the square being assembled. Here's the jig...
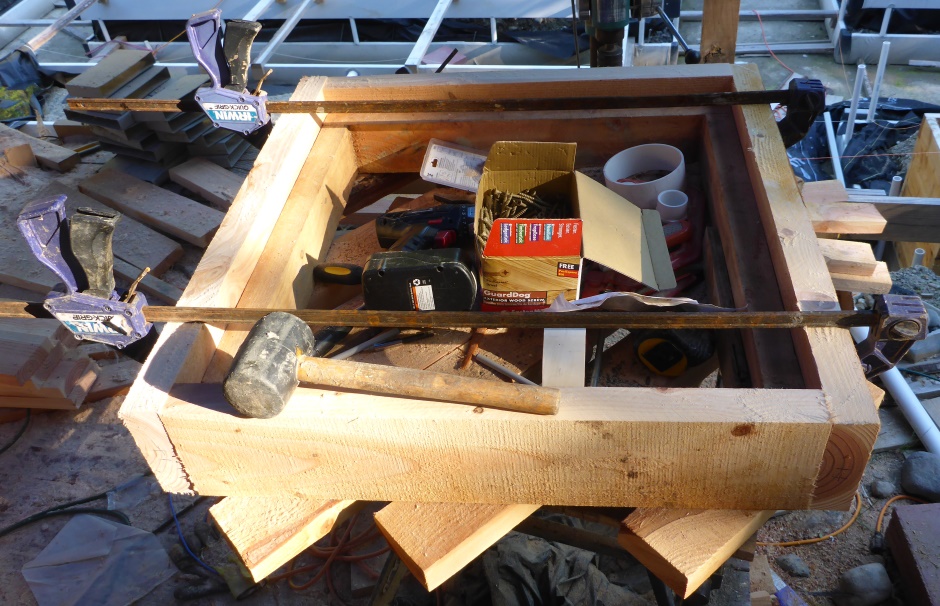
Start by using clamps to accurately position the pieces of the square. Use a rubber mallet to get everything accurately positioned and aligned.
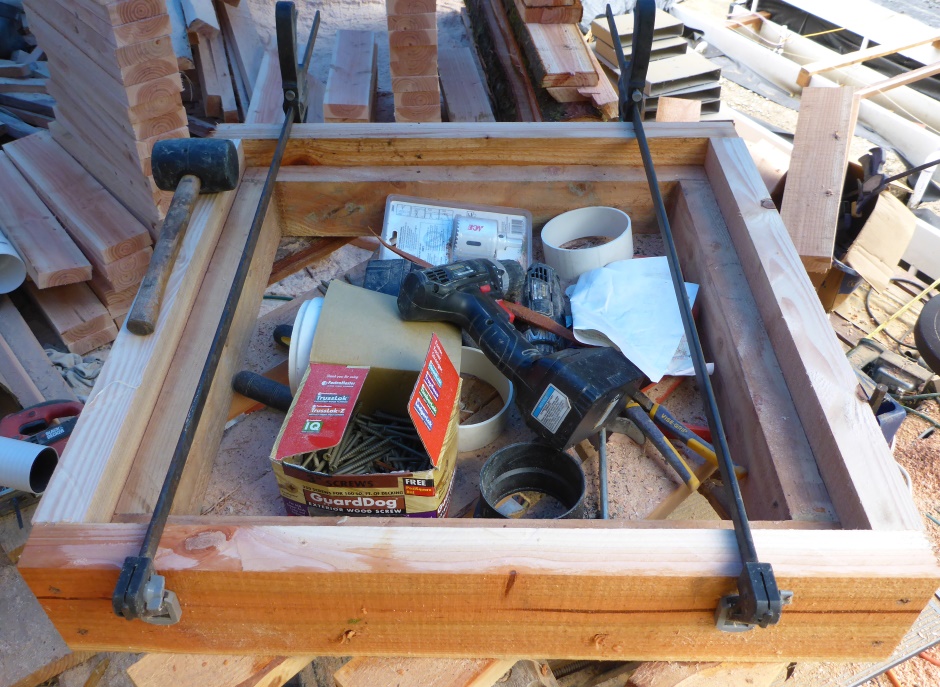
The squares are just screwed together without glue so they can be easily stripped after the concrete pour. Use exterior 3" screws as you want them to be strong and you will be able to reuse them. Use two screws per corner located 1.25" from each edge. Try to be consistent in the wood you use because the pattern in the concrete will be left after the wood forming is removed. The fashionable look is called "board formed concrete". I used wood cut on my sawmill with a rough sawn finish to get the consistent look I want. Here's a square assembled on the jig...
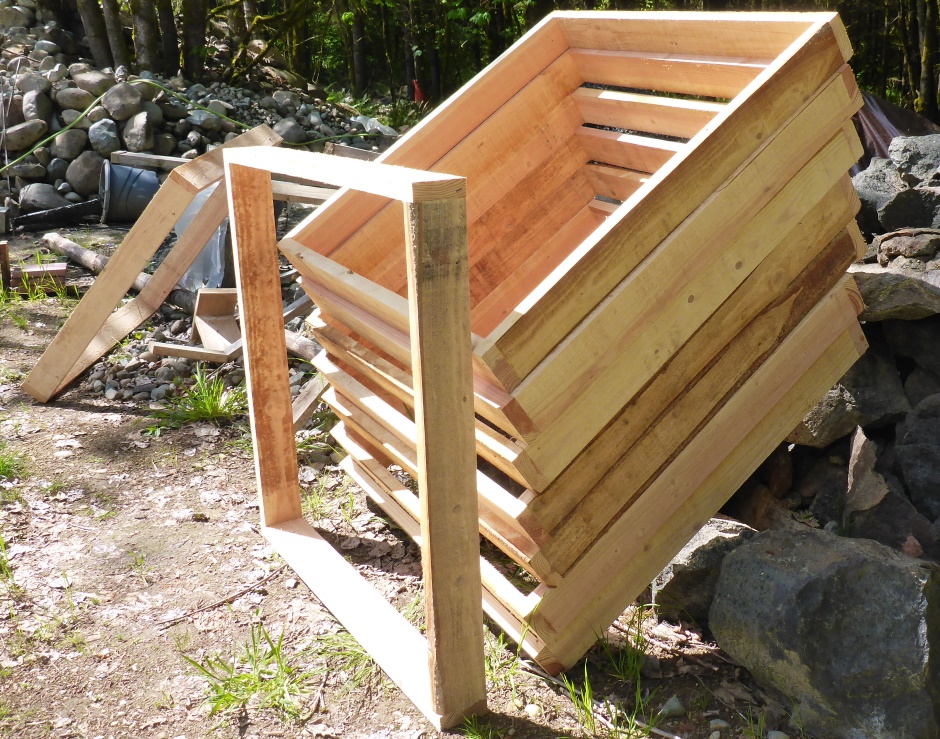
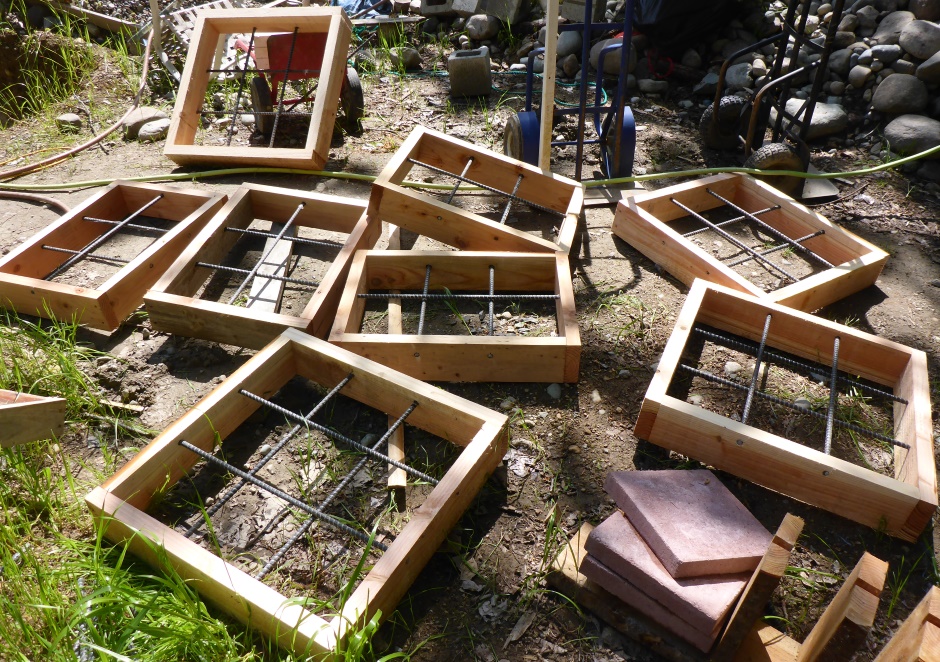
Here's a bunch of squares stacked up ready to be used...
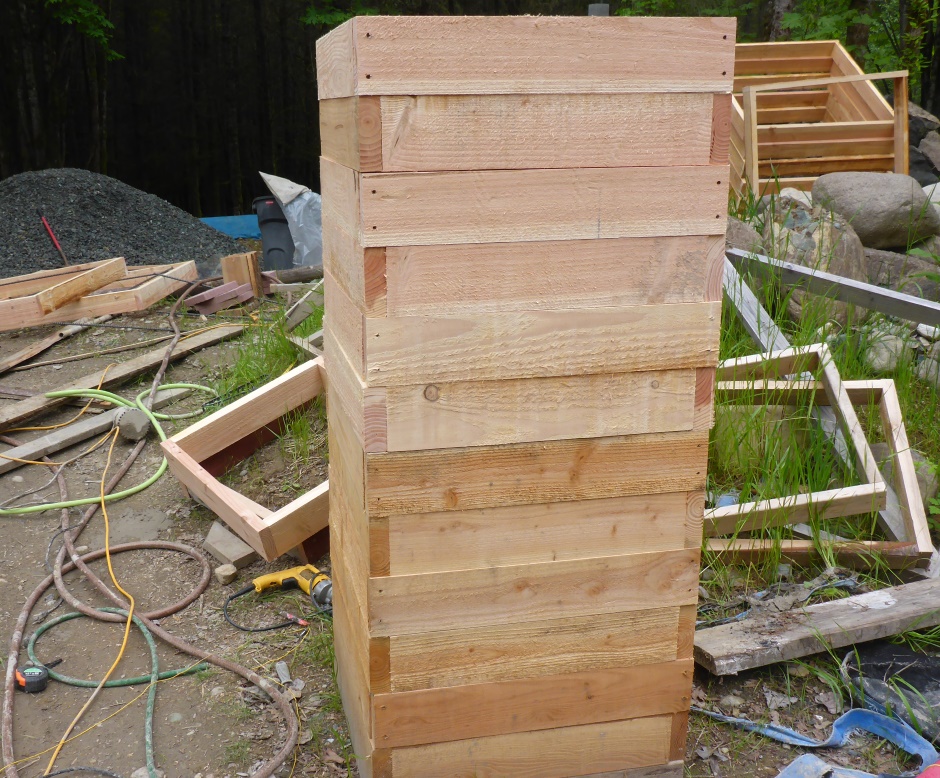
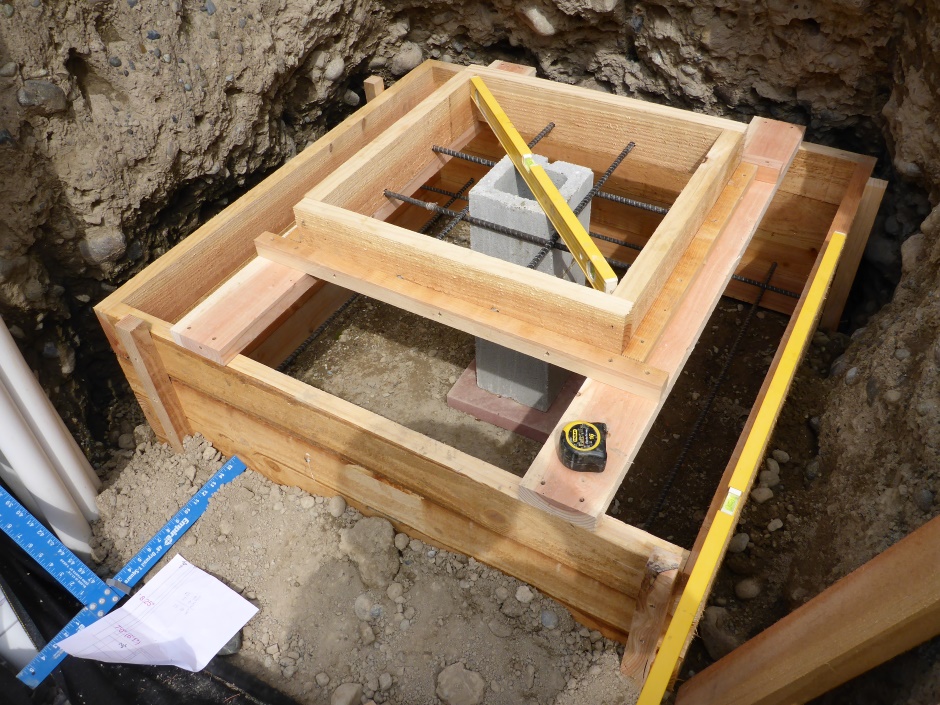
The first square at the bottom of the column shaft is fitted with rebar to accurately position the structural rebar. It also helps align the concrete blocks in the right location. The just over half inch holes are 8" from the inside edge of the wooden square. In the center (with some very slight flexing) it can accommodate a concrete block that is 7-5/8" square.
(In the picture below you will also see some of the rectangles used in the portico variant of the deck columns (see later).)
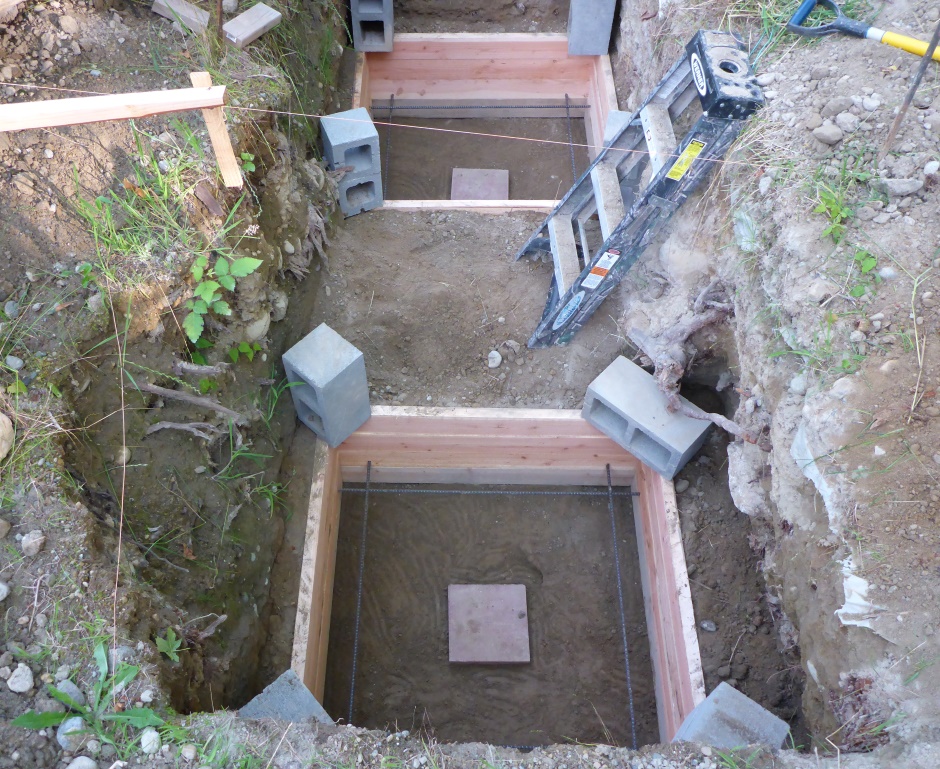
Starting a deck column
The locations of the deck columns are as per your CAD drawings. Measure relative to the batterboard strings. You may have to extrapolate the string locations a bit if the columns are outside the area covered by the batterboards. Set additional strings if you need them. Use a plumb-bob down from the strings to determine the position of the footing squares at the bottom of the excavation.
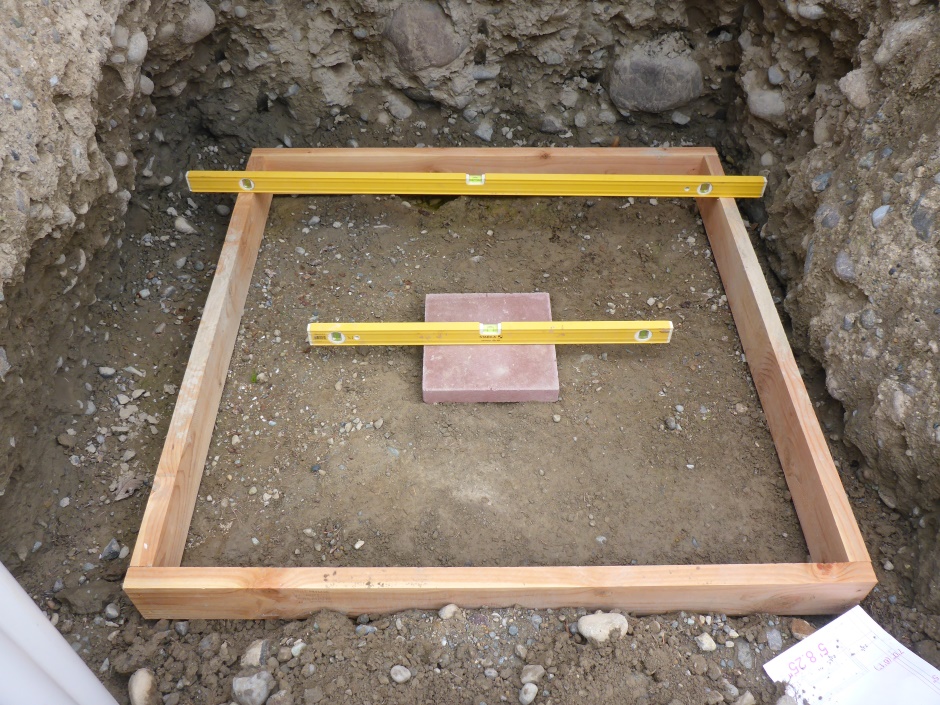
The excavated area of undisturbed soil under the footing for the column needs to be excavated approximately flat and level. Place one of the footing square wooden rectangles on the ground. Use a spirit level and a trowel to get it level. Place a 12"x12" paving slab in the center and get it level using the spirit level and trowel. Soil that is not under the wooden rectangle or the paving slab does not need to be particularly flat (it can even have big holes where a rock was removed). Accurately position the wooden footing square and the paving slab, and with shims if necessary, get them both level.
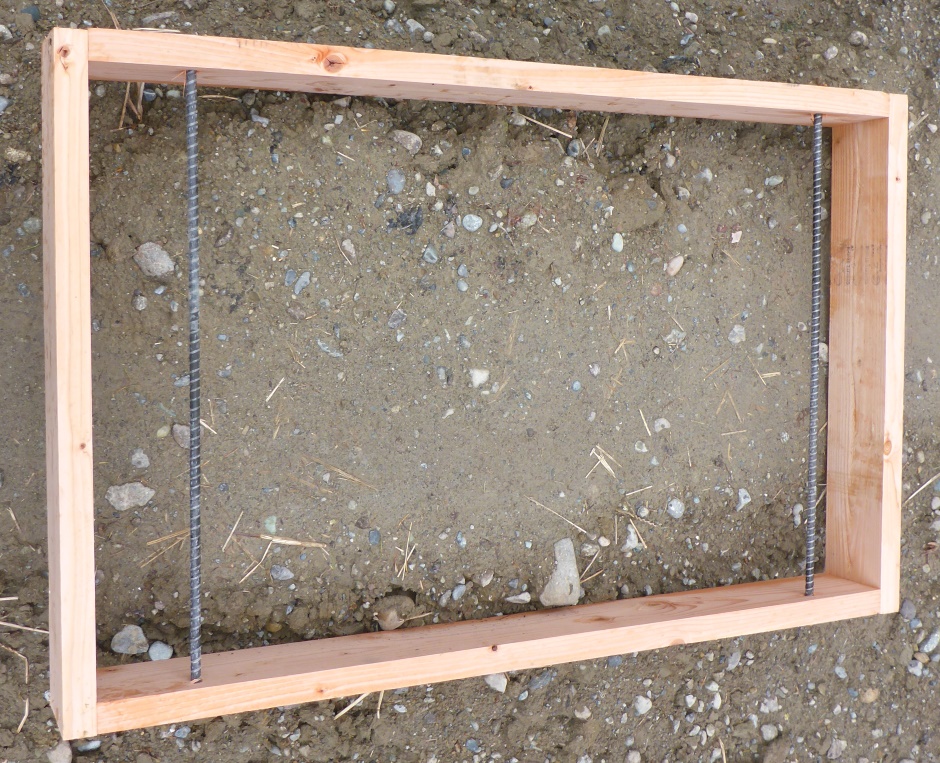
The second wood square is the one with the rebar fitted (rebar near the bottom edge).
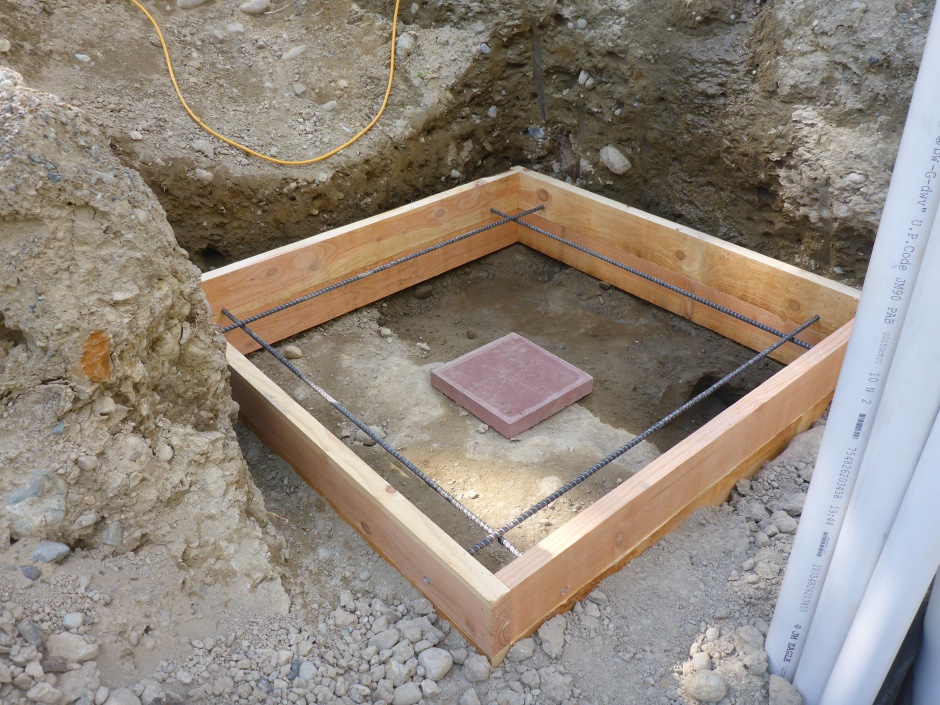
Backfill with soil around the footing up to a height of about 4" (ie just short of the top of the first square). This will hold the bottom wooden square in the right location.
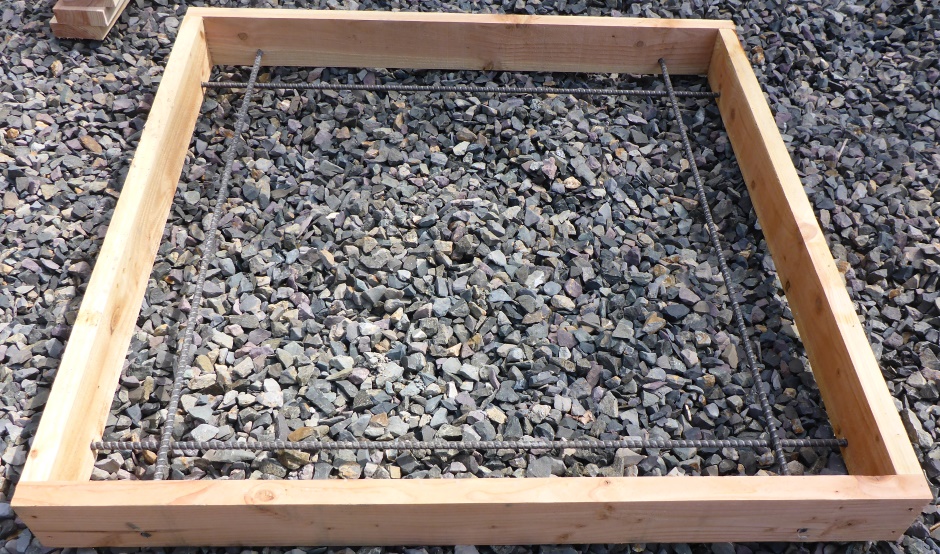
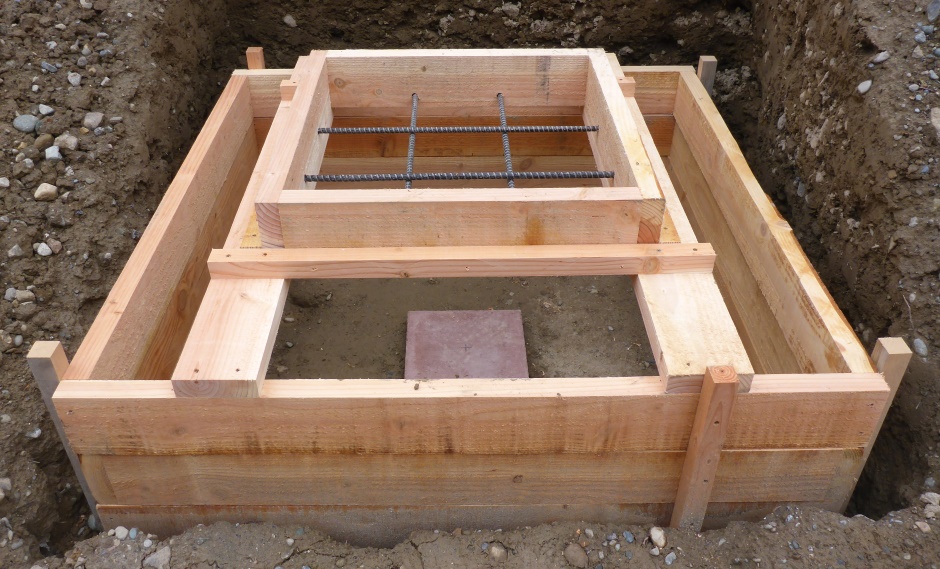
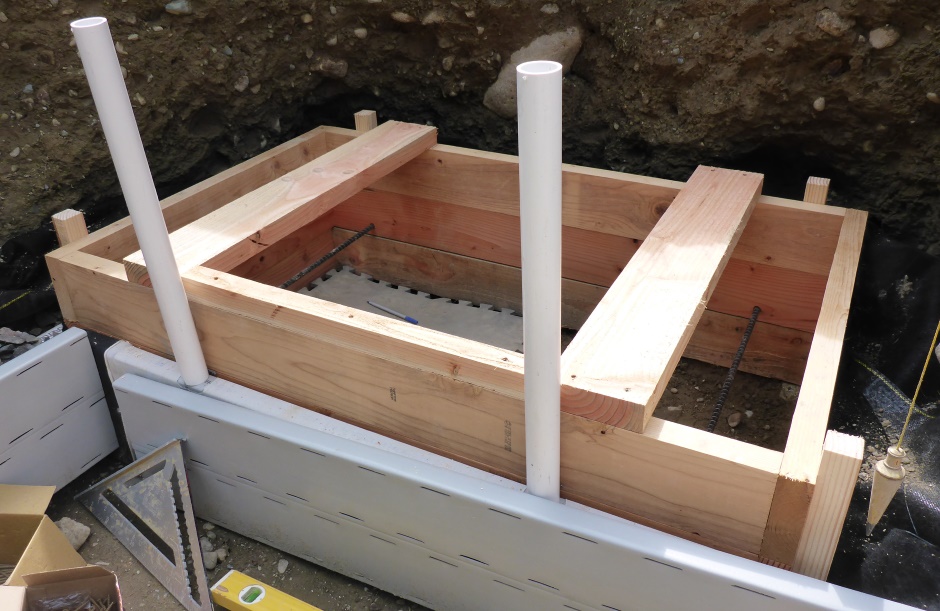
Complete forming of deck column footing
Add the other 2 wooden rectangles for the footing, making a total of 4. Weigh down the corners to keep everything in place.
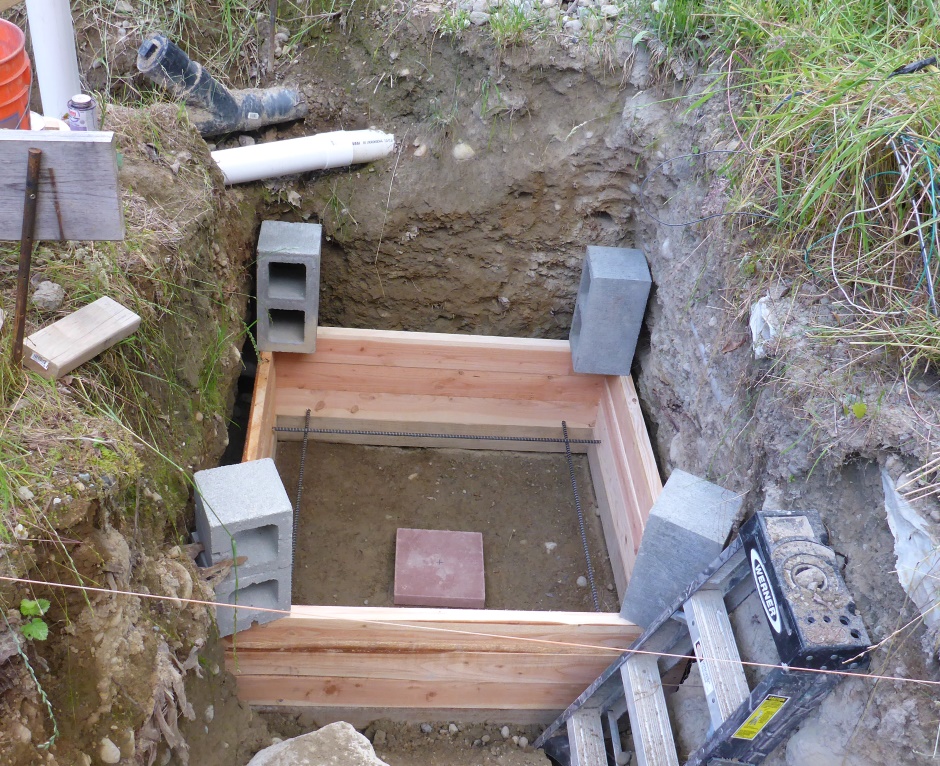
Backfill with non-organic soil to the top round the outside to fix the location and avoid lateral movement.
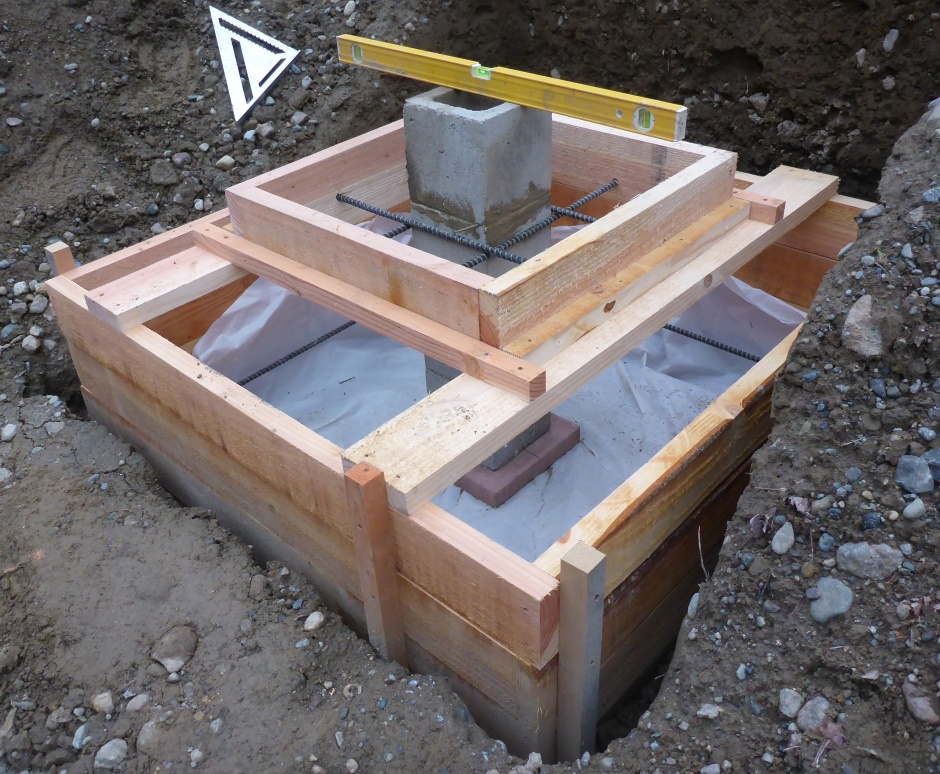
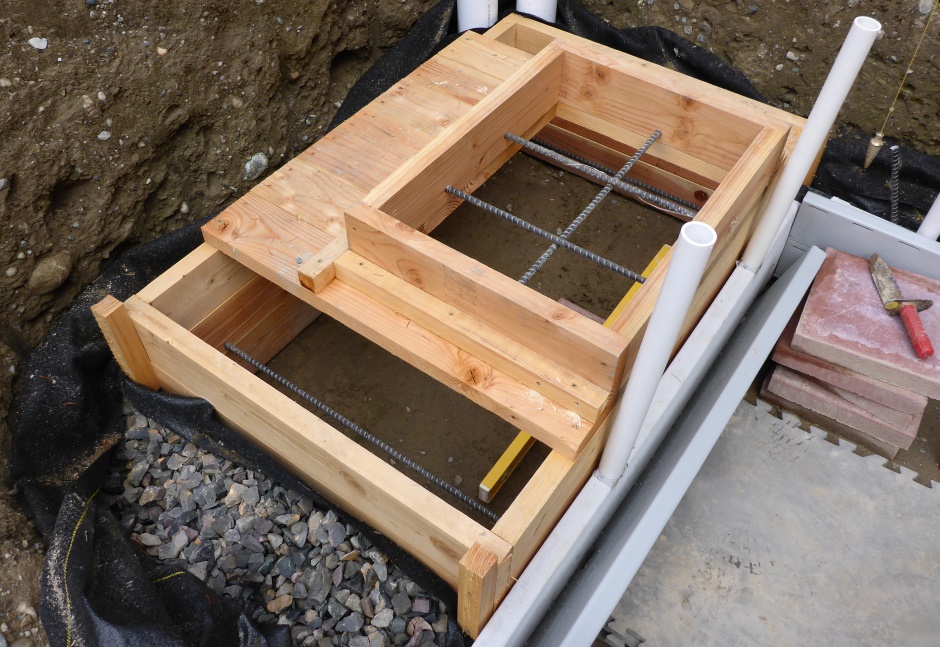
Across the top of the footing forming go some 2'3" long horizontal 5" wide 2x6 lumber to reduce the size down to the smaller wooden rectangles used for the stem of the column. The position of this needs to be set accurately from the batterboard strings to correspond with the position of the column stem (inside dimension). To avoid cumulative error, do not just measure relative to the footing rectangle.
Don't fit all the fill-in horizontal lumber until the structural rebar has been fitted (see later), although it can be useful to rest it in place to stop soil falling into the footing.
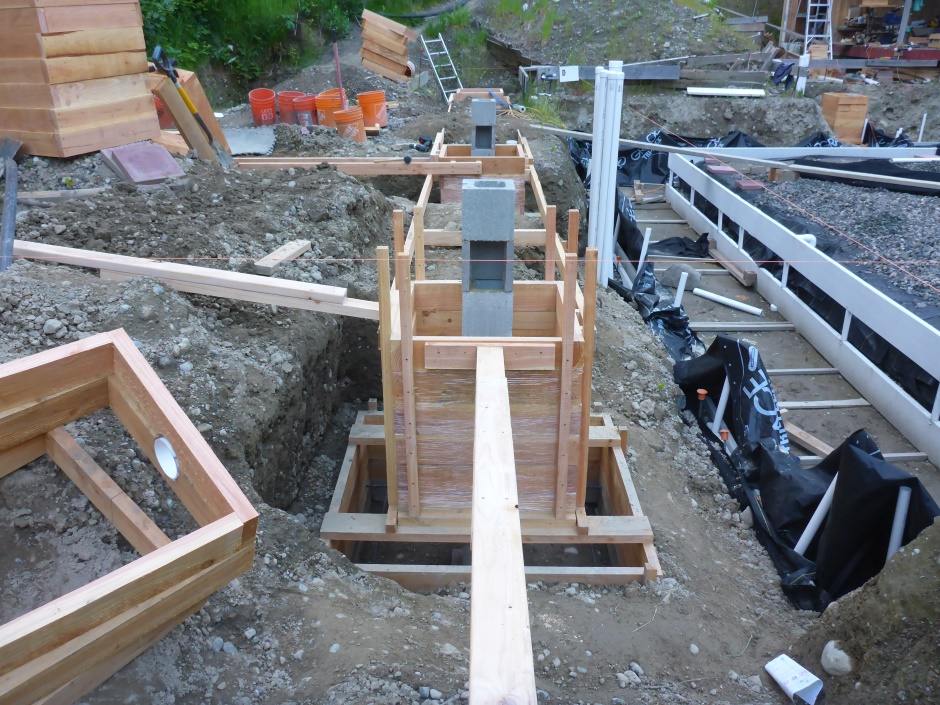
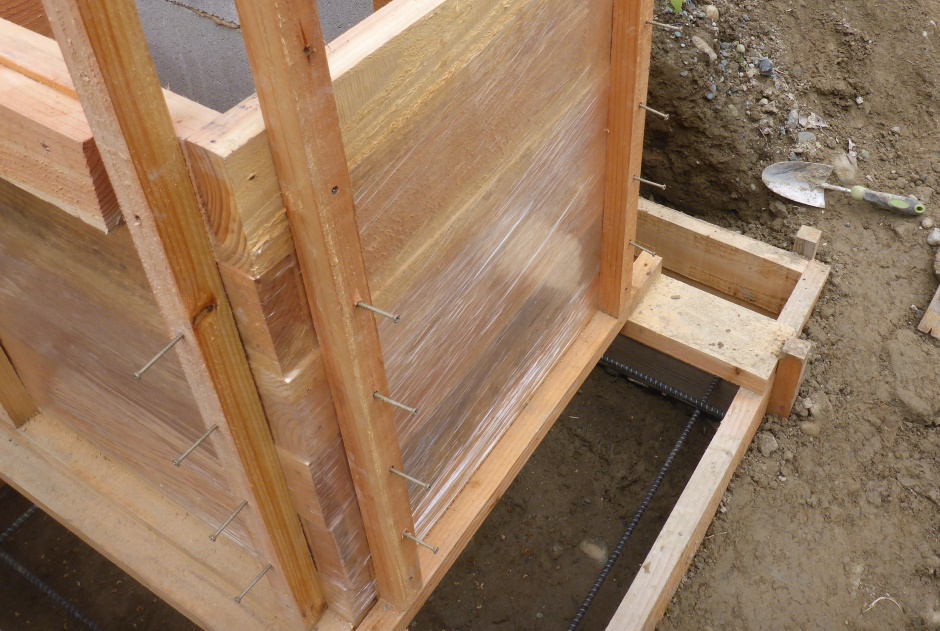
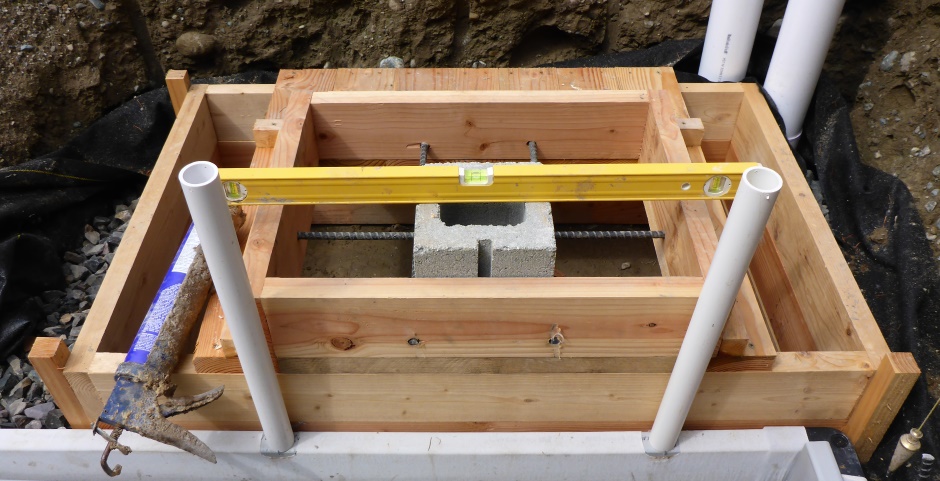
Start forming column stem
Fit the first of the column stem lumber squares. This first one has the composite rebar that holds the first of the column stirrups. Measure relative to the batterboard strings to accurately set the position of the column stem square. To avoid cumulative errors, do not just measure from the edge of the footing squares. Screw on some 1.5"x1.5" batons to hold the column stem square in the right place. The batons have holes in the side and use these to screw to the column stem square.
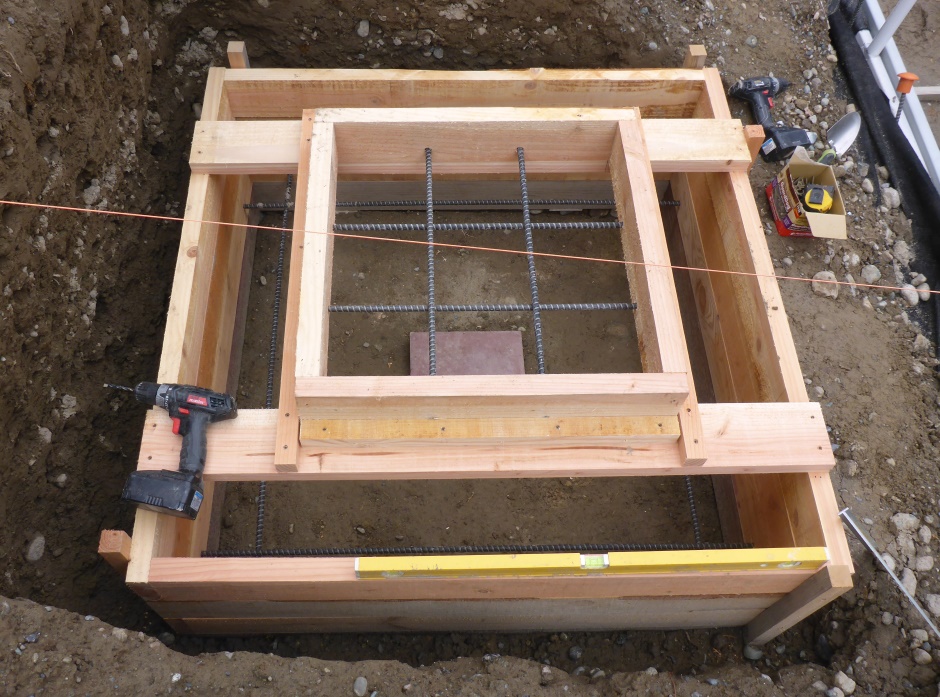
Get the top of the first column stem square exactly level by if necessary adjusting the shims under the column footing squares.
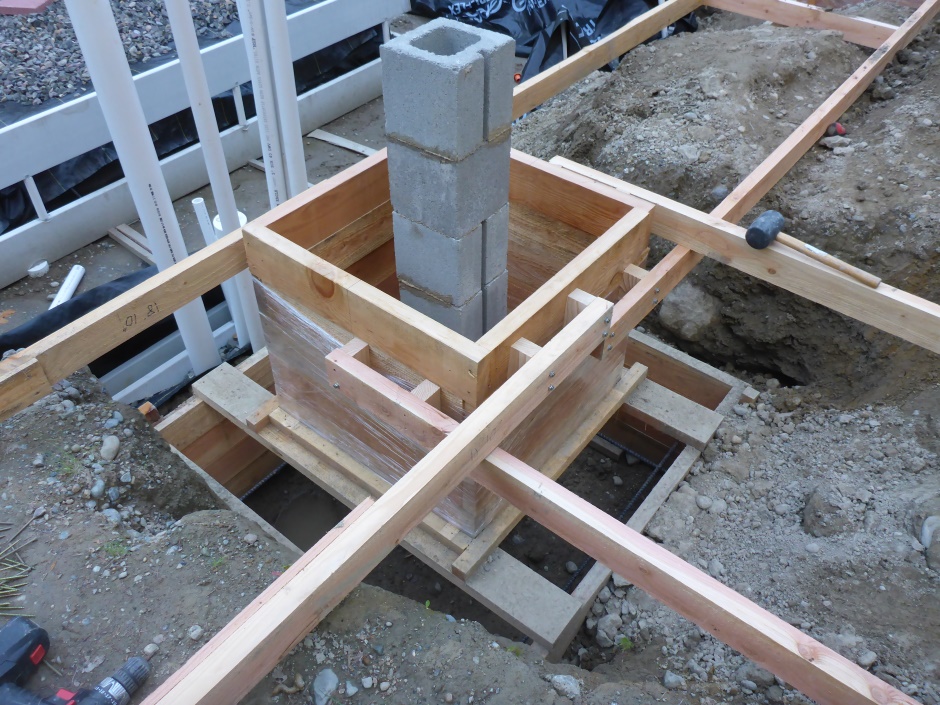
Concrete block center
Start building up a stack of concrete blocks in the center on the paving slab. They are glued using PL-Premium adhesive. Get them vertical using a spirit level (although exact vertical accuracy is not that important). The concrete blocks up to slab height do not have a drainpipe in the center. They reduce the amount of expensive poured concrete required and form a base for higher blocks.
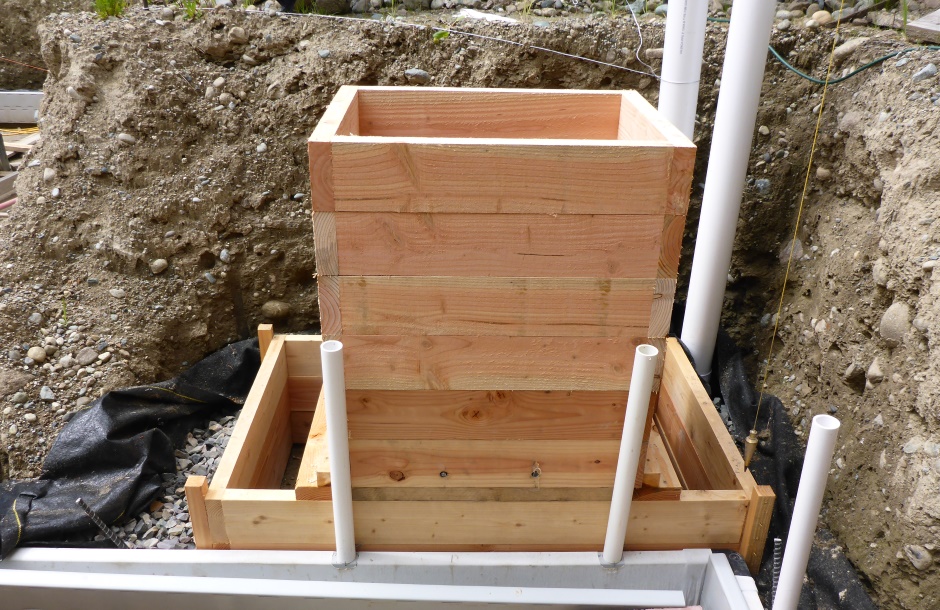
Add more column stem lumber squares
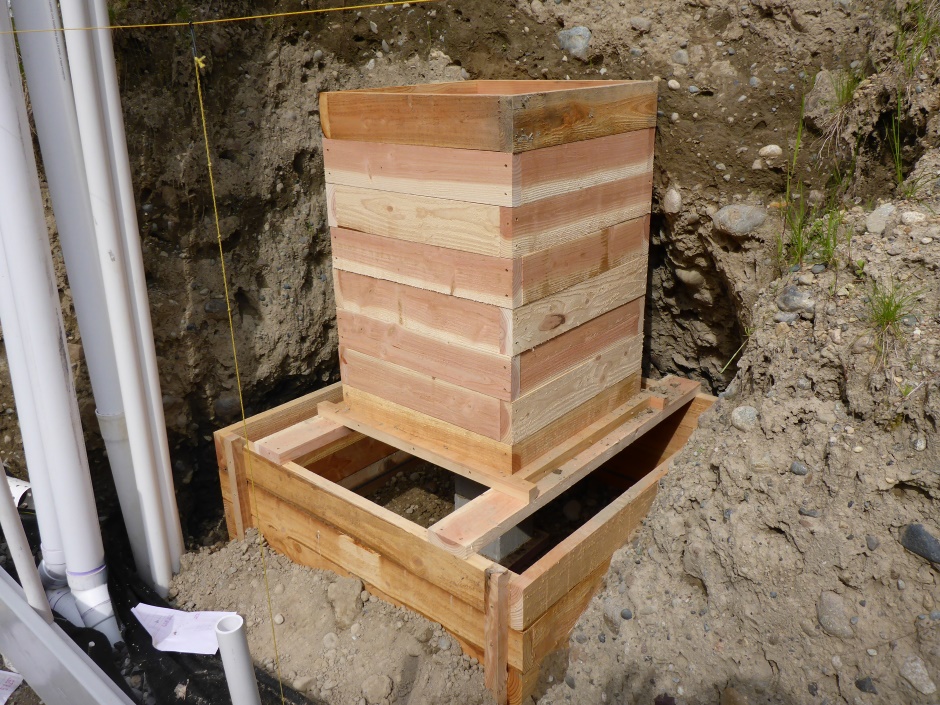
Place stem forming concrete wood squares up to a height of just above excavation level. Alternate where the overlap edges of the wooden squares are. Get them about right in terms of alignment. Even though you are not yet rigidly fixing the squares in the final position, the position of the squares should be placed relative to the batterboard strings rather than trying to make the column vertical using a spirit level as this avoids cumulative errors. The hope though is that a spirit level would show that the column is vertical.
Be conscious that at some point you need to fit the vertical composite rebar (that has a bend in the end). Use a trial piece of vertical rebar with a cut turn end to make sure you can still get it in. In practice you will find you can still get the rebar in even with the forming up to grade level.
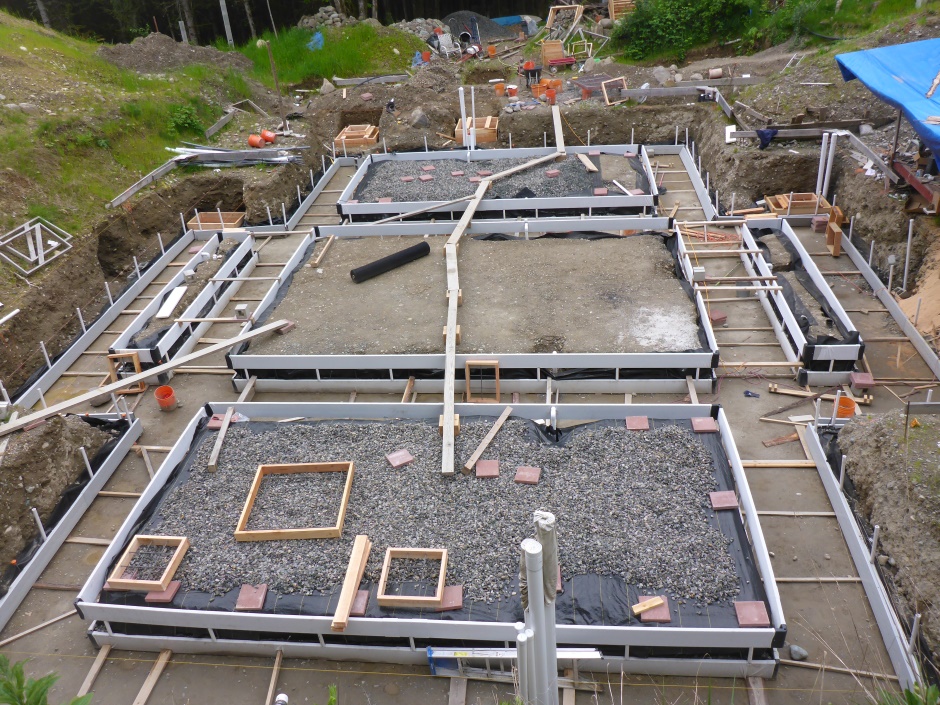
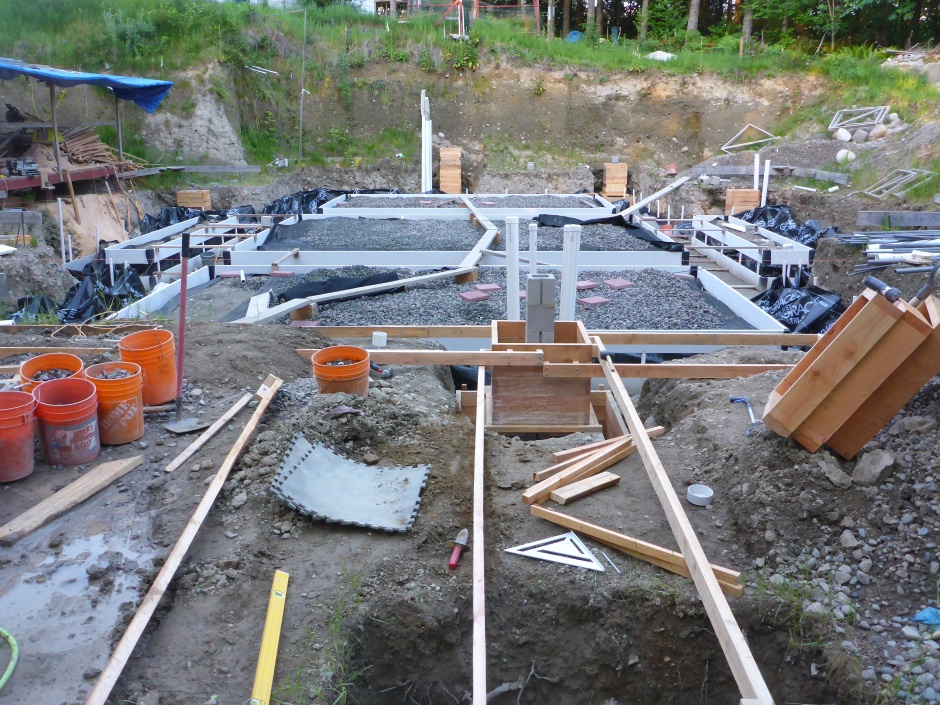
Use horizontal spacer lumber between columns
Now is a good time to make the horizontal lumber pieces that will be used to brace the columns to each other. The length is the pitch between columns as given by your CAD drawings. If you find that the distance between implemented columns is not correct then you must immediately find out what is wrong and correct the problem.
Start by picking a reference column. It is best if the one chosen is closest to the batterboard strings so that its position can be more accurately set. Once its position is accurately set, use temporary bracing from eg the batterboards to ensure it does not move.
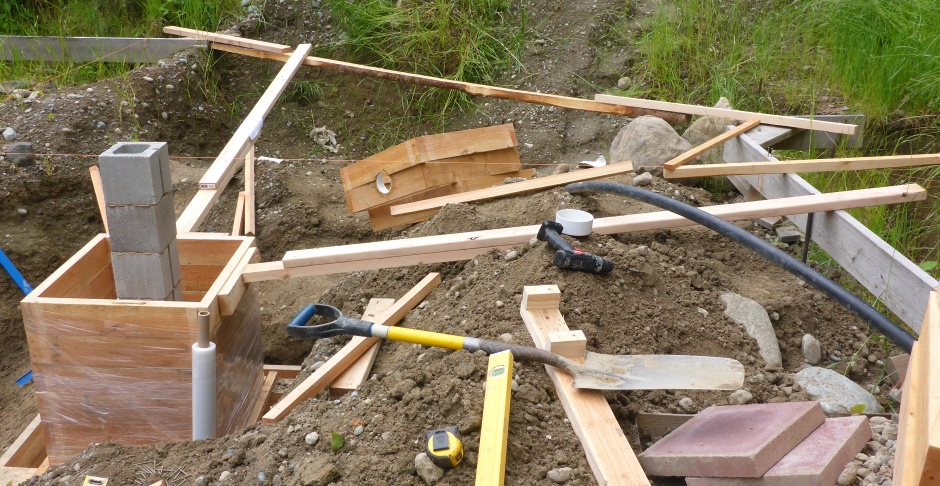
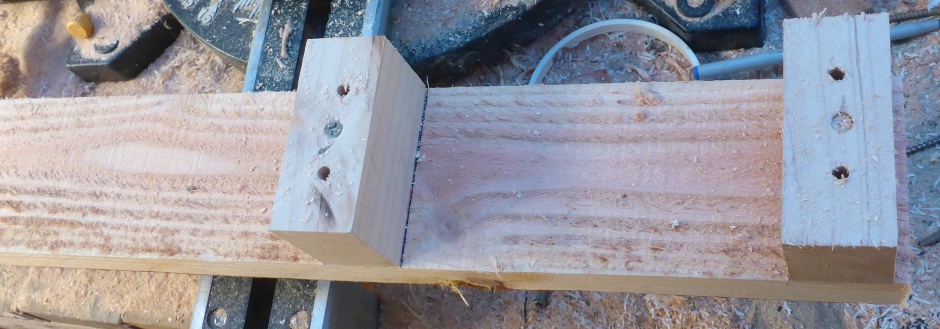
The horizontal spacing lumber has spacers on the end to avoid the vertical batons that will be on the columns. The spacer blocks are centered at 1" and 9" from the end. The holes need to be large enough to clear the 6" screws that will be used.
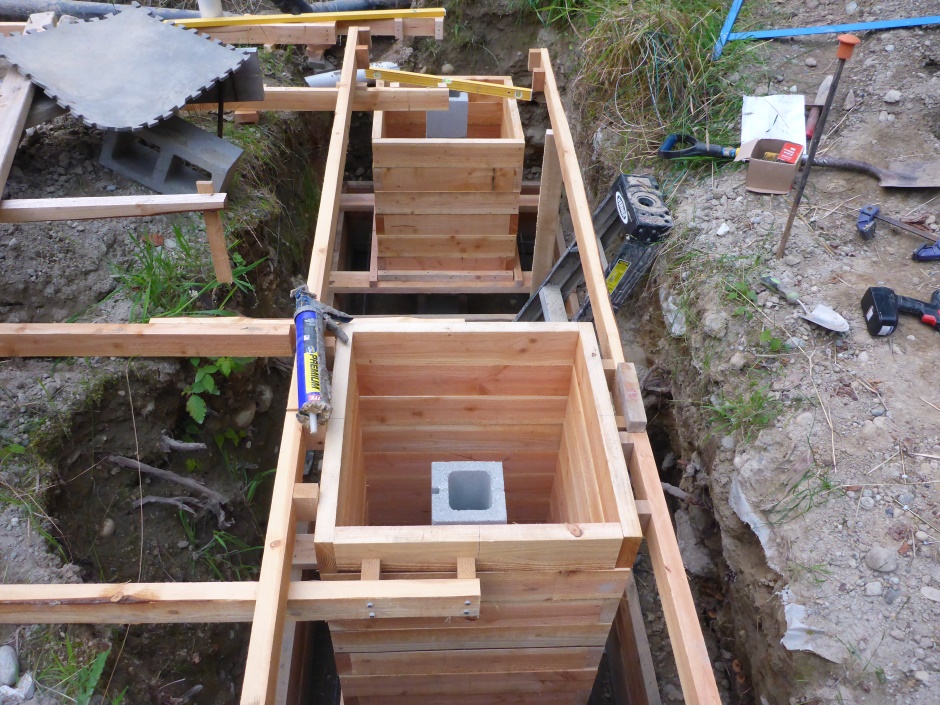
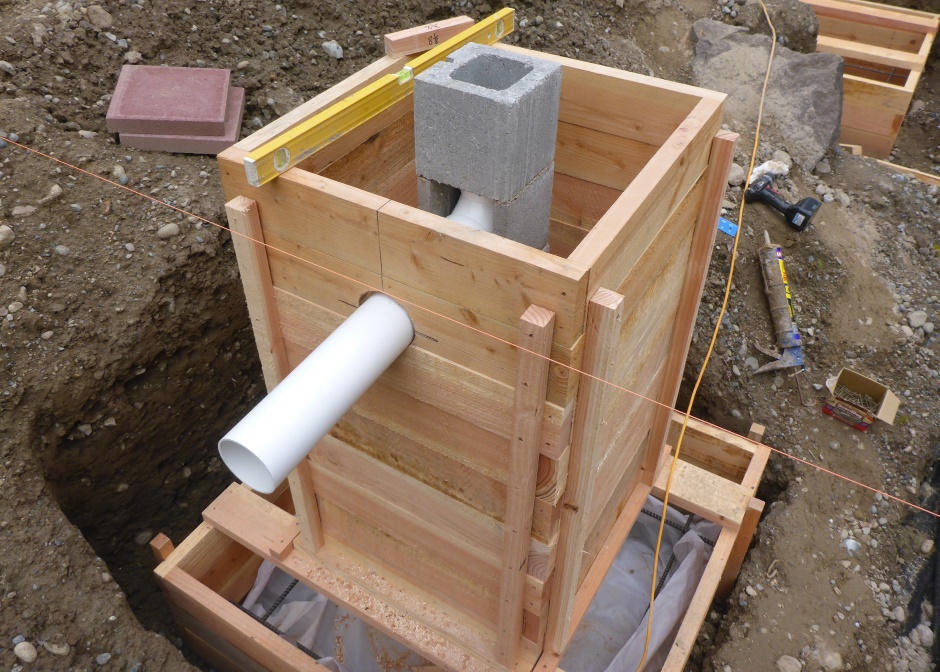
Add more concrete blocks
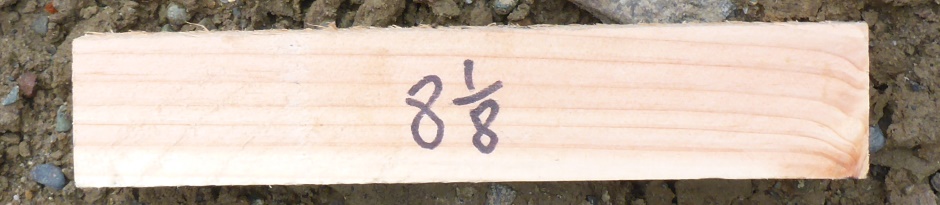
Use PL-Premium adhesive between the blocks. Set each block's position from the inside edge of the column stem squares using a spacer stick that is 8-1/8" long. Only add enough blocks to get to where the drain pipe will exit.
Drain pipe exit
While adding the concrete blocks, when you get to about 8" below grade level, you need to use a concrete block with the side cut out. It needs to be arranged such that the horizontal drain pipe from the column is just below grade so that it will not be visible. Use a circular saw with a carbide grinder wheel to cut out the side of a concrete block with enough clearance for a 3" to 4" 90 degree bend.
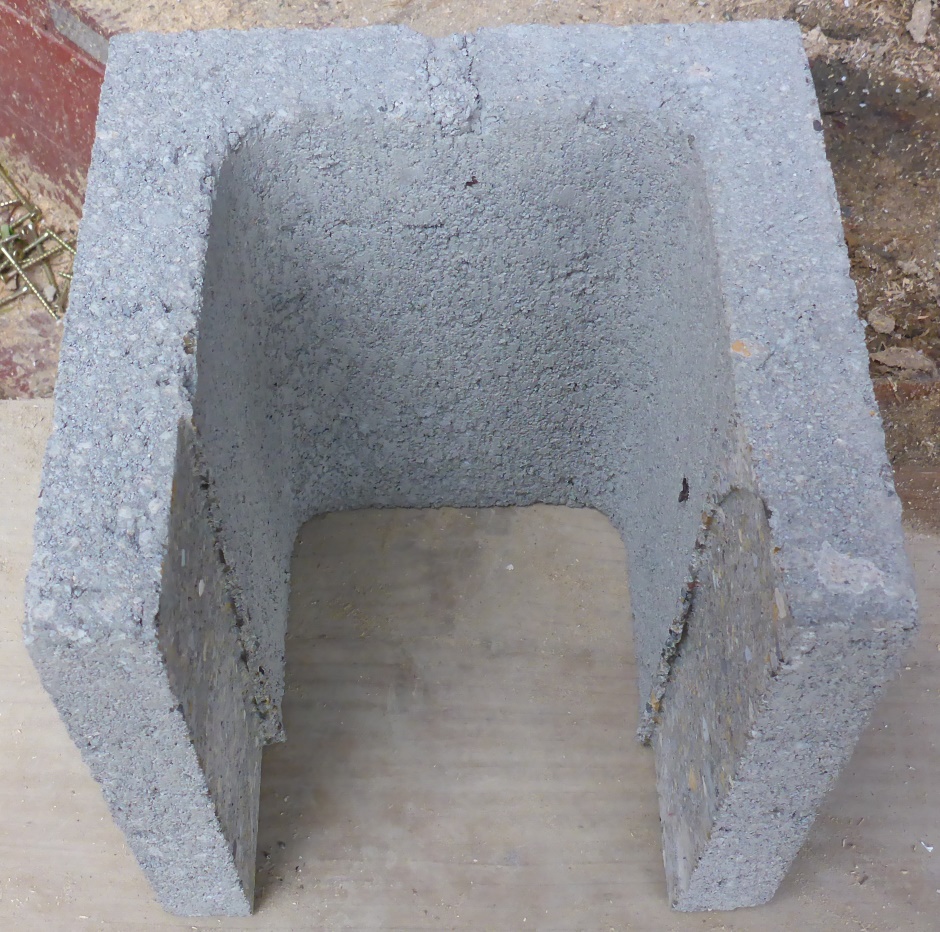
The open side of the block faces towards the downhill corner of the site. These will all connect up to take water to your rain water collection tank.
Mark on the column stem squares where the horizontal 4" drain pipe will exit and cut a hole with a jig saw. Make the hole size to allow for a collar piece (about 4-3/8" outside diameter).
Do not actually fix the pipe in place yet because it would stop you adding rebar stirrups.
Note that the 3"-to-4" bend is designed for thick wall PVC pipe so you will need to use a collar fitting (pipe joiner) to adapt it to the thinner wall PVC pipe.
Add one more concrete block (not cut) to complete the initial stack of concrete blocks to just above grade level. You will fill the wooden column with concrete on the initial pour to half way up this last concrete block such that the block will form a peg that sticks up into the next concrete pour to mechanically key it together across a cold joint.

Implement critical bits of horizontal drainage pipes
In order to make sure you get the pipe exits from the columns on the correct side it is important that you fully know how all the pipes will connect up. You should draw all the pipes on your AutoCAD drawing. Also you should implement any bits of horizontal piping that you feel are critical to your understanding of how the pipes will be implemented. Things like the routing of the sewer pipe will have a higher priority than the drainage pipes so you also need to know the routing of the sewer pipes.
Add structural rebar and stirrups
Cut the short ends of the half inch rebar type that has bends on the bottom ends to a length (from the outside of the long leg) of 1'8". The long legs are cut to be just over 3 foot longer than the height of the first concrete pour. Add the vertical rebar to the column. There is vertical rebar at the corners and also on the edges that are adjacent to other columns. The short tails of the rebar for the middle edge rebar can be slightly angled to get them to fit. Add deck column stirrups by dropping them down over the top of the vertical rebar. The stirrups are every 12" and the bottom stirrup rests on the positioning rebar that was fitted to the first wooden stem square.
In the footings, add additional lengths of straight rebar as per the drawing.
Add vertical batons
The vertical batons are pieces of 1.5"x1.5" lumber. The reason these are added as a fairly last step is that in the case of fresh cut lumber it will shrink across the grain over time and if the batons were added to early then you would get gaps between the squares. Use 8 batons per column. Make them long enough to include one square above final grade height. As you screw them on, be conscious of getting the position of the squares accurately set relative to the batterboard strings. Because of the variation in wood thickness, not all screws will be fully tightened.
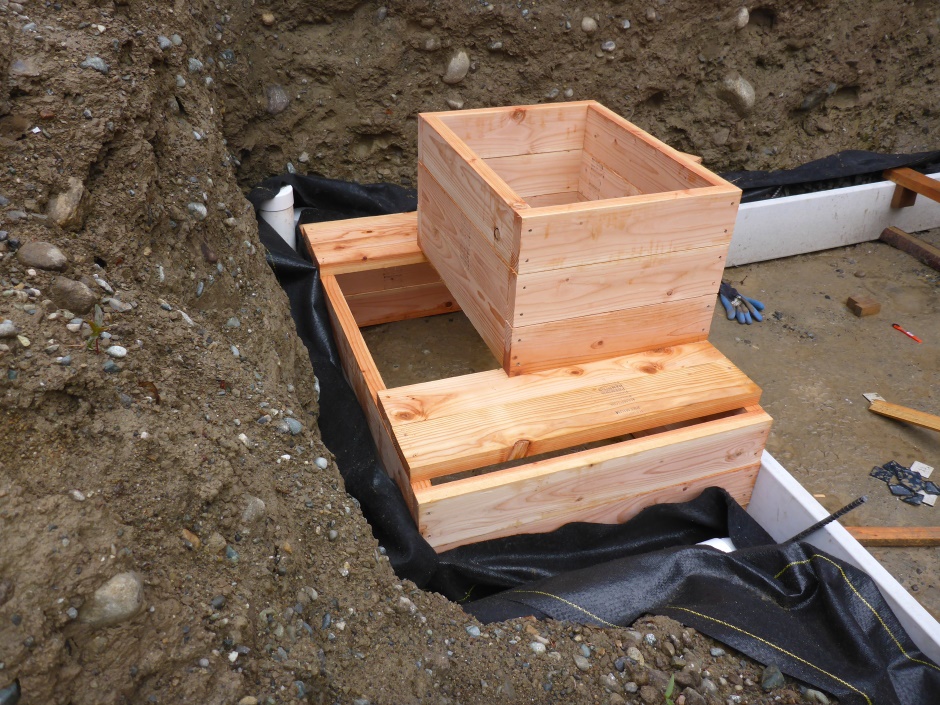
Deck column for portico
The deck columns that are on either side of the porticos are a slight variant on a regular deck column because there is not as much room given the forming for the wall footings. This is not a problem because these columns do not carry as much load.
The wooden framing for these column footings have an inside dimension of 2'5"x3'11". There are only 3 of these footing rectangles in the stack.
The second rectangle has two pieces of rebar fitted (4.75" from the inside edge) to form a base for the structural rebar.
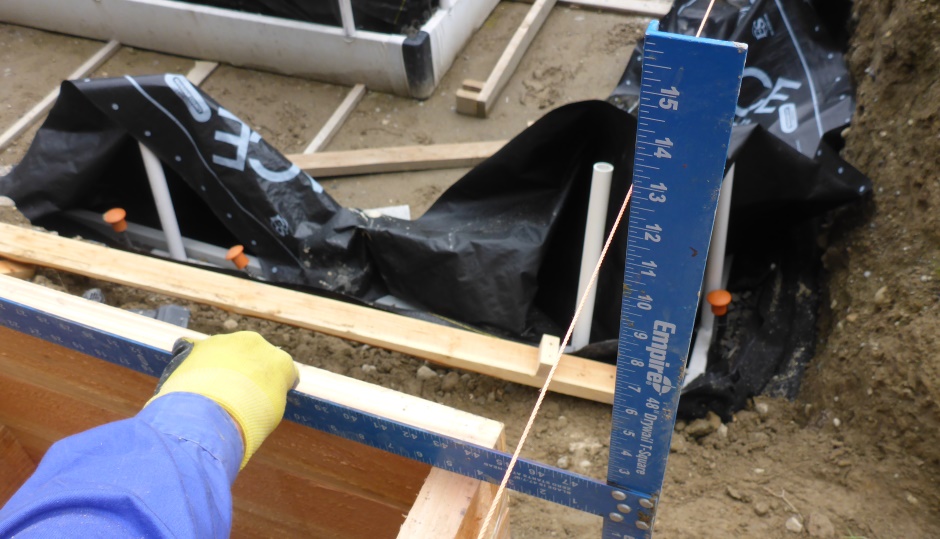
The house peripheral perforated drain pipe goes round the outside of the portico deck leg footing so therefore it is crushed rock that is used to backfill behind the wooden forming rectangles (rather than soil). Get the footing rectangles exactly horizontal using shims and/or a trowel on the excavated soil.
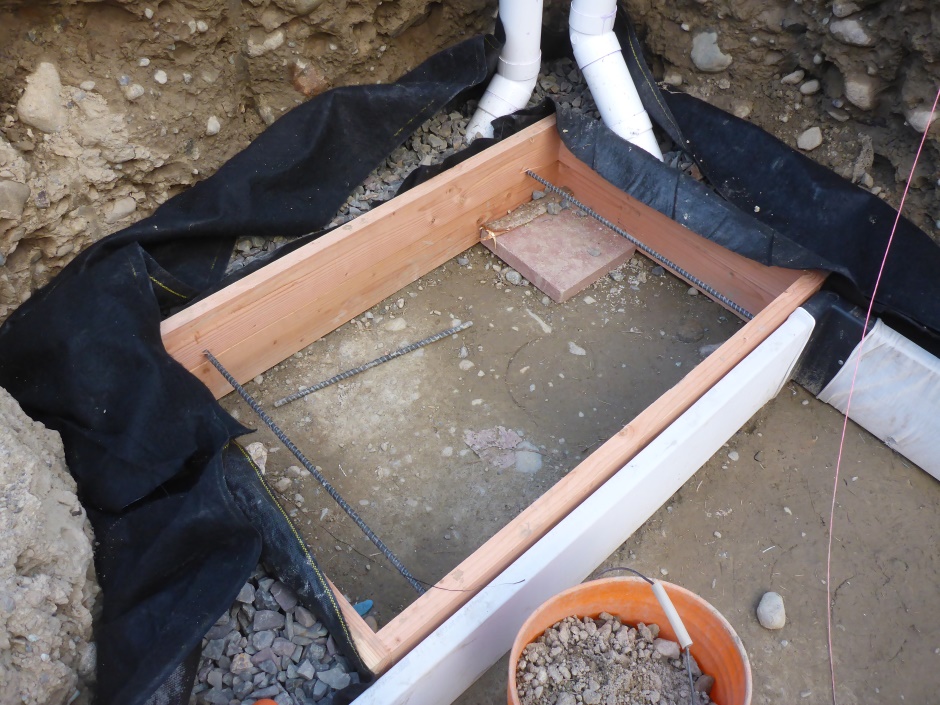
Also get a paving slab seated level (the photo above does not yet have the paving slab in the right location).
Screw on two pieces of 5" wide lumber to do the transition from the footing to the thinner column stem. Use a plumb-bob from the batterboard strings to accurately set the position so it matches your AutoCAD drawing.
The forming for the portico deck columns (up until slab height) is done using wooden rectangles with an inside dimension of 1' 5-1/2" x 2'. As with all other deck forming they are 2x6" lumber cut to a width of 5". The first of the rectangles used for the column stem has support rebar fitted. This is arranged to accommodate a concrete block (against the inside edge) that is 7-5/8" square.
On the inside, the stem rectangles are flush with the footing rectangles and the gap is filled in with a 2' length of 1.5"x1.5" lumber.
Don't yet screw on the extra bits of lumber that form the top of the footing, but you can rest them in place to stop soil falling into the footing.
Concrete pour
To pour an approximately 8 foot high column (with its footings) it takes about 2 cubic yards of concrete.