


Home Site Map - Steps - Foundations -
Foundation Rebar - Making Assemblies
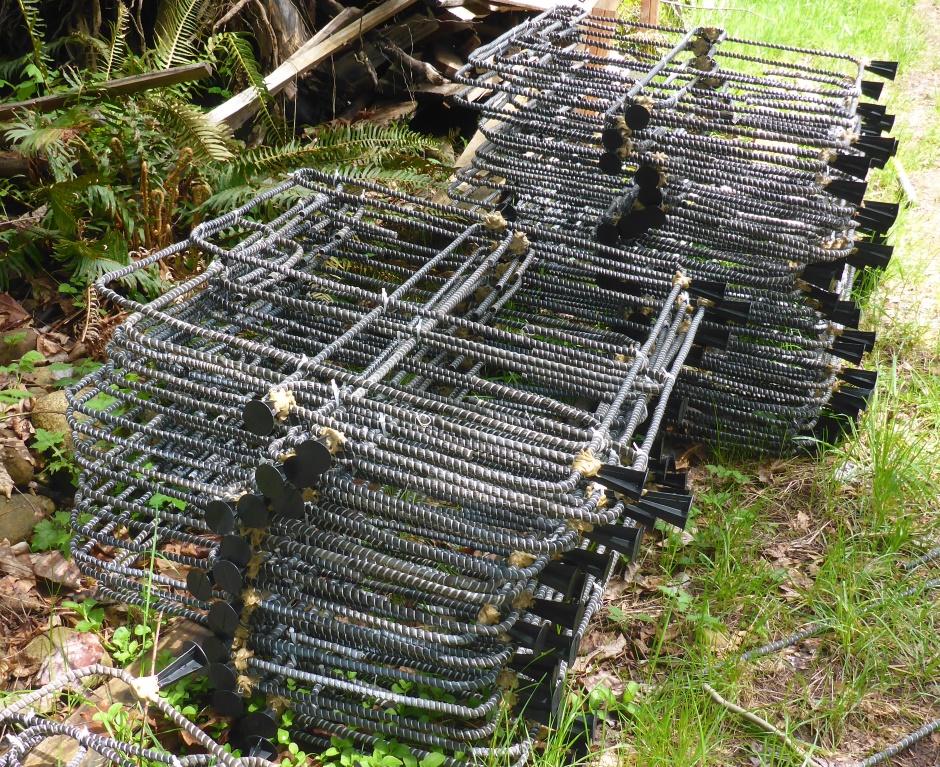
![]() There is plenty of work to do to form the stirrups into the
assemblies that are needed every 1 foot along the trenches.
There is plenty of work to do to form the stirrups into the
assemblies that are needed every 1 foot along the trenches.
Make Footing Stirrup Assemblies
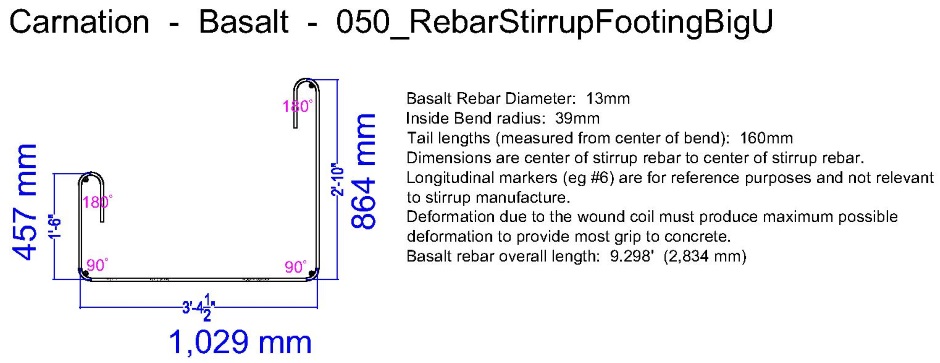
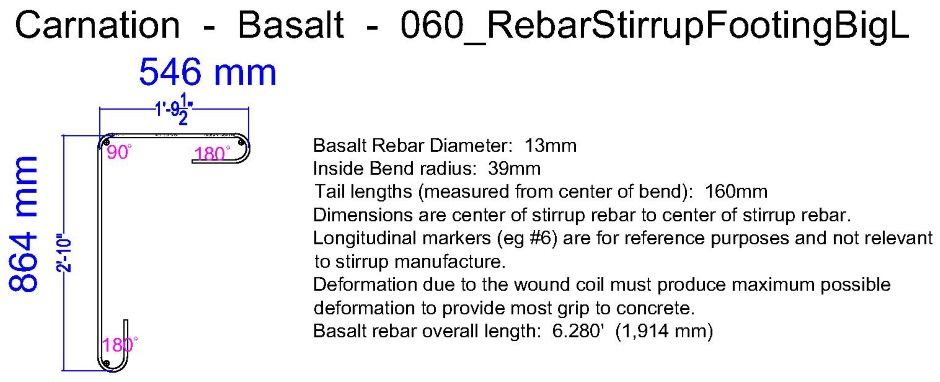
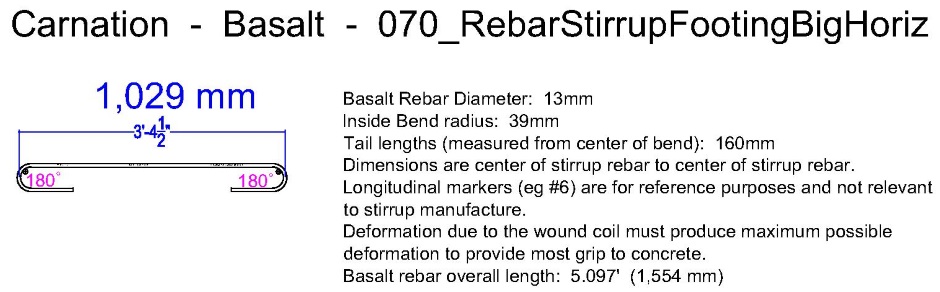
The structural engineering for the foundation calls for stirrups manufactured from half inch basalt rebar.
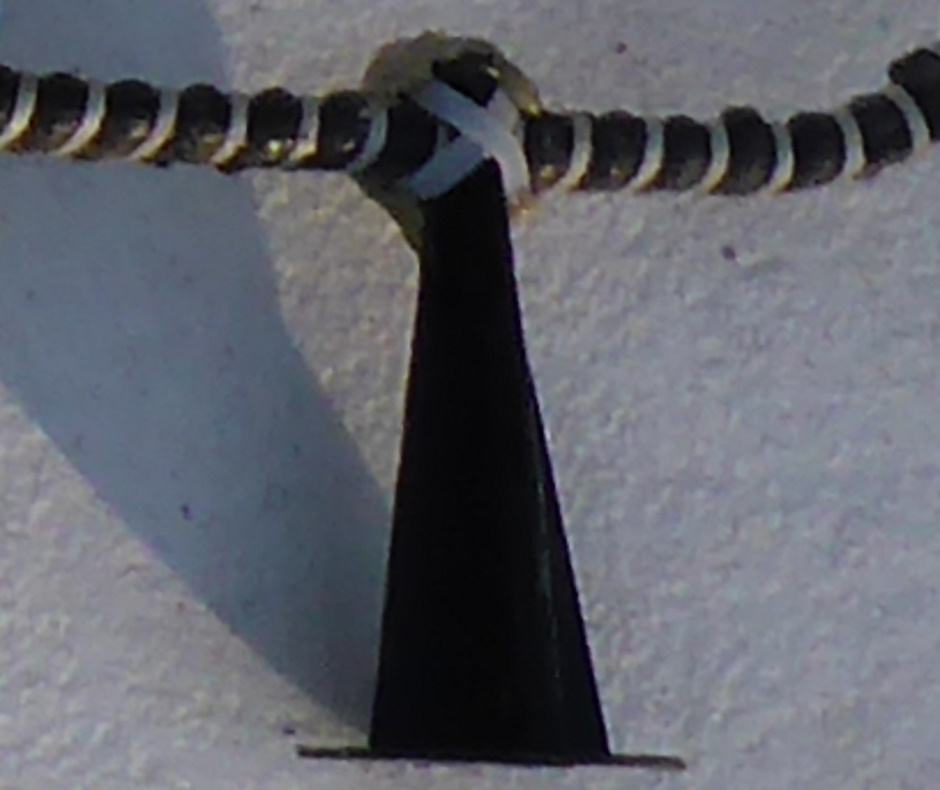
The bottom of the stirrup is supported off the bottom of the footing trench by 3.25" plastic rebar chairs to the bottom of their U. Smaller rebar chairs are used on the sides to position it properly within the trench.
Two of the following are also used...
Finally this piece goes horizontally half way up the footing...
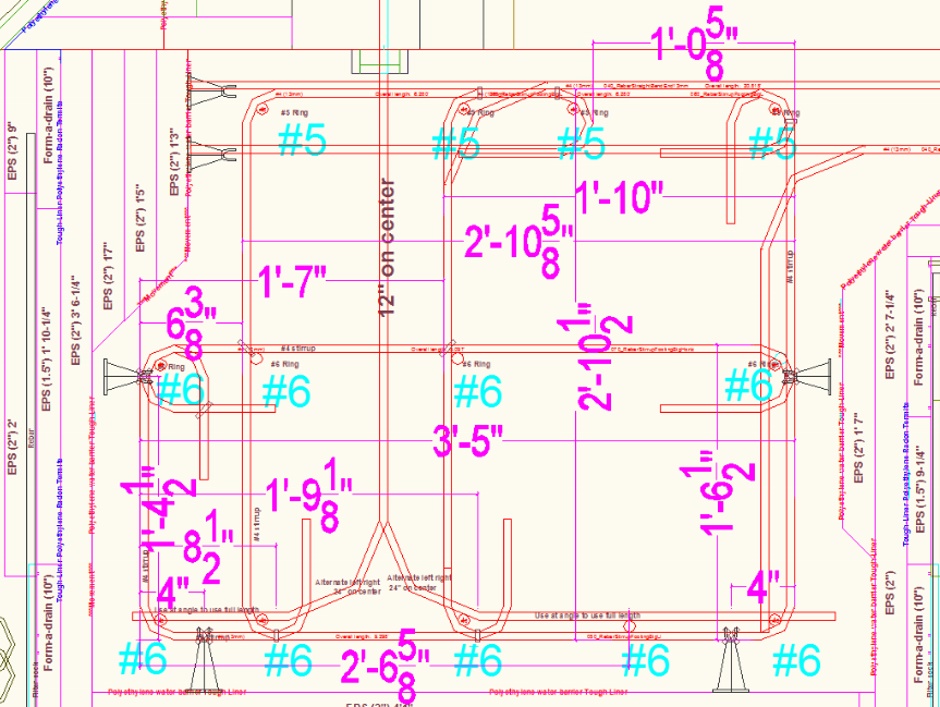
It is good to do as much rebar tying work as possible before going down into the footing trench. Use a jig to form an assembly from the different rebar stirrups. You need to make a few hundred of the foundation stirrup assemblies. Tie them together using cable ties.
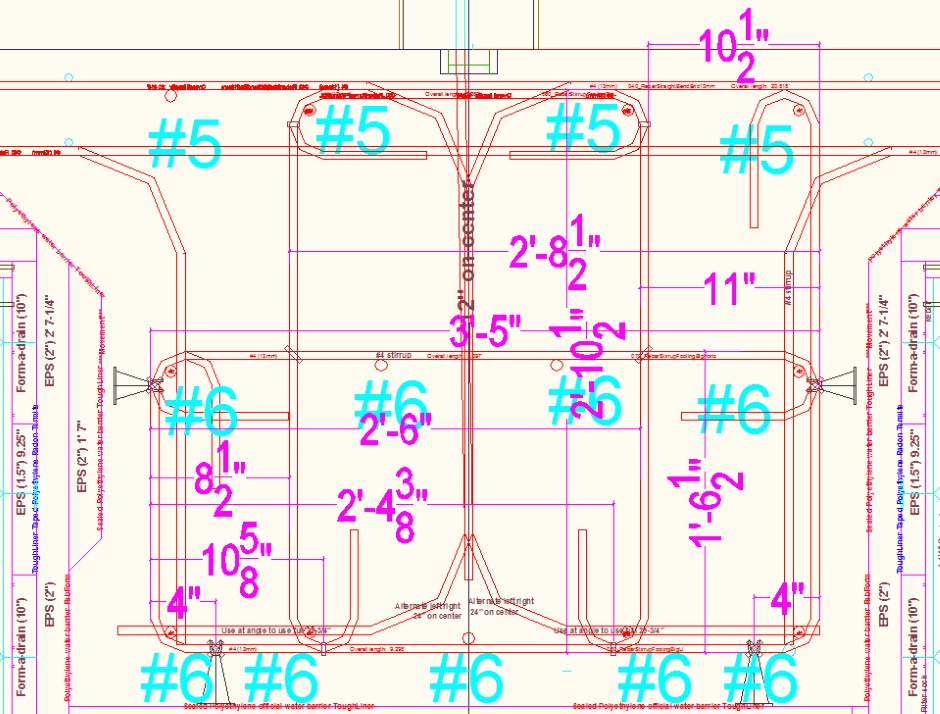
Foundation stirrup assembly jig
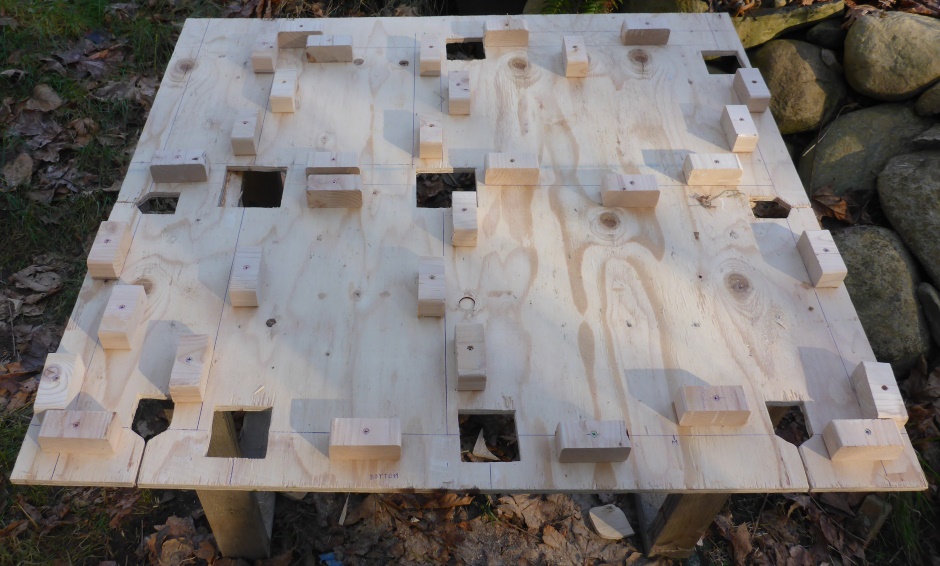
Add small wood blocks on a plywood base to form the jig. Where there are going to be cable ties it is good to cut an access hole to make it easier. The dimensions for fixing the wood blocks will come from your foundation AutoCAD drawings.
External wall stirrup assembly...
Internal wall stirrup assembly...
Here is the finished external wall jig that also has cable tie access holes. It also has cut slots in the edges where the rebar chairs will go...
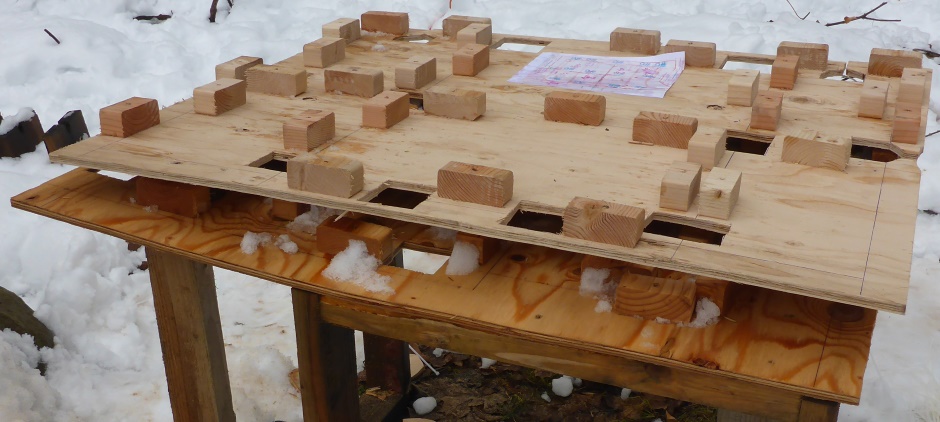
The internal wall stirrup assembly is different from the external wall case. Here is the internal wall jig (sitting on the external wall jig)...
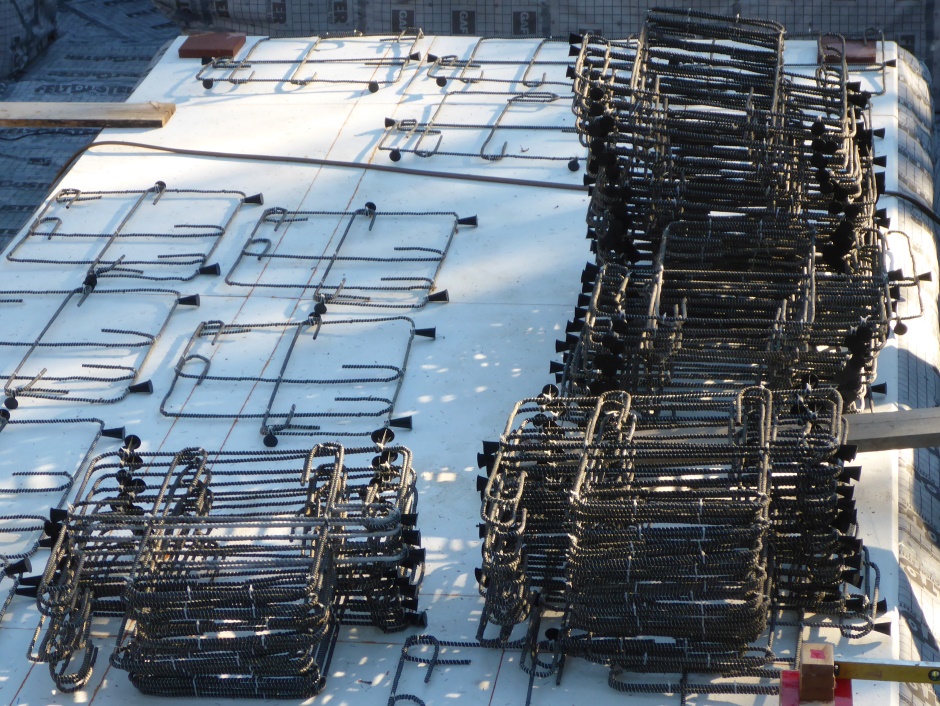
Make foundation stirrup assemblies
Lay the various stirrups into the jig. For both external wall and internal wall cases there are two versions of the sequence of adding rebar stirrups. This makes two variants of the stirrup assemblies.
The sequence
for the Green variant (and Cyan variant) is...
Big U
Middle Big L
Inner Big
L
Horizontal
For the Red variant (and Magenta variant), reverse the sequence.
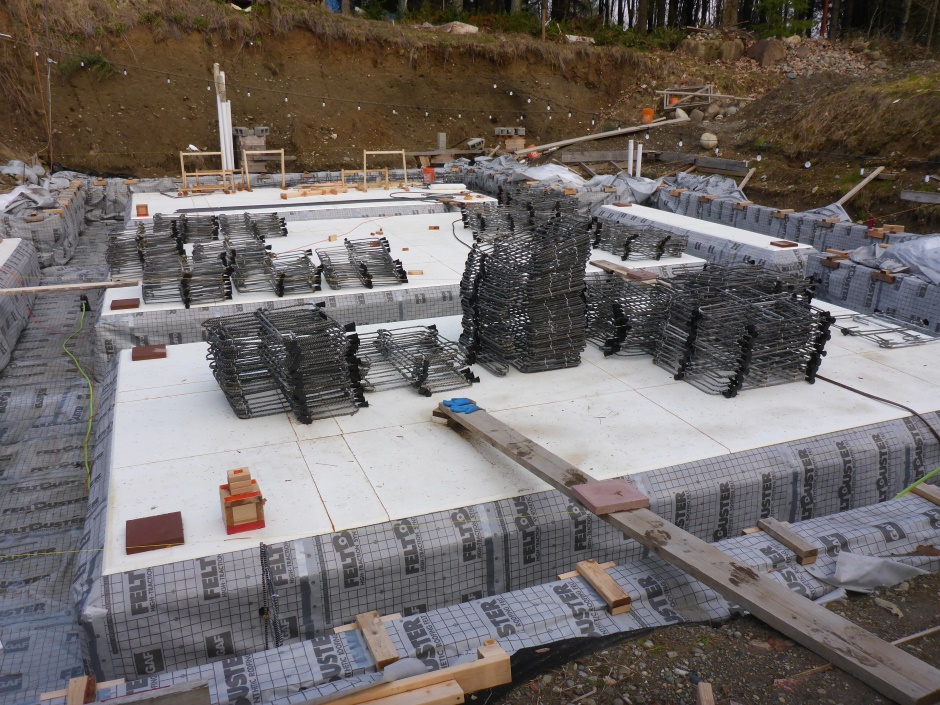
For my house I need the following number of pre-made stirrup
assemblies...
External wall Green variant 90
External wall Red variant 90
Internal wall Cyan variant 48
Internal wall Magenta variant
48
At the corners, individual stirrups are used rather than stirrup assemblies.
On the stirrup assembly jig tie the stirrups together with cable ties at the places where there is a jig hole. If a stirrup is a bit warped then you may occasionally decide to add an additional cable tie.
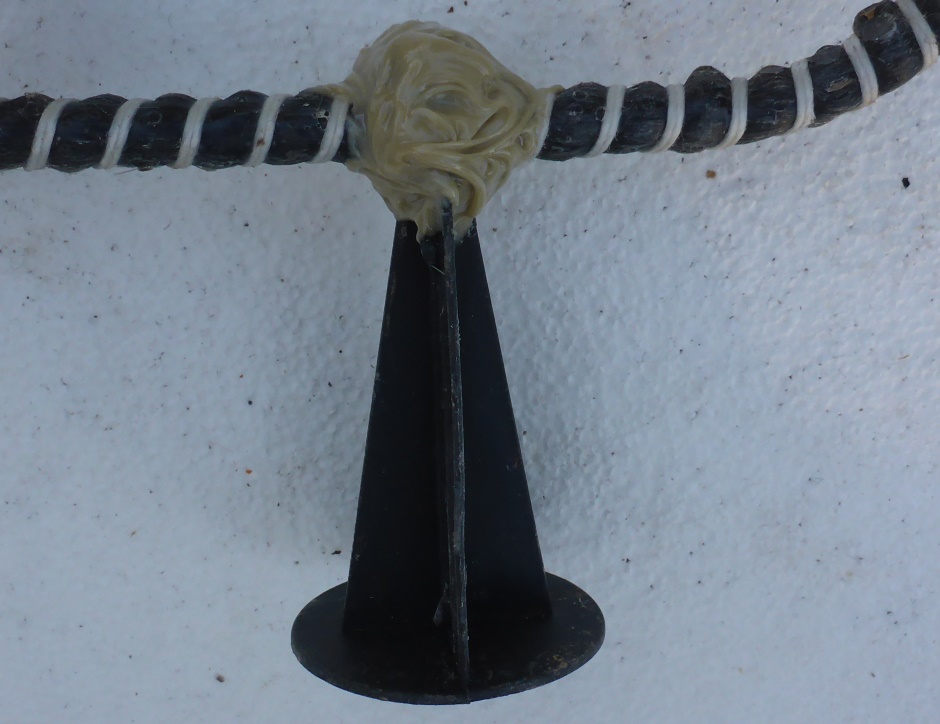
Also add rebar chairs to the assembly, both at the bottom and the sides. At the bottom use 3.25" chairs and at the sides 2.25" chairs. Put the rebar in the chair U and then add two cable ties in a cross. Then once the assembly is off the jig spread PL-Premium adhesive on the joint to stop the chair position rotating. Gluing on just one side is sufficient.
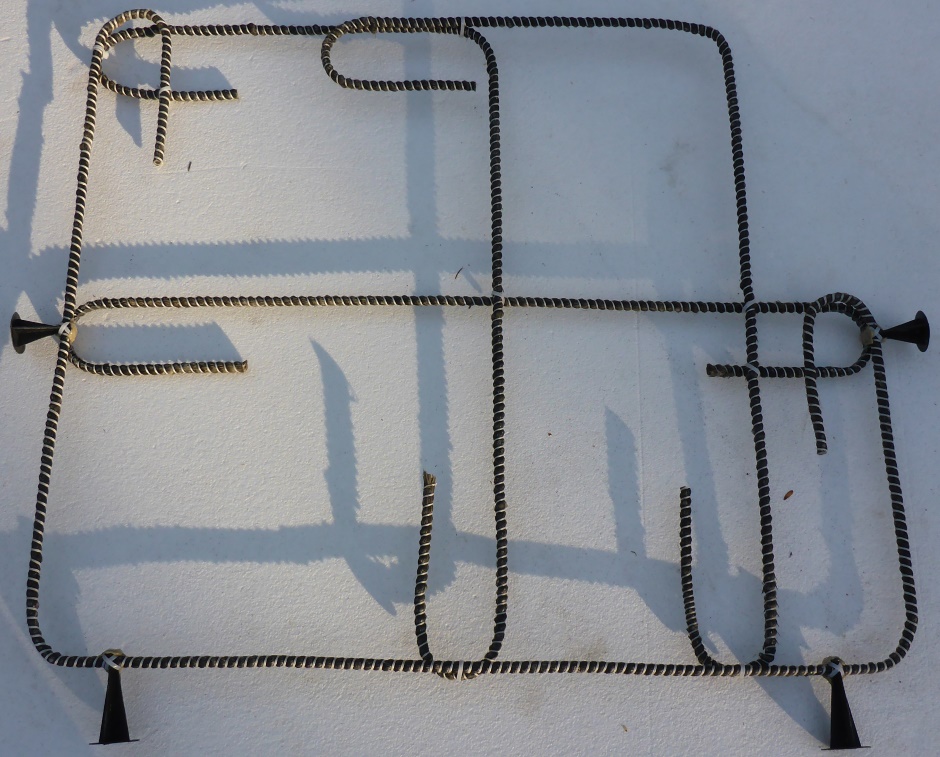
Here is the built assembly on the jig (complete with rebar chairs)...

Remove the assembly from the jig.
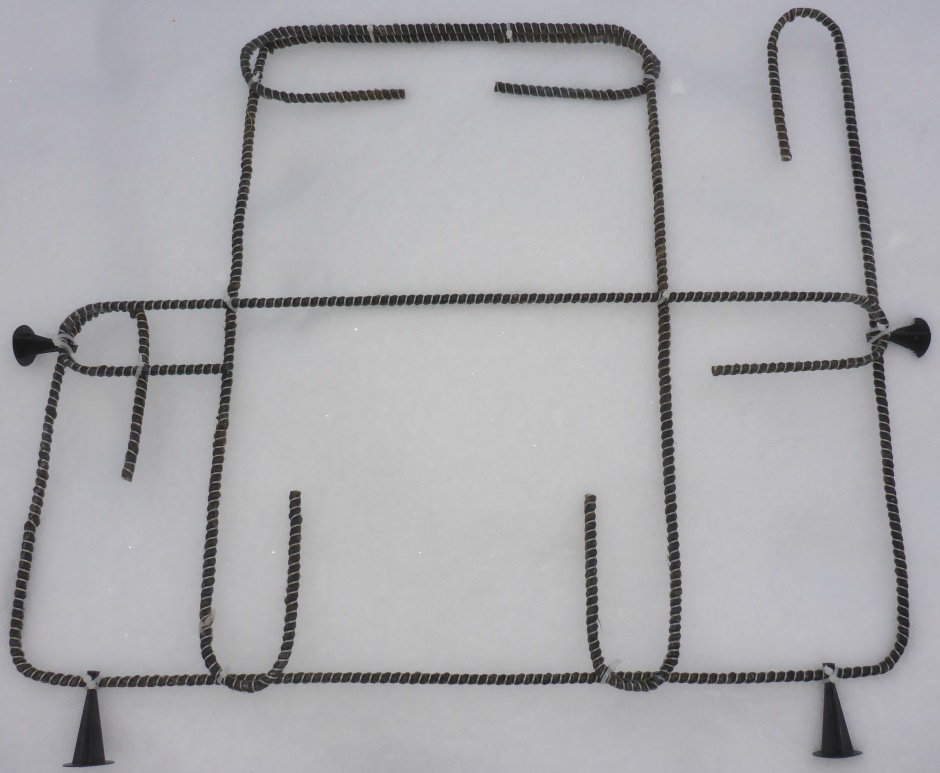
Here is the internal wall version...
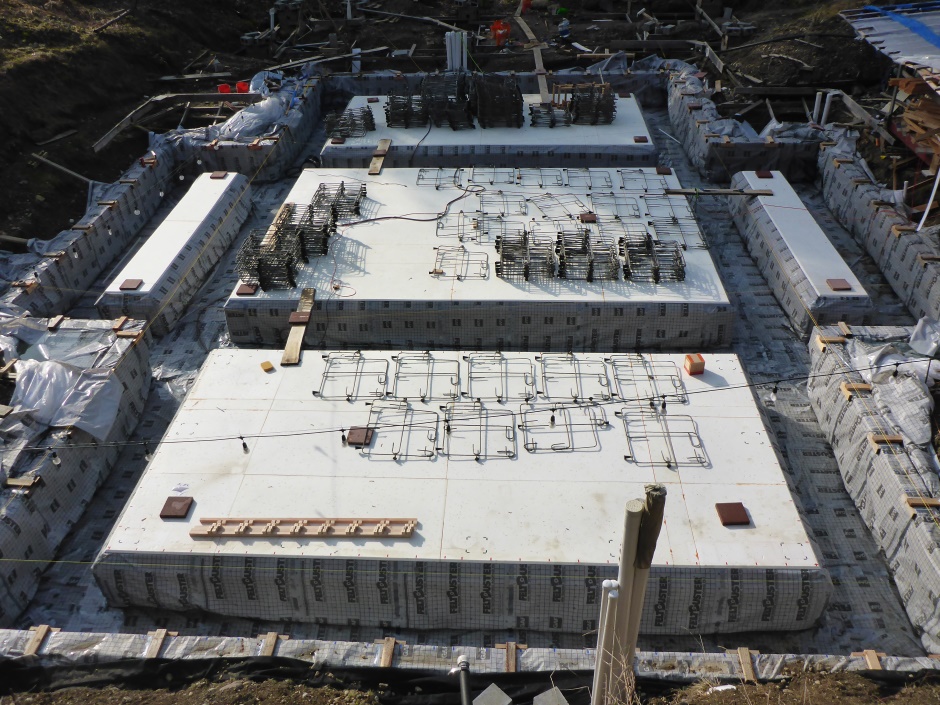
The assemblies go every 1 foot along the external wall footings. They should all be shown on your CAD foundation drawings.