


Home Site Map - Steps - Foundations -
Foundation Lining - First Polyethylene
![]() The first waterproof membrane is primarily a backup and a termite
and radon barrier.
The first waterproof membrane is primarily a backup and a termite
and radon barrier.
Install first polyethylene sheet in footing trench
Design and function
This is the first of the membranes that line the entire underground area. It is primarily to stop termites getting to the main layer of polystyrene.
It is implemented such that any radon gas caught by it is prevented from seeping upwards while at the same time stopping termites from digging up through the bottom.
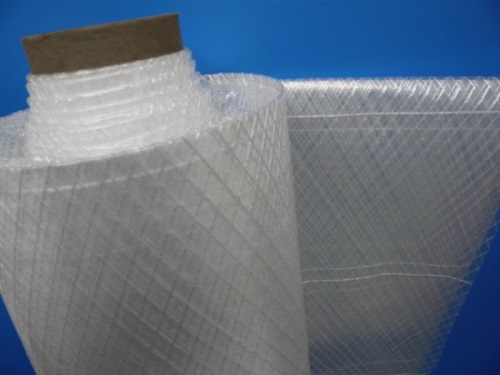
The membrane needs to be something tough enough to stop termites, and 6 mil polyethylene sheet is one step up from landscape fabric. To catch radon gas, the polyethylene needs to be tightly sealed at all the high points, ie over the slab areas. Holes in the membrane at the bottom of the footing trench are of less consequence, but I still try to avoid puncturing or ripping it.
Once the sheet is installed you will need to use a pump to remove rain water from the footings.
Obtain polyethylene sheeting
Even though not as critical as the official vapor/water membrane that gets added later, it is still good to avoid joins. For the slab areas you want to try to get a good gas-tight seal. See here for purchasing details of large polyethylene sheets.
The first sheet needs to be cut to be long enough to go from the top of the outer upper Form-a-drain, then down the inside of the outer Form-a-drain, then along the bottom of the footing trench, then up the inner edge of the inner Form-a-drain, then across the first slab area, then down and up the inner wall footing, then across the middle slab area, then down and up the inner wall footing, then across the third slab area, then down and up the far footing to the top of the outer upper Form-a-drain. It's worth also adding a couple of foot or so extra to be safe.
Note that you will need to purchase two custom sheets as there are two polyethylene membranes used in the foundations. You will want to have them shipped together to save shipping costs.
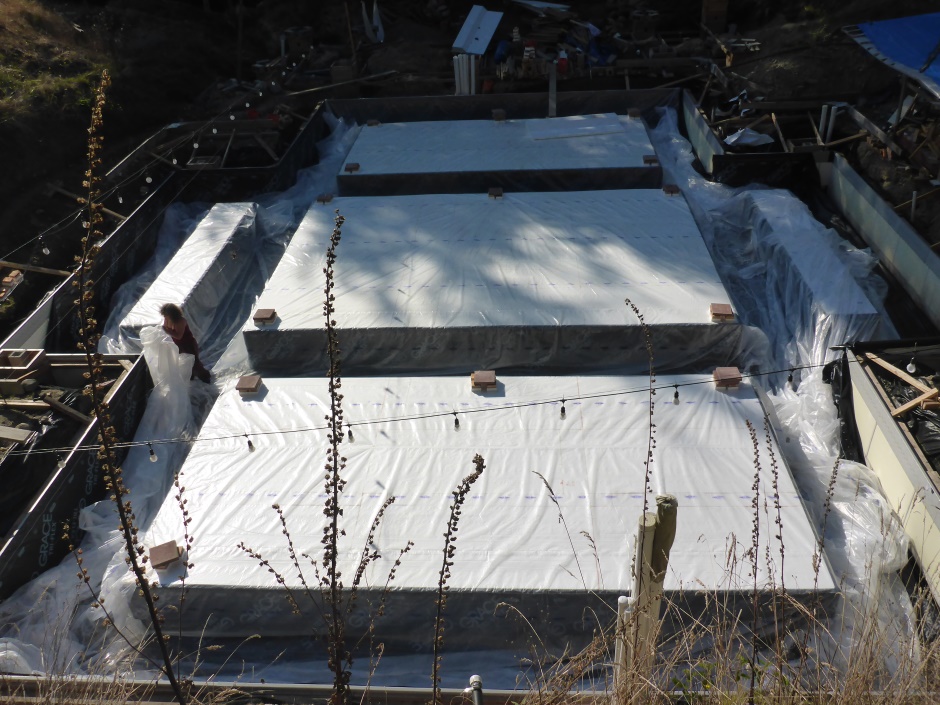
Install polyethylene sheet
To position it, select the two downhill sides of the building as your starting points. In my case it is the west side and the south side. Measure along the polyethylene sheet to find the center of the west side and align this mark with the middle of the west form-a-drain. You can move it relative to this to put any excess on the uphill side of the building. Use some double sided 2" tape on the top edge of the outer upper Form-A-Drain on the downhill side of the building as you position the sheet. On the downhill side you only need about 4" beyond the top of the outer Form-a-drain. Any excess will be used on the uphill side of the building. Do the same on the south side.
Leave a bit of slack (say 2" either side of the footing and 2" at the bottom of the footing trench) in the 6 mil polyethylene sheet to allow for some settlement movement and to ensure the polyethylene is not stretched when you add the EPS. Some creative crumpling and folding is needed at the corners.
We are not looking for neatness in the folding of the sheet. The important thing is that it forms a continuous gas tight membrane (in the high areas). We do NOT want to cut the sheet to achieve neat folds. It's infinitely better to have crumpled up spare flaps rather than cutting to achieve neatness.
The spare round the edges can be laid over the sides of the outer upper Form-a-drain and rolled up out of the way.
Joins and seals (best avoided)
If you need to join polyethylene sheets (best avoided), use double sided tape, then single sided 2 inch tape, then single sided 4 inch tape on top of that. This process is also repeated on the other side of the sheet join. Using the belt and suspender approach helps keep the join gas tight even if one of the tapes fails with age. Note that with the 2 foot overlap of the sheets, the double sided tape will be offset 1 foot one way and the single sided tape will be offset 1 foot the other way, then the opposite on the other side of the sheet.
If you have pipes coming through the slab (eg sewer or a radon vent) then you need to cut openings to allow the pipes to come through. Cut a cross in the 6 mil polyethylene sheet at the carefully figured out place, but keep the cutting to an absolute minimum as we are aiming for a sealed membrane. Gently forcing an under-sized cut cross over the pipes will nicely stretch the 6 mil polyethylene sheet to help form a good seal. The flaps of the cut cross should face upwards around the pipe so they can be taped. Leave a bit of extra slack in the polyethylene sheet between the pipes.
I decided that it is best for the sewer pipe to come through the basement wall just above slab height rather than come through the slab. I also decided to route the radon vent pipes under the footing rather than through the slab.
We are aiming to have this sheet fully sealed in the under-slab areas so that no radon gas escapes upwards. Tape it well all around the perforations due to the pipes that come up through the slab. Use a couple of rings of double sided tape round the pipe and then single sided 2 inch tape on top, then single sided 4 inch tape on top of that.