


Home Site Map - Techniques - Structure -
Carnation Walling - Finishing Forming
![]() Implement groove keyway and holes for pipes etc and add extra
bracing.
Implement groove keyway and holes for pipes etc and add extra
bracing.
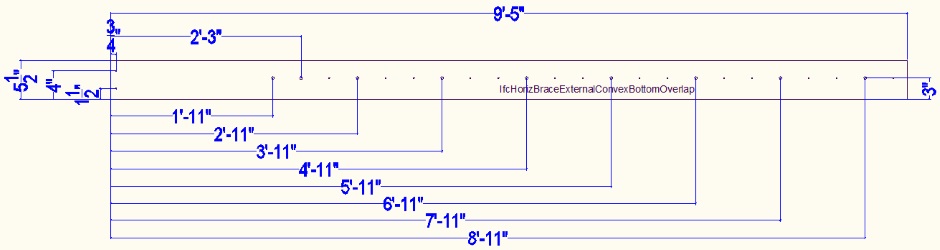
Make external horizontal bracing
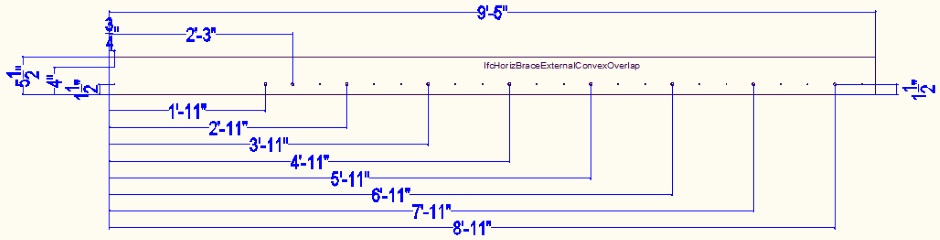
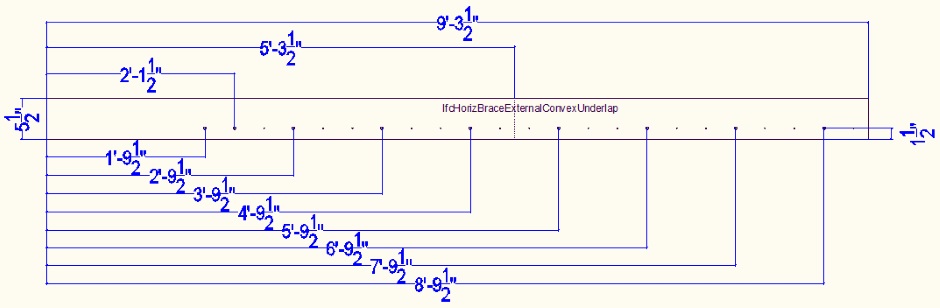
These 2x4 planks go on the outside of the wall. They hold the external vertical 2x4 batons the right distance apart and with padding bits between them and the EPS they help withstand the wet concrete pressure. Here are the dimensions for the overlap and underlap cases for a convex house wall corner...
<Update drawings to be 2x4>

And here are the versions for a concave house wall corner...
The planks also have 3/16" holes on 4" center between the 3/8" holes in order to screw into the padding spacers to stop the padding spacers from dropping out.
<Update drawings to be 2x4>
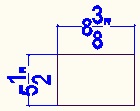
The padding spacers used between the horizontal bracing and the EPS are 8-3/8" long to fit into the 8-1/2" gaps between vertical 2x4 batons...
Add external horizontal bracing
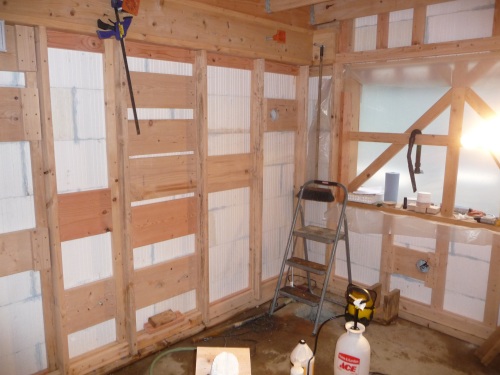
Now that you have fitted all the EPS sheets it is ok to add the 2x4 external horizontal bracing. There is external horizontal bracing at the bottom of the wall and also 4' up the wall. Fit padding spacers between the horizontal bracing and the EPS, using wood screws to hold them in place.
Squirt foam gap filler in the gap between the horizontal bracing at the bottom of the wall and the foundation polyethylene covered EPS.
Fill gap under 2" EPS with foam
There is no concrete slab under most of the 2" EPS because the slab does not extend out that far. There's just the EPS that lines the foundation with 6 mil polyethylene sheet over it. There is nothing much that can support the external vertical 2x4 batons so they rely on being held by the steel threaded rod through the wall. Use pieces of 2" EPS and foam gap filler to fill under the 2" EPS sheet to the foundation EPS. It will expand out of the gap but can be broken away later. It is ok to put foam under the external vertical 2x4 batons as it will easily break away when eventually the batons are removed. (Never cut away excess foam on the outside because you may damage the 6mil polyethylene sheet.)
Implement groove plank, wood cubes, and walkways
Implementing and bracing pipes through walls
Sewage
HRV Vent pipes
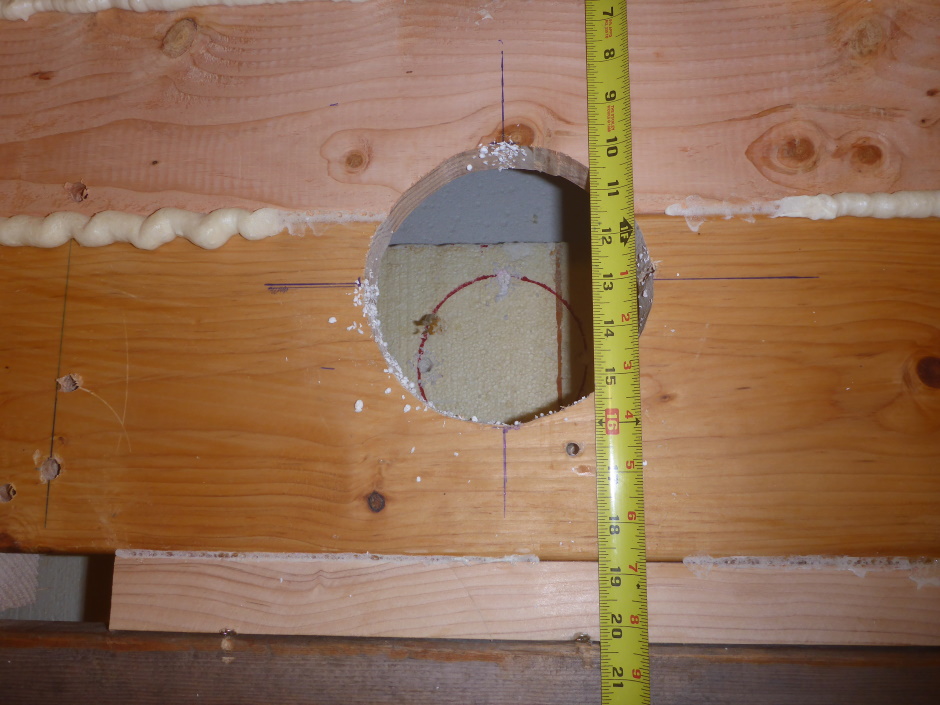
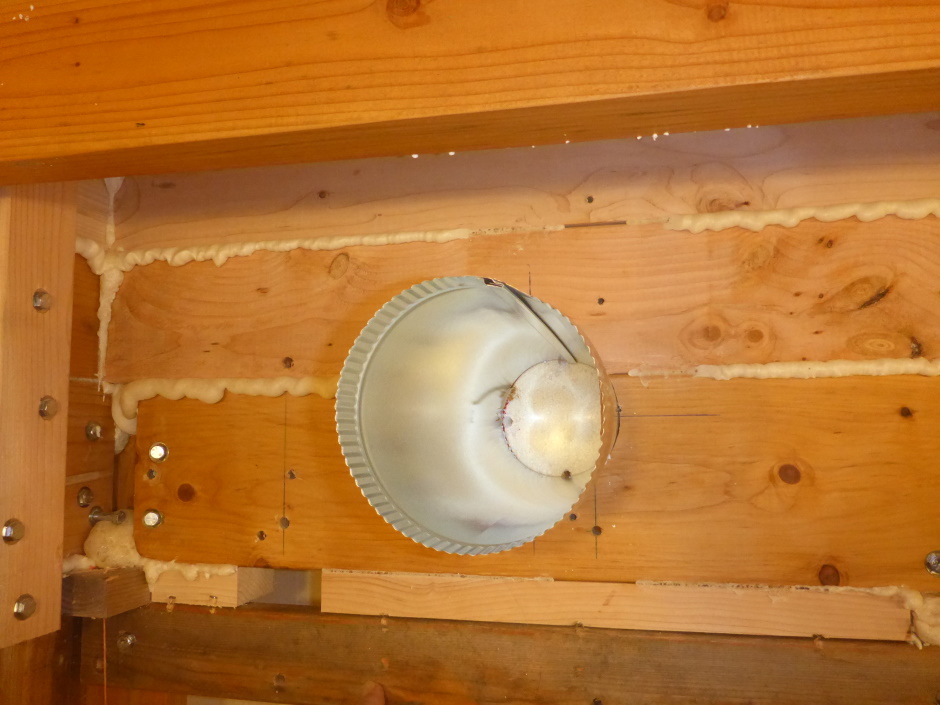
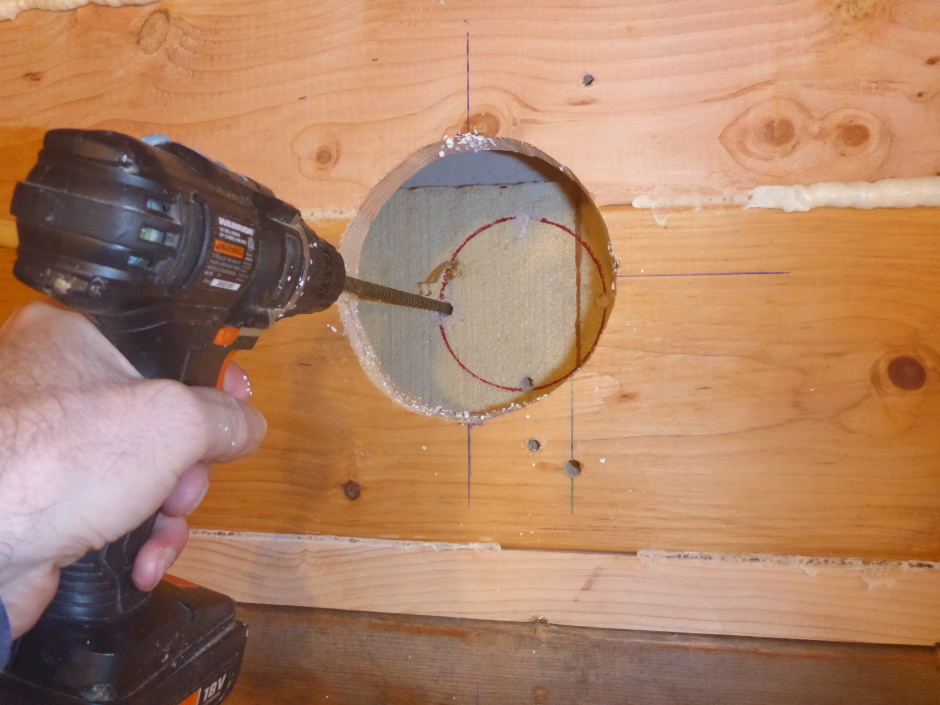
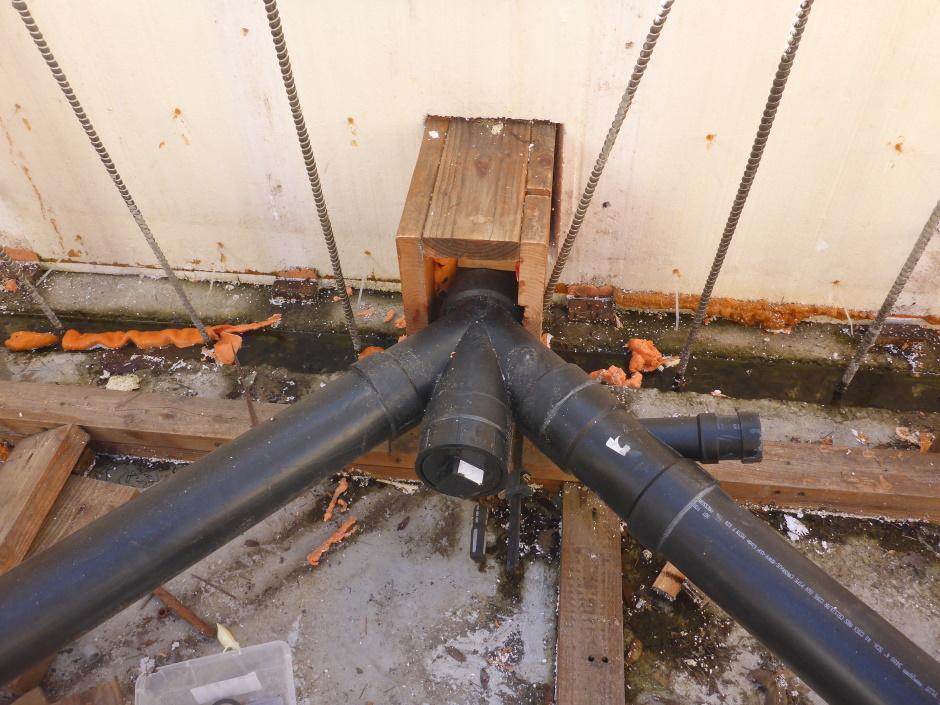
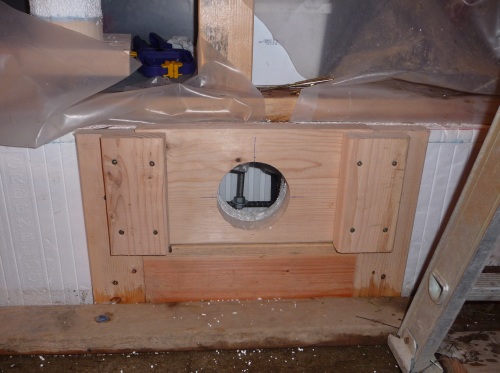
Where there are holes to allow electrical, plumbing, utilities, and vents through the concrete wall, it is best to use 4" PVC pipe cut to a length of XX". This is the right length for the wall width plus two pieces of 2-by either side to brace it. Where it is the actual 4" PVC pipe that will be used (eg air ducting), make the pipe longer so it can be joined to other piping.
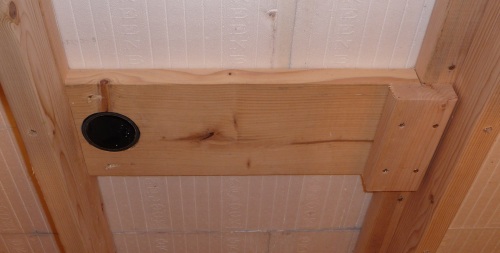
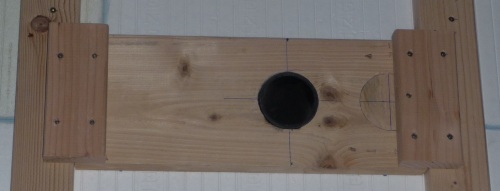
(The pictures show bits of 2x4 to sometimes attach to the vertical bracing, but it is better to just always use Kreg screws to the batons.)
Things not to forget
Through walls
Electrical main feed through back wall
Well water main feed through back wall
Internet through back wall
Propane through south wall
Pressurized rain water through west wall
Power for external wall power outlets
Power for external lights (plan them in AutoCAD)
Motion activated yard zone wires
Water pex to external hose faucets
HRV inlet and outlet 6" vents (two sets as two HRVs)
Combustion air intake and outlet for wood fires
Tumble dryer vents
Bathroom extractor vents
Kitchen extractor vent
Vent from server room
Hot and cold water for external shower
Water pipes through internal walls
Fire sprinkler pipes through internal walls
Muddy water sink pipe to yard
Wall alcoves in internal walls (eg up the stairs)
Bolts for any wall mounted toilets
Central vac though internal walls
Earth wire through west wall
Wires to generator hookup plug
Cat-6 from DSL modem (elsewhere on property)
TV feed
Spare holes
Through ceiling
DWV stack pipes
Toilet holes for floor above
Floor drains for floor above
Shower u bend holes for floor above
Bath u bend holes for floor above
HRV stale and fresh 4" PVC pipes
DWV vent pipes
Hooks for kitchen island roof
Hooks for chandeliers (and swings etc)
Sink pipe from kitchen island sink
Electrical up to floor above
2" water pipe for sprinklers to floor above
Vent from safe room
Trash pipes (eg from kitchen to basement)
Compost pipe (from kitchen to basement)
Fire ash shoot (from living room to basement)
Central vac
Holes under pilasters for floor above
Cat-6
TV feed?
Spare holes
Inspection holes
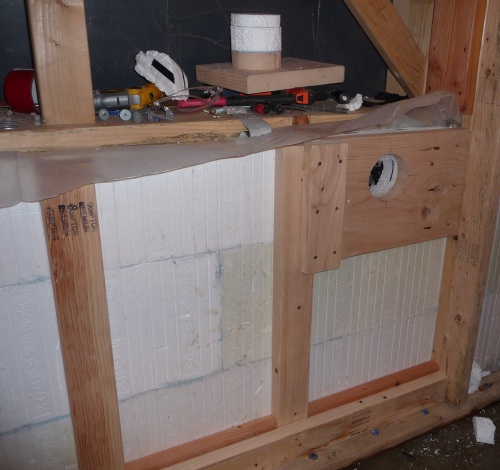

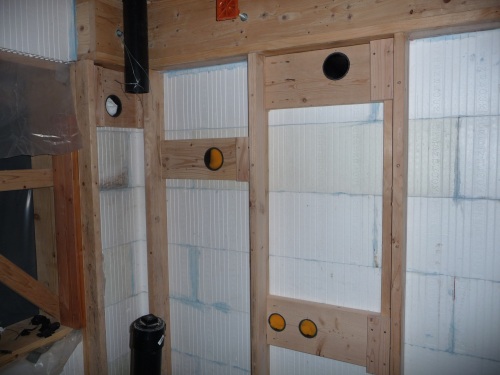
Additional bracing
Wherever you think there might be a weak area in the wall it is good to add some extra bracing. Typically this means some horizontal pieces of 2x4 that are screwed between the vertical bracing assemblies.
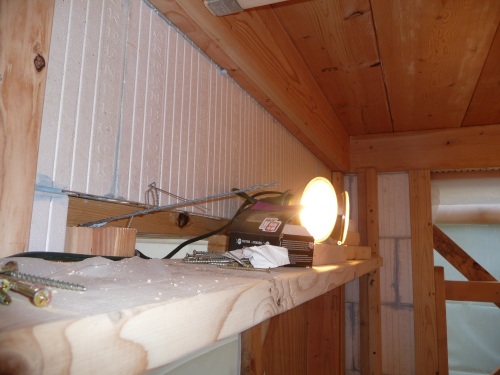
Sometimes a long horizontal plank is useful to keep two windows in line. It also forms a useful shelf for tools and lights.
Install bolts for railings
See here .
Move 6mil polyethylene edges
The large polyethylene sheet that hugs the contours of the EPS flooring blocks currently extends to over the 8" of wall EPS. The vertical rebar in the walls will be through puncture holes in the sheet. Just ahead of the concrete pour you need to cut and move the edge to go down the inside of the wall plywood.
During Concrete Pour
The actual concrete pour is handled in the next step, but it is worth noting that immediately after the pour, while the concrete is still wet, it is necessary to check the walls are still accurately vertical and if necessary adjust them using turnbuckles on the angled bracing.
After Concrete PourRemove the wall ties
Undo the nuts and pull out the threaded rod.
Remove thick plywood
The construction grade thicker plywood is easy to remove because the thin plywood stops the concrete from touching its surface.
Squirt PL-Premium into holes in thin ply
As well as filling the holes so they can be sanded and painted, the PL-Premium also secures the plastic pipe to the thin plywood so the plywood is less likely to fall off the concrete wall.
Fill EPS holes from outside
Do this all the way through with foam gap filler .