


Home Site Map - Steps - Basement Walls and Ceiling -
Concrete Set Time
![]() Things that you can do to fill the time while waiting for the
concrete to set.
Things that you can do to fill the time while waiting for the
concrete to set.
Remove bracing
2x4 bracing
Remove the through wall bolt ties. All the 2x4s need to be removed, both on the outside and inside of the walls.
Remove internal thick plywood
This is just the half inch construction grade plywood. The quarter inch smooth plywood stays in place as it will be stuck to the concrete.
Sewer
Pipe from building to septic
This routes through the basement wall just above slab height. Check the gradient is 1/4" per foot all the way to the septic tank and this is the determining factor on the exact pipe height. Don't forget to put a two way cleanout just outside the wall.
Also implement any other piping needed.
Implement sewer stacks
See your AutoCAD drawings for the details. Don't forget the cleanouts at the base of each stack.
Through the wall just above slab height will be 4" ABS pipes for the sewer. This branches out to various horizontal (slightly sloping) 4" ABS pipes under the basement floor raised floor.
At the 3 stack positions, route 4" pipes up to basement ceiling
height with appropriate branches.
Terminate one foot above Living Room floor
height with a glued on end cap.
Make sure you allow for all the fixture connections into the waste stacks as you implement the stacks. Trying to retrofit branches is not possible later. In the basement there will be some branches at shin height and some in the ceiling. If in doubt, add a few extra branches.
Plumbing for basement and main level toilets
Toilets are the least flexible thing to fit and can have a big impact on the DWV stack. Implement the wall mounted flange for any basement toilet and implement the floor mounted flanges for the toilets that will be on the main floor.
Typically the toilet will be some height above the rough floor. For a concrete floor you should assume the finished floor will be 3.75" above the rough concrete slab height.
Water service
Full plan
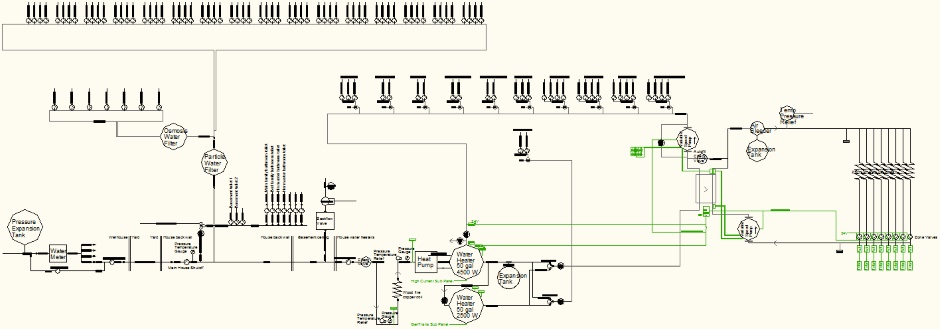
Route water pipe through rear wall
The water will have been brought to the house using 2" flexible thick walled black pipe. Convert to 2" PVC just after coming through the wall. Connect using an internal barb fitting and jubilee clip. The barbed connector screws into the PVC pipe fitting end.
Install main water shut-off
This will shut-off the water to the whole house. This is the first stop for the water feed that comes through the back wall.
There is no real point in making it an electrical shutoff valve when you have well water because a better solution is turn off the well water pressure pump if there's a problem.
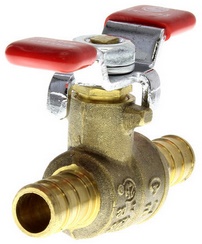
(If you are using a separate feed for drinking water then install a separate shutoff for it. It is all done with half inch PEX pipe and a PEX shutoff.)
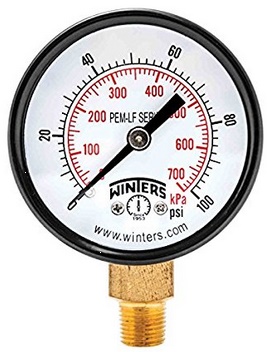
Install water pressure gauge
Make sure it is rated for potable water.
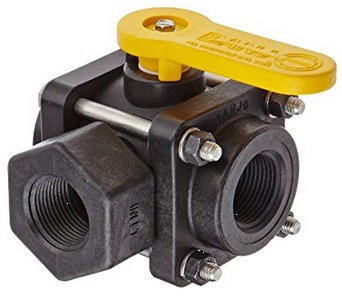
Branch off to toilet flushing
Provision should be made to either route potable water or pressurized rain water to the pipe that goes to the toilets. It must not be possible to ever connect the rain water to the potable water, so in addition to using two shutoff valves there needs to be a pipe that has to be physically moved from one to the other. Either use a flexible pipe with jubilee clamps or use a high pressure screw fixing (like used on pressure tanks). Also include a check valve so any residual rain water in the pipe to the toilets cannot mingle with potable water.
Branch off to cold water system
The water pipe stays as 2" PVC (continuing on to the fire sprinkler system). A reducing tee is used to tap off using 3/4" PEX.
Cold Water particle filter
All cold water used in the house goes through a filter to take out particles.

Branch off to drinking water
For water that is intended for direct drinking there is an additional filter - a reverse osmosis filter.
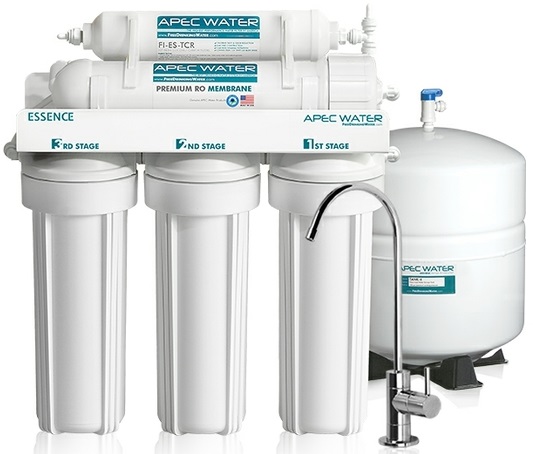
Water from the filter is distributed in a dual feed loop of 1/4" white PEX to separate drinking water faucets in the kitchen and bathrooms.
I prefer to use a dispenser that can do both ice cold and hot water...

https://smile.amazon.com/gp/product/B079VHRG56/ref=ox_sc_act_title_1?smid=ATVPDKIKX0DER&th=1 $282.56
Cold water distribution
This is the water from the particle filter (not from the reverse osmosis filter).
Conventional wisdom says that there should be a separate run of PEX pipe from a manifold in the basement to each fixture. In a large house that can be a lot of PEX pipes running long distances. It also means that in the case of rarely used faucets there will be water sitting in the pipe going stale.
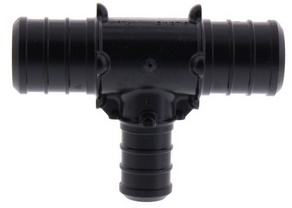
My preference is to have a loop of 3/4" PEX that goes round the house past all the fixtures. Opening any one faucet gets water flowing in the loop pipe (both legs). PEX reducing tees are used to tap off to 1/2" PEX that then goes via 1/2" PEX shutoffs to the individual fixtures.
Route hot and cold pipes separately, ie well separated taking different routes.
If a particular fixture is not yet installed it is good practice to fit a PEX plug at the far end of each pipe so that no dust and debris gets in.
Branch off to fire sprinkler system
The 2" pipe goes to the fire sprinkler system. Note that there deliberately isn't a separate shutoff for the fire system because it might accidently be turned off without it being obvious. It is good to make provision for a pressure tank somewhere along the path of the 2" white PVC pipe (possobly under the raised floor).
3/4" PEX to hot water system
Pressure expansion tank
This is a pressure tank like used in the wellhouse, but the size can be smaller. The benefit is that it provides a store of water pressure inside the house that is more local to the fire sprinklers. Even if you don't buy and install it initially, it is still good to make provision for it.
Building code requires an expansion tank in the cold water feed to the water heater, near the water heater.
Connection to hot water system
Provide a shutoff valve so water can be turned off to the water heaters. Use 3/4" blue PEX.
Install basement Heat Pump and Water Heater
New (2015) building code potentially (but not in practice in most jurisdictions) requires that all water heaters are heat pump type. They are called Heat Pump Water Heaters (HPWH). These work best if positioned near a heat source, eg near a wood burning stove. In my case the wood burning fire will be in the mud room so that is the best place to put the HPWH.
My preference is to use a separate heat pump that feeds into a conventional resistance electric water heater. It is good to have the resistance heating capability as a backup. A heat pump is optional and can be fitted later, but the important thing is to make provision for it
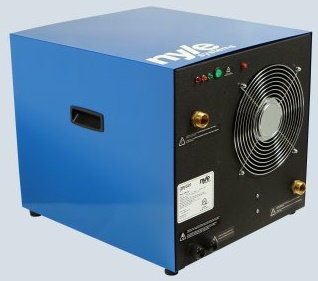 Heat Pump Water Heater
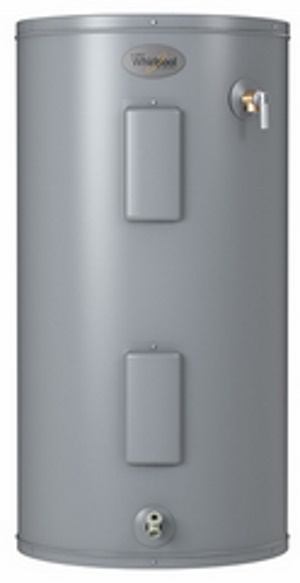
Another possibility is to use an air source heat pump water heater when they are available at a sensible price.
To allow for operation in a power outage, the secondary 240V water heater is fed from twin breakers in the transfer panel. Provide changeover water switches on the water heater outputs to allow either hot water manifold to be fed from either hot water tank.
It is worth sitting the tanks in drain pan trays with a drain. Need to route the drain pipe to above a suitable sink. Using a sink provides an air gap and avoids needing a separate trap that would dry out. In my case that is problematical because of doorways, so I needed to add a sink in the basement center near the water heaters.
The platform (mezzanine) on which the tanks sit needs to be strong enough to stand the weight of full tanks. It also has to withstand an earthquake. The building inspector may require additional metal straps.
Implement hot water distribution
Details on the house hot water loop distribution can be found here .
Electrical service
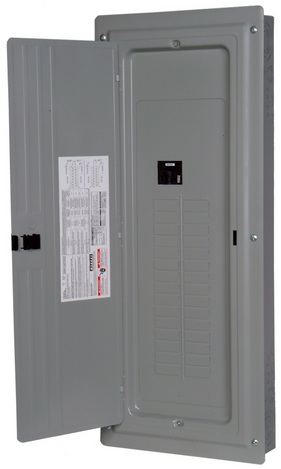
Install Electrical Sub-Panels
The various electrical panels are located in the basement on the back wall and contain all the circuit breakers. There are two sub-panels and one transfer panel for generator powered essential services. A mezzanine is provided in front of the panels on the back wall to meet building code requirements. More details on the electrical feed and panels is here .
 Details are here
.
Details are here
.
A small house only needs one panel, but for a large house use two separate panel boxes. These are fed using two separate runs of thick cable from the main panel in the yard. One sub-panel will be used to power high current things such as boilers and heaters and it does not need many breaker feeds. The other one needs as many as possible breakers (say 40) and is used to feed the lighting and regular power sockets.
The second sub-panel feeds a transfer panel for fixtures that want backup generator power.
The sub-panels both need to be rated at 200 amps, but only one of them (the one for the lights and electronics) needs to have a large number of output connections. A good brand of electrical panel (and one that is capable of being used in sub-panel mode) is Siemens.
Whatever brand you pick, get one that uses copper bus bars.
The thing that is an even bigger factor in picking the brand of panel is the price of AFCI breakers in go into it given that AFCI is needed on almost all 15 and 20 amp circuits. As it happens, the Siemens AFCI breakers are as low cost as they come (which at $30 - $35 each is still expensive).
The 2005 NEC states that AFCIs must be placed on bedroom power and lighting circuits. As of the 2014 version of the NEC, AFCI protection is required on all branch circuits supplying outlets or devices installed in dwelling unit kitchens, family rooms, dining rooms, living rooms, parlors, libraries, dens, bedrooms, sunrooms, recreation rooms, closets, hallways, laundry areas, or similar rooms or areas.
Sub-panels must have separate earth and neutral
In a sub-panel it is necessary to keep the Neutral and the Earth connections separate. Good panels (such as the Siemens) allow you to separate the neutral bus to make it into two separate busses (one for neutral and one for earth). Only in the Main Panel are the two connected. This means that the wire from the Main Panel to a Sub-panel needs to have 4 conductors: Live1, Live2, Neutral, and Earth. It is ok for the earth wire to not be separately insulated, but the other three need to be individually insulated. When connecting wire to the sub-panel for a 110V circuit (eg a string of power sockets) then you will connect the live to a suitable breaker, the neutral to the neutral bus, and the earth to the earth bus.
Main-Lug sub-panels
If you decide that it is not a required convenience to have a master on/off breaker on your sub-panel, then you can use a "Main-Lug" instead of a full panel. This may be a reasonable choice if you just want to distribute power to a shed. If there is no main breaker then you will rely on the breaker in the main panel to provide the current limiting and to provide a master on/off switch. A good Siemens main-lug that provides 8 spaces for full sized breakers, has copper bus bars, has an included earth bus bar, and can be installed outside is here .
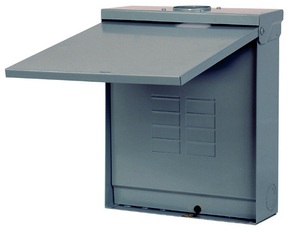
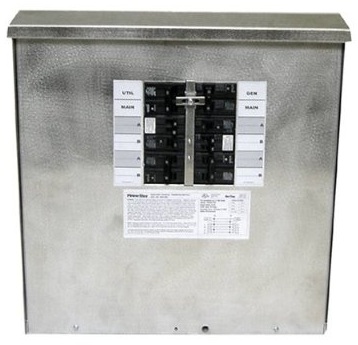
Install generator transfer panel and external connector box
Inside the house, next to the internal subpanel, use a generator transfer panel fed via an external connector box and a generator. This has the breakers for the circuits in the house that need to be available in a power cut. It may be that an external version is less expensive, if so it is ok to use an external panel inside.
Install Grounding stake
Having good grounding for all your electrical panels will protect the electronics in your house and might even save your life. Details here. When surge protectors trigger they need to be able to dump excess energy into the ground and you need to get rid of that energy or else the surge protector will not help you.
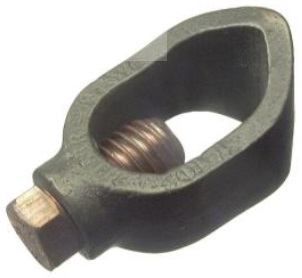
Rather than just using the two 6 foot separated metal stakes in the ground it is worth going above a beyond. Using 10 copper clad 8 foot long 5/8" diameter stakes driven into earth (not stones) that rain water will flow to will provide a much better ground. Put the first two stakes close to the panel with about an 8 foot spacing because this will ensure you meet building code. Put the other 8 stakes in an earth swale (shallow ditch to channel ground water flow). Put the stakes about 10 feet apart and bang them in so that the tops are 6" below the surface (the 6" will be covered by gravel). Connect all the stakes using a continuous piece of thick stranded uninsulated copper wire of at least #4 diameter. Use good quality acorn clamps (UL approved for burial) to daisy-chain attach the wire to the stakes.
 Details
are here .
Details
are here .
Keep the wire a continuous piece rather than having any joins. Bury the wire between stakes 6" below the surface. Using uninsulated wire all helps with making intimate contact with the ground. If you have a Well then layout the stakes in the direction of the Well and continue the wire on past the stakes to the Well metal casing. This will need something like a total of 150 feet of earth wire because there is a building exclusion area of 100 feet radius around any Well. The metal casing of a Well is a very good earth so it is highly beneficial to connect it into your grounding system.
Even though a sub-panel must separately connect the earth back to the earth of the main panel (and the ground in the sub-panel must not be connected to the neutral in the sub-panel), it is still highly desirable to provide a grounding system associated with the sub-panel. Having a good earth close to your actual house (rather than the main panel in your yard) is actually the most important because all your sensitive electronics will mainly be in your house. In my case, the main panel in the yard just has a grounding system that just meets code by having two earth stakes. Associated with the house (ie the house sub-panel) there is a really good "10 stake + Well" grounding system. If the main panel in the yard gets hit by lightning then it may even be that the lowest resistance path to earth will be via the ground wire to the sub-panel and from there to the house grounding system, but that's perfectly ok.
It is also perfectly fine to connect the earths from two sub-panels to one earth grounding stake system.
Inside your house you should run a ground wire back to the panel ground for anything large that is metal, eg duct work, garage door runners, etc. To avoid having to run too many ground wires it is best to avoid metal conduit, metal pipes, and metal electrical boxes. Using plastic is a much better choice.
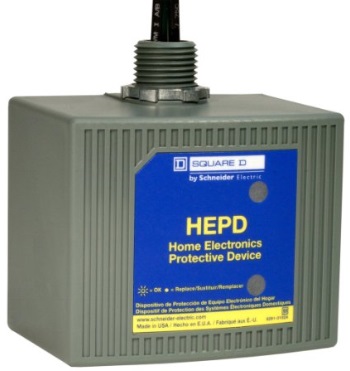
Install whole house power surge arrestor
It is highly recommended that you install a whole house power surge arrestor in your main panel and in any sub-panel that feeds electronic equipment.
 Details
here .
Details
here .
This will clamp your 120V to stop it exceeding 130V, and clamp your 240V to stop it exceeding 260V. In the case of a large event such as a lightening strike it may sacrifice itself in the process and become a short circuit to trip your breaker. You should install it on an in-use high current dual pole breaker in your panel so that it's obvious to you if the surge arrestor has had to sacrifice itself.
In my case I have one in the 600A main panel but connected the other side of the 200A breaker that feeds the primary sub-panel in the house. It protects all of the 600A circuit but only the 200A breaker will trip if it has to sacrifice itself. I also have another one in the house sub-panel that feeds sensitive electronics and this is connected to the dual pole breaker that feeds the kitchen range. If the one in the house sacrifices itself then I will know because the kitchen range will stop working.
Implement basement lighting
Now that there is power to the house you can connect up the lighting strings for the basement