


Home Site Map - Steps - Foundations -
Foundation Rebar - External Footing Corners
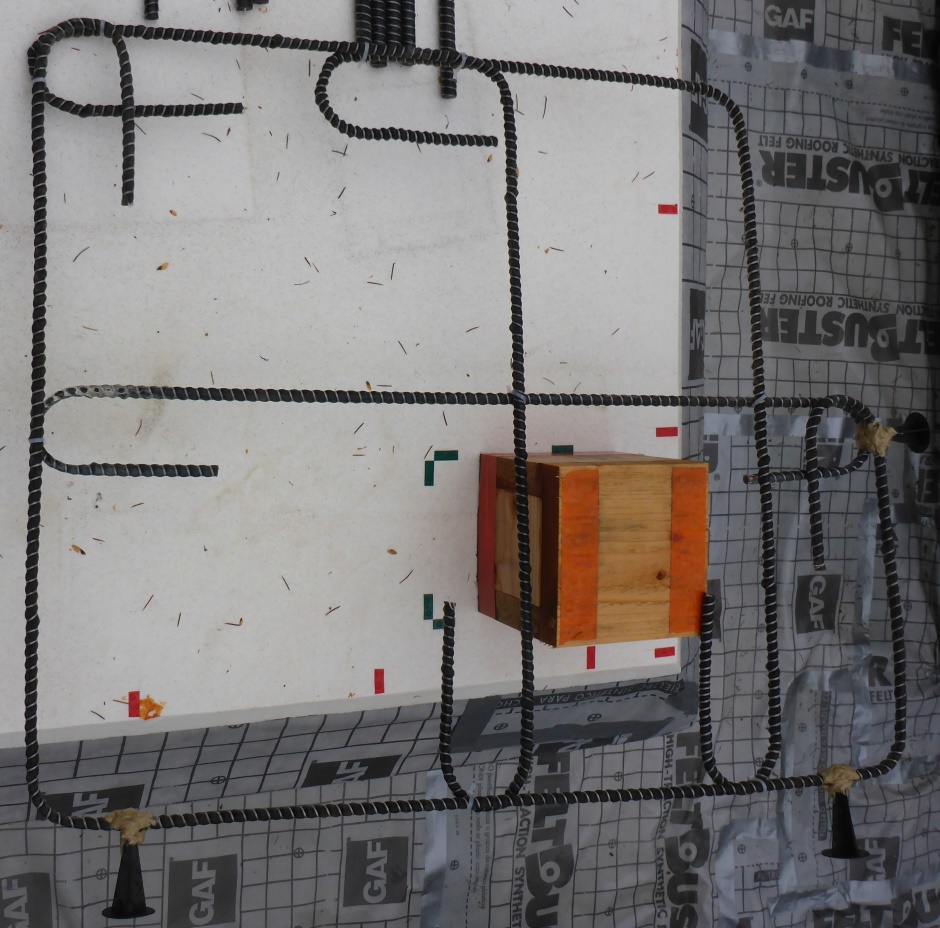
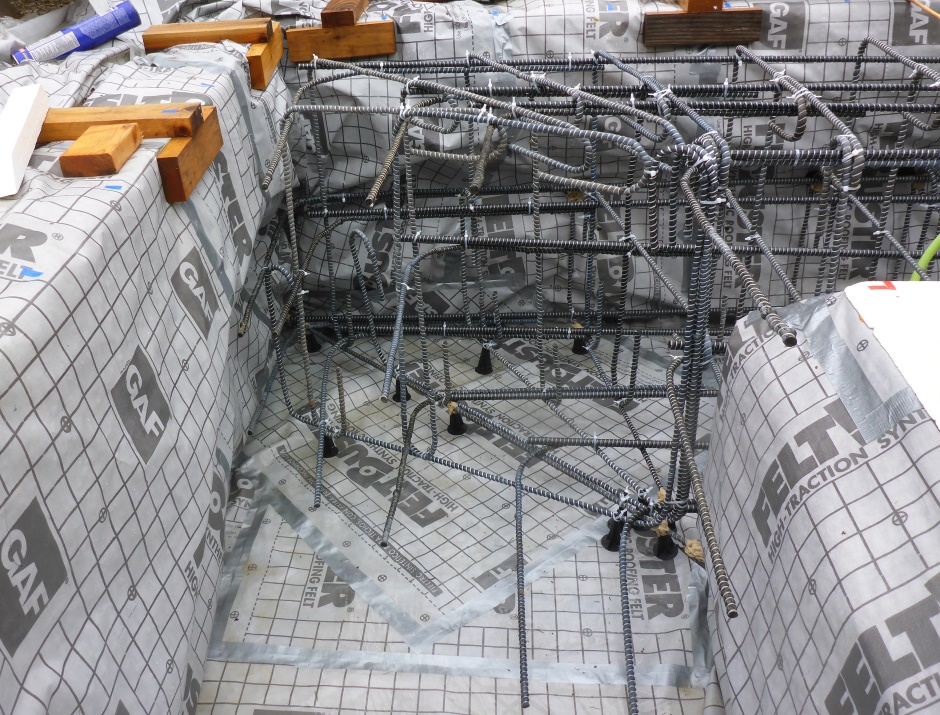
![]() Rebar assemblies are used to form the corners and extra rebar
strengthening is added.
Rebar assemblies are used to form the corners and extra rebar
strengthening is added.
Footing External Corners
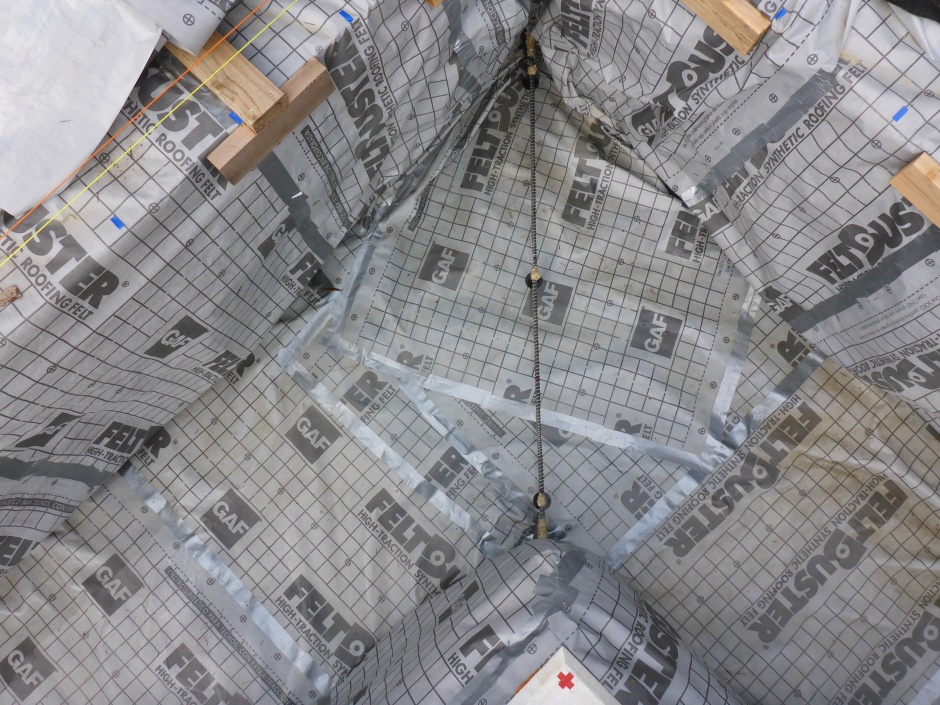
Adjust liners
Make sure the ToughLiner and underlying waterproof membrane are in the right position. You want the slack to be at the sides of the trench and you want to ensure that there is slack both above and below where the horizontal side chairs will be.
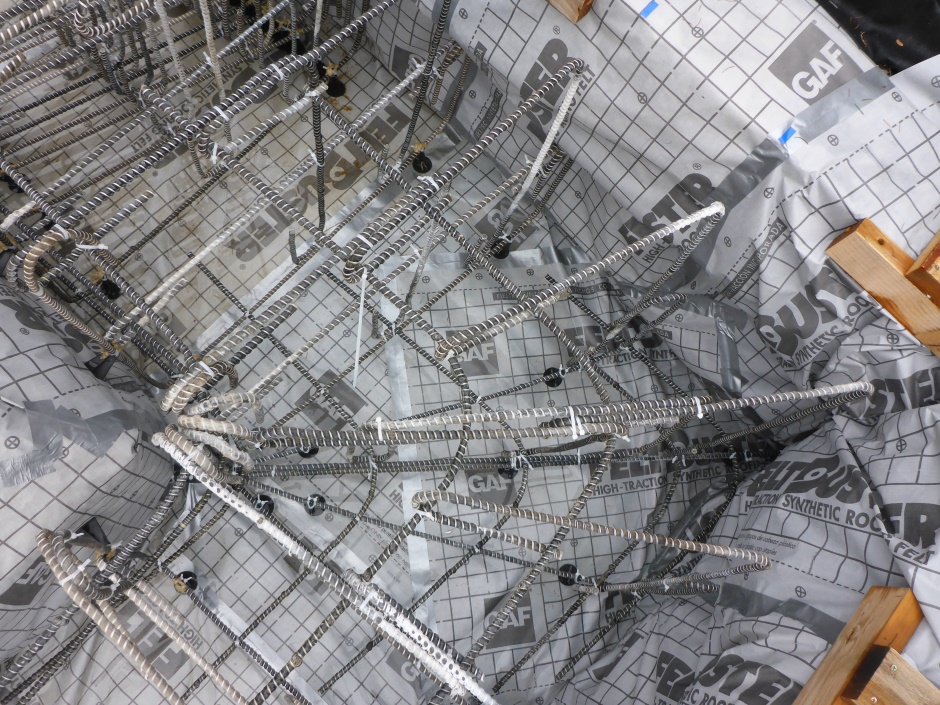
Add assemblies either side of corners
Either side of the corners, add one completely orthogonal stirrup assembly and one very slightly angled. This is enough to be tied to the three inner corner pieces and a few more of the further in corner pieces.
Don't put horizontal chairs on the inside for the very slightly angled stirrup assemblies as the inside edges will be cable tied tightly together.
Work from one side of the corner to the other side in order to get good access for cable tying.
It is useful to use a straight wooden stick between the marker tape on each side of the trench. Adding an 8" piece of wood on the end takes out the differences in the slab level compared with the outer Form-a-drain.

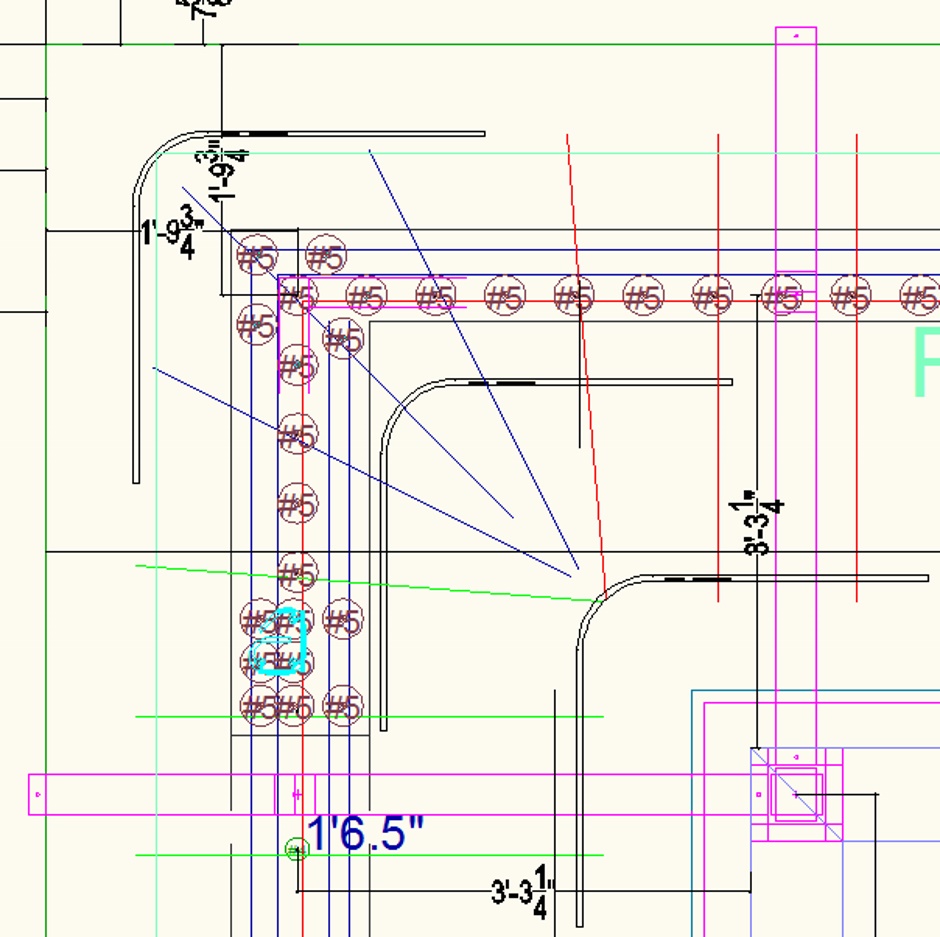
Cut to make horizontal #4 corner pieces
At the corners use #4 angle pieces. They will overlap by at least 22.5" (ie at least 30 times the #6 rebar diameter). In practice the legs of my corner pieces are 2 (24") as they are the corners cut from my rebar straights that have a bend in the end.
The bend pieces are made by cutting off the corners from the straights that have a bend in the end. Each leg is 2' and the corner is 6" so it leaves a straight offcut piece that is 16 foot long.
Even though it is not a requirement of the structural engineering, it is good to provide continuity between the horizontal rebar in the footings round the corner. As there are 13 pieces of horizontal rebar that means each convex corner needs 13 corner pieces. It is not a concern that you will be joining #6 and #5 rebar straights using #4 diameter corner pieces (given that it is not a structural engineering requirement even to have corner pieces).
My main house has 8 convex corners so that means I need 104 corner pieces.
The bend pieces will not all be within the stirrup assemblies and even the ones that are will be in different places inside the stirrup assembly.
Internal wall footing corners do not require corner pieces because these are all crosses and the horizontal rebar can be continued across the cross, all be it with a slight joggle of their position between an internal wall footing and an external wall footing.
Horizontal straight rebar at corners
When at 45 degrees the Big U stirrups are not wide enough to go to the corner of the trench. A horizontal rebar straight with a chair on each end will work ok in the corners to hold the stirrup assembly in the right place laterally. In practice there is lots of bunched up polyethylene sheet in the corners to make a relatively flat surface for the chair to rest on. This also keeps the liners properly fitted into the corners. A sensible length of the rebar straight is 5'5". Fix rebar chairs horizontally on the end using a cable tie through a hole drilled in the chair. Also fix 3.25" chairs near each end and in the middle to hold the rebar the right distance off the bottom. In addition to crossed cable ties it is good to also use some PL-Premium adhesive on the chair joins.

It is useful to mark on the horizontal 45 degree rebar the positions where the bent corner pieces will cross the 5'5" long rebar. Measured from the inside end the cross points are...
6-1/4" inside
1' 7-1/8"
2' 10-3/8"
4' 4-1/4"
5' 0-3/4" outside
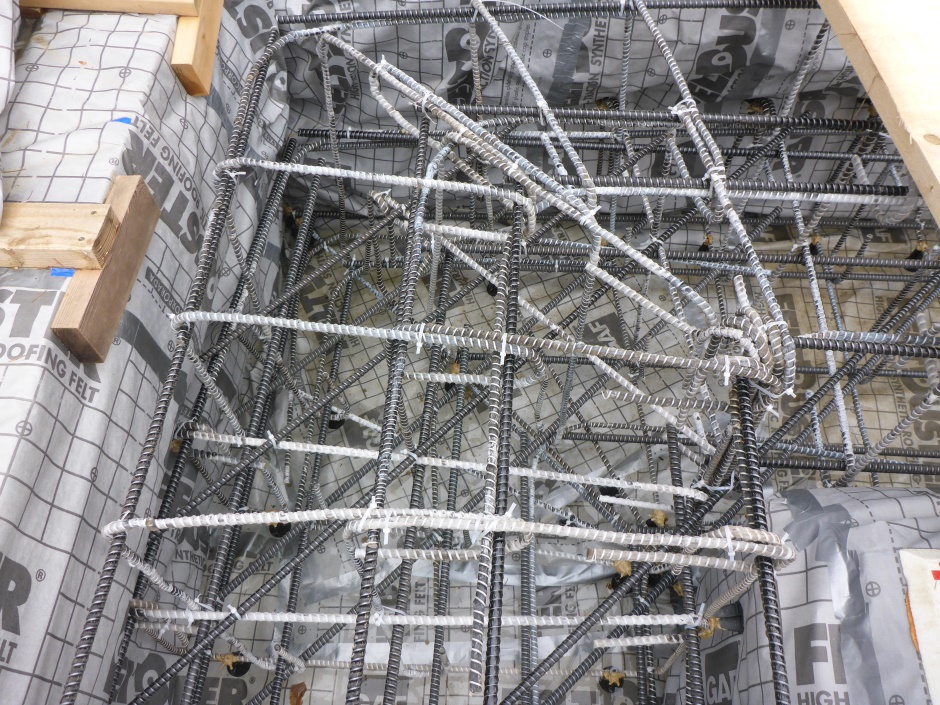
Add angled stirrups at corners
These are the same stirrups but placed at an angle in the corners. They cannot be pre-formed into stirrup assemblies because the dimensions of the assembly need to be different at the corners. You need to form modified stirrup assemblies in situ at the corners.
At the corners, tie the stirrups to the 45 degree horizontal rebar using cable ties.
First put in place the Big U stirrups. Then tie in place the Big L stirrups.
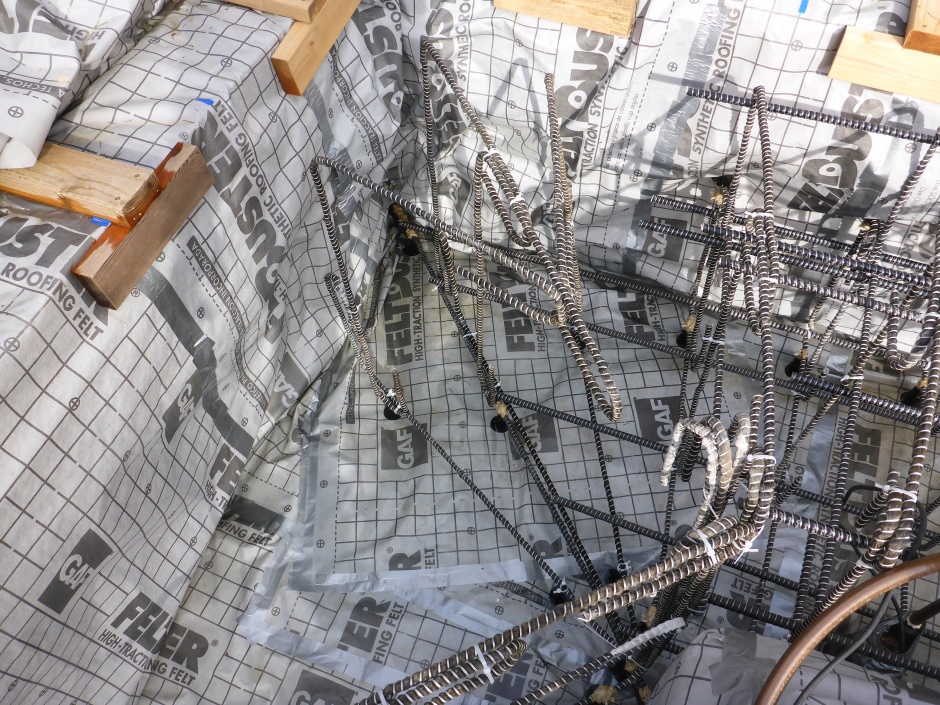
Note that even at the corners it is the position of the vertical rebar (that will go up into the walls) that determines the position of the stirrup assemblies.
In practice you will do most of your work from one side of the corner and incrementally form the corners. The important thing is to ensure you never snooker yourself such that you cannot get access to do the tying.
Put in place bent corner pieces
Thread the corner pieces through the variants of the stirrup assemblies used at the corners.
On the inside of the curve use cable ties to attach them such that they are in the right places to mate up with the horizontal rebar that is not yet added. This uses a few extra cable ties but it is worth it to hold the corners together. The positions for the horizontal rebar can be found from the orthogonal stirrup assemblies on each side of the corner.
The corner pieces on the outside will not span the full complement of angled stirrup assemblies. You will find it easier to add these after the horizontal rebar has been added to the trench.
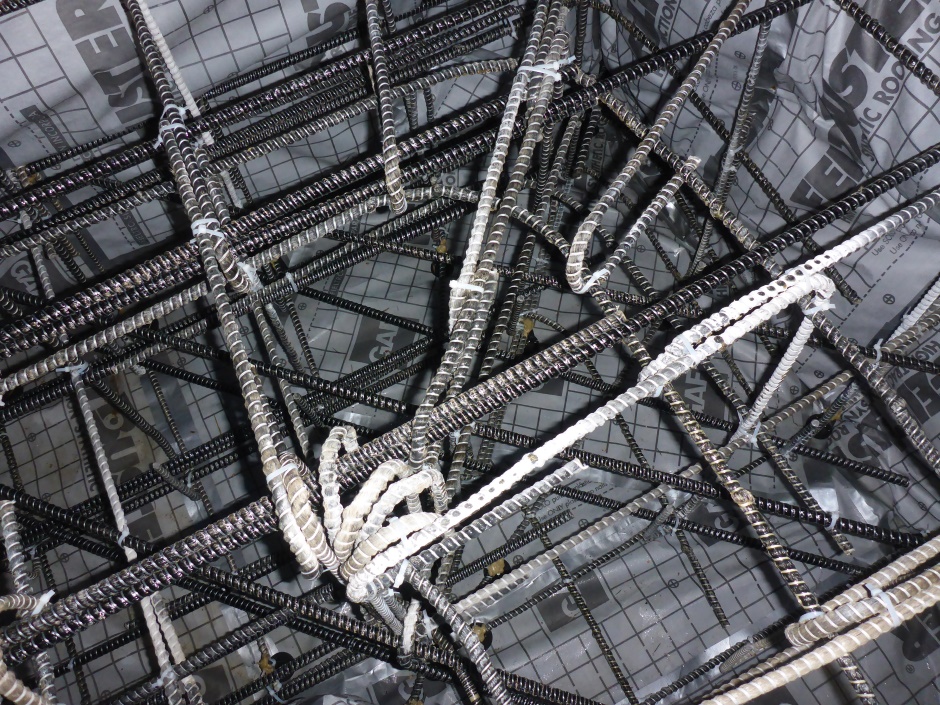
Add diagonal straight rebar across corner
There will be some offcut pieces of 3/4" and 5/8" rebar from the cutting process (see later) and it is an added bonus to fit these at 45 degrees across the corners. It all helps with the strength of the foundations.
Use #6 rebar of lengths 8', 6'2", 5', and 3' 2-1/4" at the bottom. Use #5 rebar of lengths 8', 6'2", 5', and 3' 2-1/4" at the middle. Lay them into the U tails of the stirrup assemblies and you only need to cable tie them in a couple of places to keep them in place.
Add Big Horizontal at 45 degrees
As a final step on the corner add a horizontal big horizontal stirrup at 45 degrees on the corner just for good measure.
First orthogonal stirrup assembly
The last piece of what it designated the corner assembly is the first stirrup assembly that is orthogonal in the trench that you will be doing next. It is important to get this stirrup assembly in exactly the right place as all other stirrup assemblies will be set relative to this.
The stirrup assemblies are positioned such that on the stirrup assembly the rebar center of the top edge rebar that goes against the vertical is on the "horizontal" edge of the 1/2" marker tape. This is to make sure the vertical rebar added later will be in the correct position. Use a straight wood stick with an 8" spacer on the end between the marker tape on the slab and the marker tape on the outside form-a-drain to see where the vertical rebar will be. Use a spirit level to get the bottom of the stirrup assembly in the right place. Once the first stirrup assembly is in the right place you can at least on the inside edge fix it by cable tying it to the horizontal corner bent pieces. Fixing the outside edge will have to wait until the first horizontal rebar has been fitted and tied to the corner.
The corner assemblies should now form a stable "corner-stone" that can help hold everything in place.
General notes on methodology
Once you have done the first corner and the first set of horizontal rebar then you can increment on from there along the trench and then other trenches. The important thing is to make sure you never snooker yourself.
You can add the complete set of stirrup assemblies along the trench before you implement the corner on the other end. To do this you will have to have the bottom horizontal rebar positioned relative to the 45 degrees corner straights so you have something to tie the bottom of the stirrup assemblies to. Note that you cannot permanently tie the horizontal rebar at the corners unless you have the corner pieces rested in place.