


Home Site Map - Steps - Foundations -
Foundation Rebar - Vertical Positions
![]() It is important to accurately determine the positions for the rebar
assemblies along the footing trenches.
It is important to accurately determine the positions for the rebar
assemblies along the footing trenches.
Marking vertical rebar positions
From previously there are screws in the top of the batterboards to indicate the outer edges of the Form-a-drain. What is now needed is a batterboard string between the two current strings that indicates the position of the vertical rebar.
For external walls, add a batterboard screw that is 1' 9-3/4" from the outer form-a-drain edge screw and add strings along all the footing trenches.
The positions of the internal wall vertical rebar are slightly offset (1.25" difference) compared with external walls, but again the positions will be as per your AutoCAD drawing. The following drawing shows the internal wall vertical rebar positions relative to the existing batterboard strings...
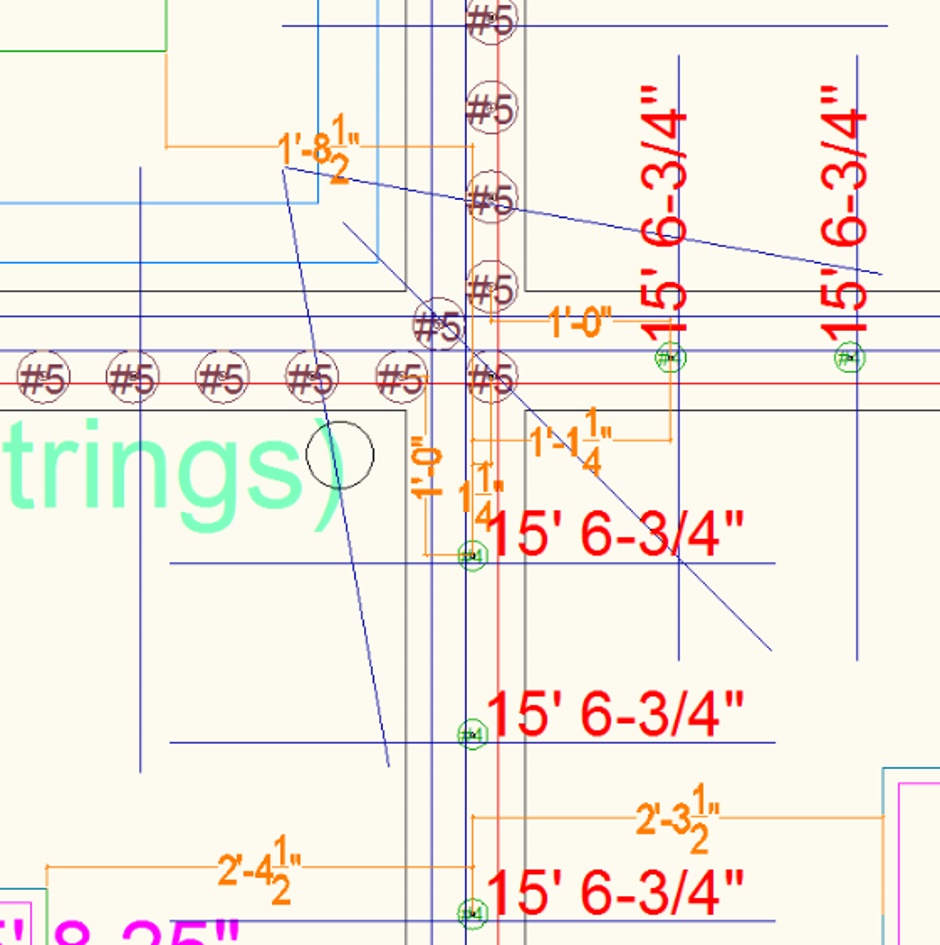
To summarize the above drawing for internal walls, the vertical rebar string needs to be 2' 4-1/2" from the internal wall outside form-a-drain outer edge.
Where the strings cross at a corner, is the exact position of the corner vertical rebar. Other vertical positions along the trench can be found by measuring in 1 foot increments from the corner position.
Mark rebar grid positions
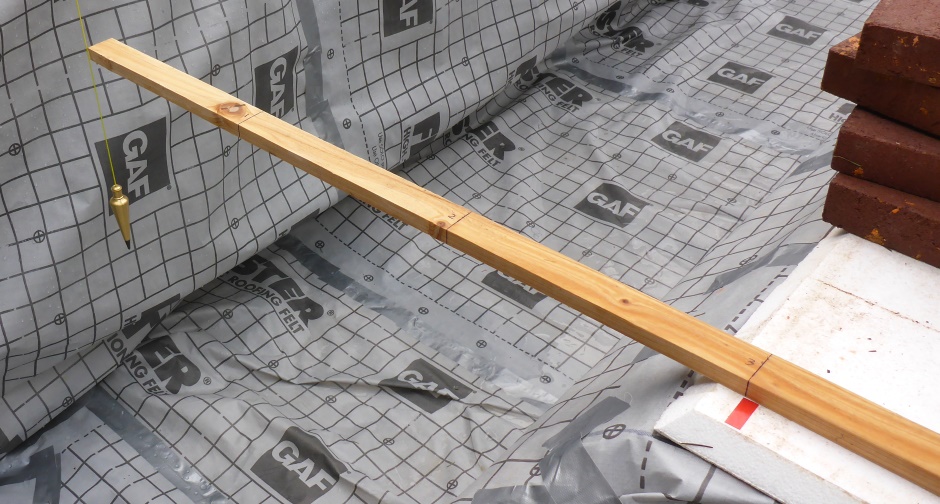
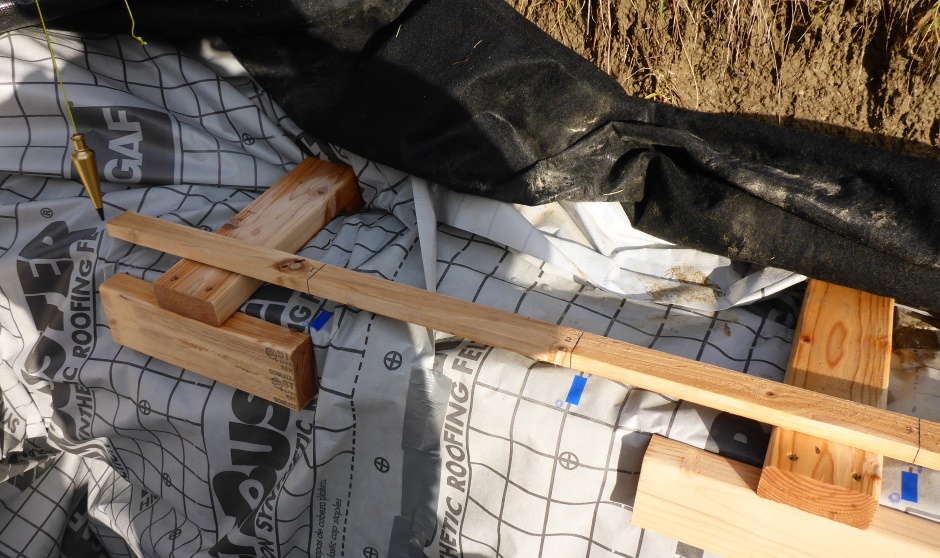
Measuring in from the string in the perpendicular footing allows marks to be put on the slab protection EPS and on the outer form-a-drain. To do this, use a plumb-bob and a wooden stick marked with 1' marks.
Put marks on slab edge
Use half inch colored tape to show the positions.
One edge of the half inch tape indicates the vertical rebar position and the other edge is the horizontal rebar position that is offset by half an inch towards the building center.
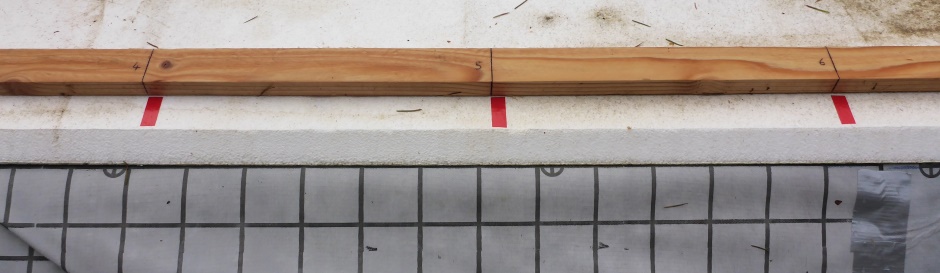
To avoid getting confused, mark with a circle the edge of the tape that is the vertical rebar position. Mark the other tape edge with a line to represent the horizontal rebar position. There is no particular need to number the positions, but you can if you want.

At the center points of the building (the building cross) the spacing will be less than 1 foot because the 1' grid is from the corners working towards the center. The actual dimension (vertical rebar to vertical rebar) in my case is 7-1/4" for both north-south crossovers and east-west crossovers.
Mark on outside of trench
Also put tape pieces around the outside of the footing trench to show the 12" grid positions. Again mark one tape edge with a 0 to represent the vertical rebar position and the other edge with a line to represent the offset horizontal rebar position. Obviously the markings need to be as per your AutoCAD drawing that details the positions of the vertical wall rebar. Use a plumb bob off your batterboard strings to find the positions to mark.
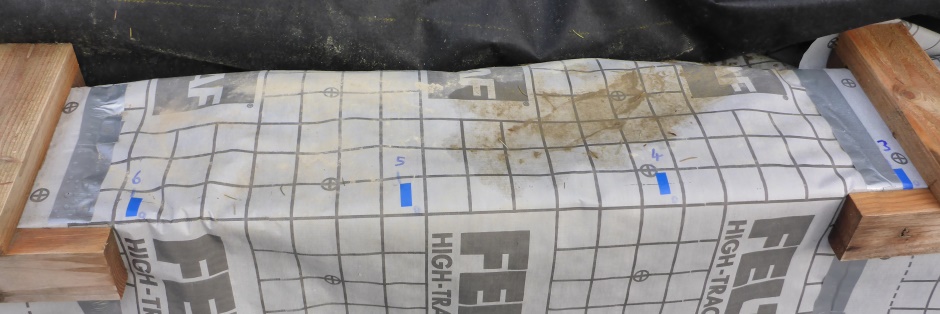
You need to try to avoid moving the tough-liner after adding the marking tape.
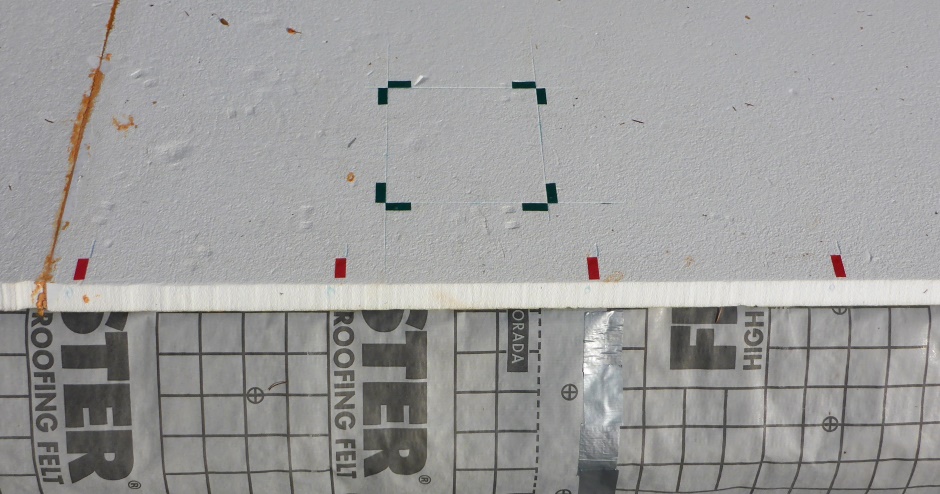
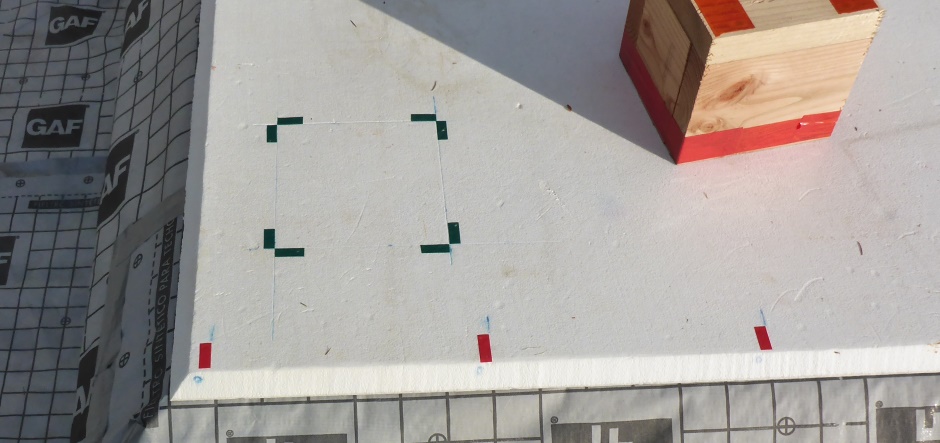
Mark cube positions
Eight inch wooden cubes are used later to support the groove planks and the walkway. It is good to mark out early the places where the cubes will go. The cubes are in the spaces between the crosshatch grid of rebar that will go over the slab. The positions of the cubes are as per your AutoCAD drawing. It is worth doing it in CAD because on a large foundation it can get a bit complicated figuring out how to avoid the rebar grid. The cube edge is 3' 3-1/4" from the vertical rebar string in the case of outside walls. For internal walls the distance is usually 2' 9-1/2", although it is a bit more at the corners.
Mark the cube positions on the slab protection EPS using tape.