


Home Site Map - Steps - Foundations -
Dig Foundation - Batterboards And Markout
![]() Install the batterboards and the strings between them.
Install the batterboards and the strings between them.
Batterboard design
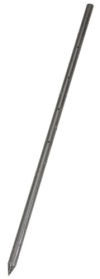
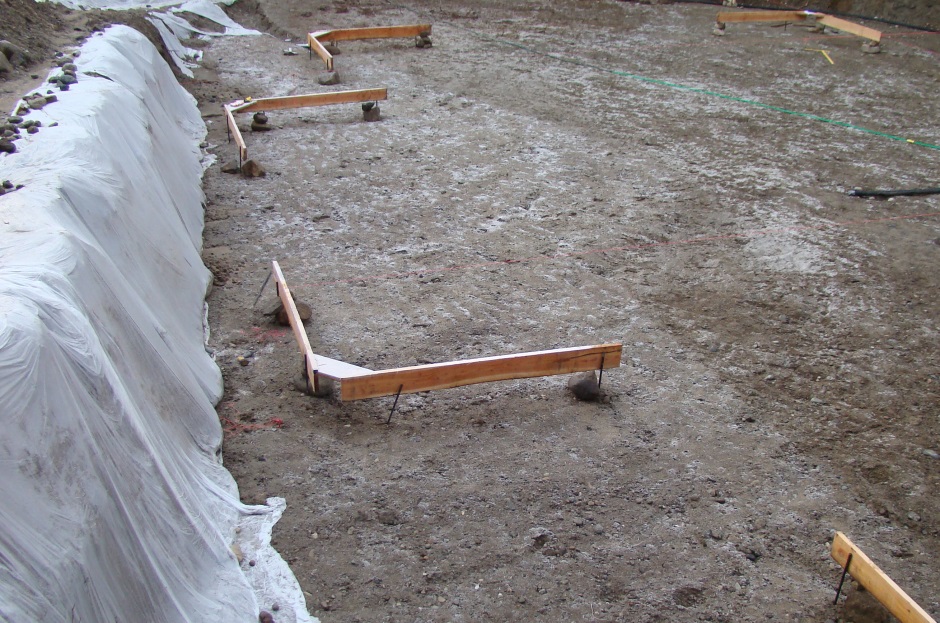
The horizontals of the batterboard are made from 2x8 lumber. I cut my own lumber using my SawMill. The stakes are steel stakes because the ground is so solid. Steel stakes also take less space.
It is important that the batterboard assemblies are very strong. A lot depends on the accuracy with which you mark-out the foundations, and that means you don't want the batter boards to move.
The exact positioning of the batter boards does not matter as it will be the strings that you attach to the batter boards that set the accurate position for the foundations. It also does not matter if the stakes go into the ground crookedly, just as long as they do not move around.
It even does not matter too much if you want to put one or two of the batter boards further out than normal to for example give room for an access driveway. If you are using corner batterboards (like I typically do) then you can only move them out by about an extra foot or else the legs will not be long enough for the strings in both directions. Typically it is good to stick to having the batterboards between 2-3 feet from where the Form-a-drain edge will be.
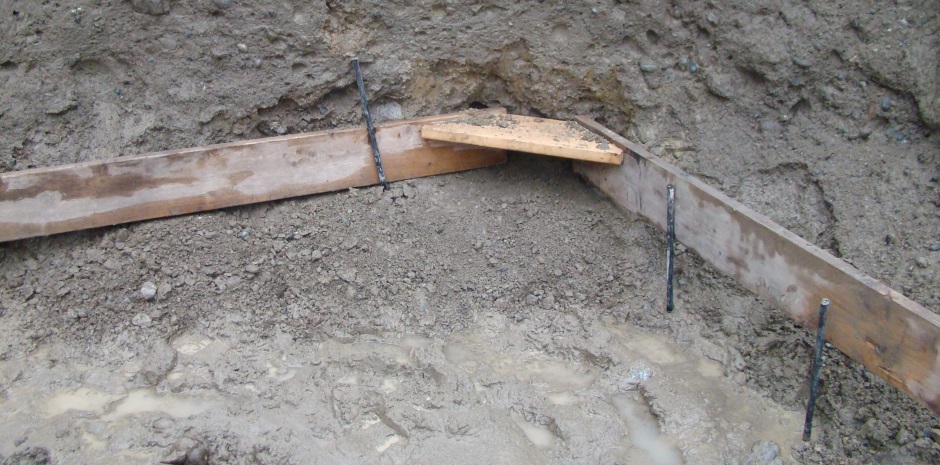
You bang in the stakes using a big club hammer. With rocks in the ground, the stakes will probably not go in completely vertical, but that's ok. Being solid in the ground so they don't move is what counts.

Sometimes the batterboard assembly has to be very much set into the side of the excavation. It may be necessary to chip away at the edge of the excavation to get the batterboards in the required place.
You need to set the rest of the batterboard assemblies so that their positions all correspond with the house foundation layout drawing. It is best to do the most difficult ones first, ie the ones that are tight up against the edge of the excavation. In my case I mainly used a convention of the inner edge of the batterboards being 2 feet from the outer edge of the Form-a-drain.
Initially it is about getting the batterboard assemblies in the right places as per the plan, rather than setting the height of the batterboards. At this stage, the batterboards are not screwed to the stakes.
Later when forming the footing you will also add wood at the bottom of the stakes so that you have something to brace to.
Set the height of the batterboards
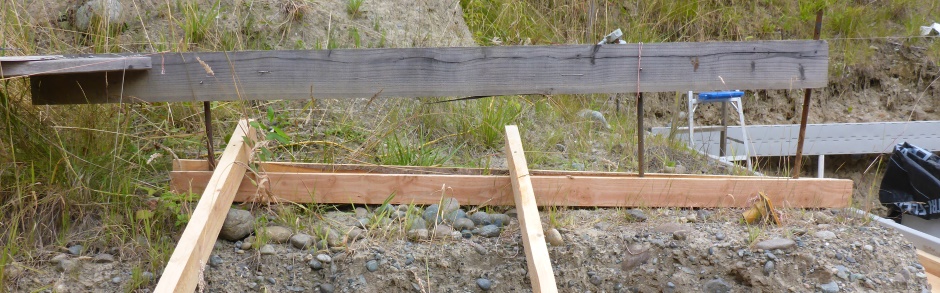
Once the stakes are securely in the ground, you will then screw horizontal 2x8 boards to the stakes such that the boards are all the same height all the way round the building. They do need to be exactly (better than +/-1/8") the same height because you will want to use the strings as a vertical reference point when implementing the foundations and slab.
The height you chose for the top of the batter boards is not that important (as long as they are all the same). In my case 2'2" above what I decided was going to be the top of the basement slab level was what I chose. That also happens to make the batterboard strings at reference grade height which is nice. When you have decided on this batterboard height, make sure to add it to your excavation cross-section drawing because you will be using the strings attached to the top of the batter boards as a height reference.
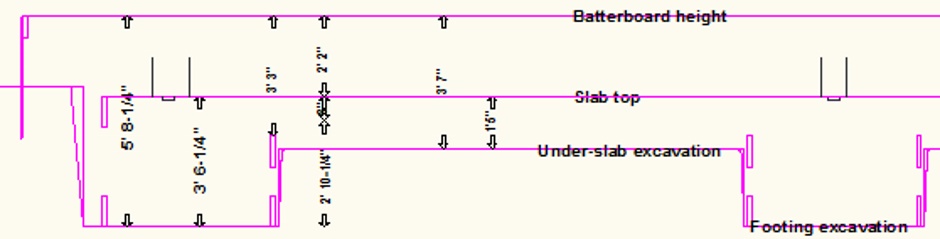

Here's the equivalent drawing I used for the evaluation building...

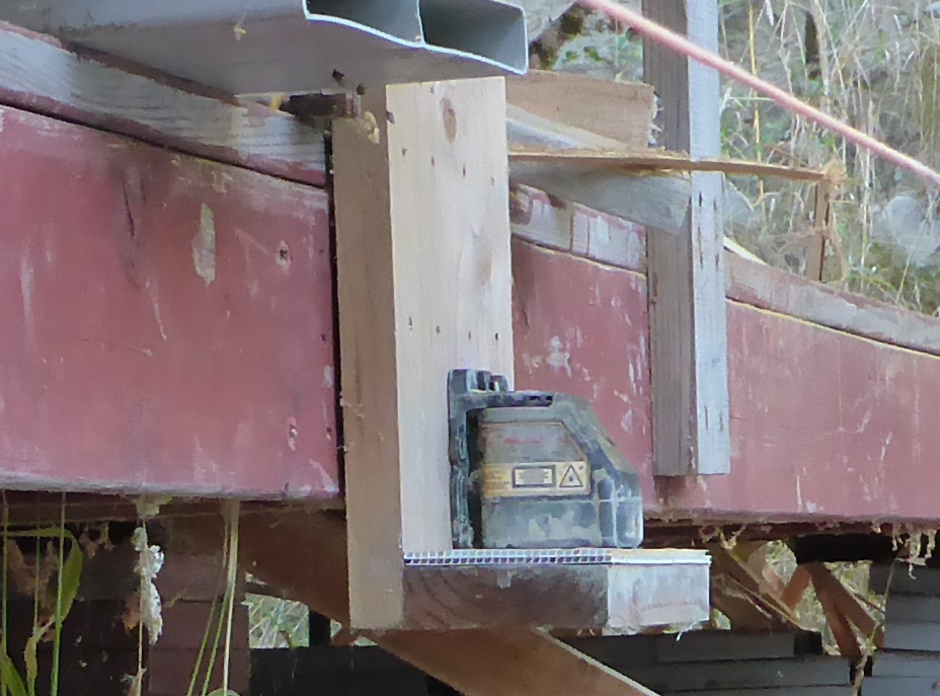
The easiest way to get the batter boards all exactly the same height is with a self leveling laser level. A good one that self levels and makes a horizontal line is about $150.
 Details
are here .
Details
are here .
Place the laser on a level platform in the middle of the house area.
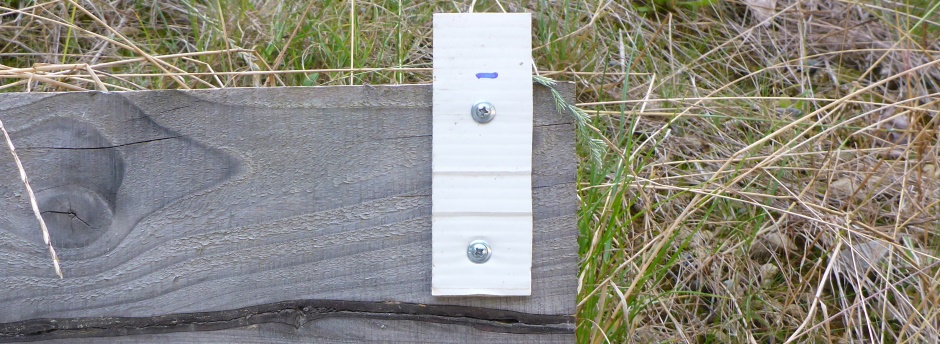
It is good to have a laser target on the far side of the build site to ensure the laser height has not moved.
Initially it is good to set the horizontal beam just above the batterboard height that you have decided to standardize on so one batterboard will not block the laser to a batterboard behind. You can do this with a temporary 1" wood spacer under the laser unit. Rotate it to shine in the direction of each batterboard in turn and get the top of the batterboards to all be at that distance (eg 1") below the beam.
Initially it is best to set the batterboard heights using rocks underneath.
Once you are happy with the height then you can screw the stakes to the horizontal lumber.
The batterboard horizontals need to be accurately level as well as accurately the right height. A check worth doing is to move your laser level to one batter board and shine it at another batter board because that will make sure your laser really is working accurately.
Setting the outer edge footing strings
Once the batterboards are all installed in about the right locations and their height has been accurately set then it is time to add the strings that will accurately represent the outer edge of the outer Form-a-drain that forms the footing. The east-west reference string should be about right for the north wall of the main house rectangle, and the copy of the north-south string should be about right for the eastern wall, but there is still an opportunity to make them even more accurate.
Strings are implemented by putting a wood screw in the top edge of the batterboards. Tie small loops in the end of the strings and stretch them between the screws. They need to be as tight as you can possibly get them. They want to be just short of the breaking point of the string. You will likely need to tie multiple loops in the end of the string so you can stretch it to the tightest one. The tighter you make the strings the less they will move about and the greater the accuracy you will achieve. Be careful because when strings break you can get a nasty string burn on your arm, leg, or face!
You will likely need to move the screw positions a bit to get everything dimensionally correct and square.
Using string between batterboards may seem a bit low tech, but it really is the most accurate way. It relies on the point of crossing of the strings rather than the absolute position of the batterboards. Avoid the temptation of using glue where the strings cross because accuracy relies on the string's ability to move with things like string age or ambient temperature.
The taught strings extend beyond the footings (to reach the batter boards) and need to cross each other at exactly a right angle (this is the outer corner of the footing).
Use a 100ft tape measure to set the other wall strings so they correspond with the foundation layout house drawings. By measuring from the reference strings you should be able to preserve the right angle that was previously set using the 90 degree laser tool . Note that sideways force from the lip of a tape measure will move the strings slightly even when they are very tight, so try to avoid and compensate if necessary.
I find that making temporary marks on strings is best done using pieces of electrical insulation tape. You may well need someone to hold the other end of the tape measure because you don't want to accidentally move the strings by hooking a tape measure to them.
Using loops to attach the strings to the wood screws is better than using a tight knot because it allows you to temporarily remove the strings if they get in the way, eg get in the way of the digger. What is actually the most important is that the screws do not get moved.
Refining the 90 degree accuracy
We need the 90 degree corners to be very accurate or else the building will be skewed (and the roof won't fit properly).
If you have an accurate 90 degree corner, then the distance from string crossover to string crossover should be the same across both the diagonals of the rectangle, ie the hypotenuses should be equal. We're looking for better than a 1/8" difference here.
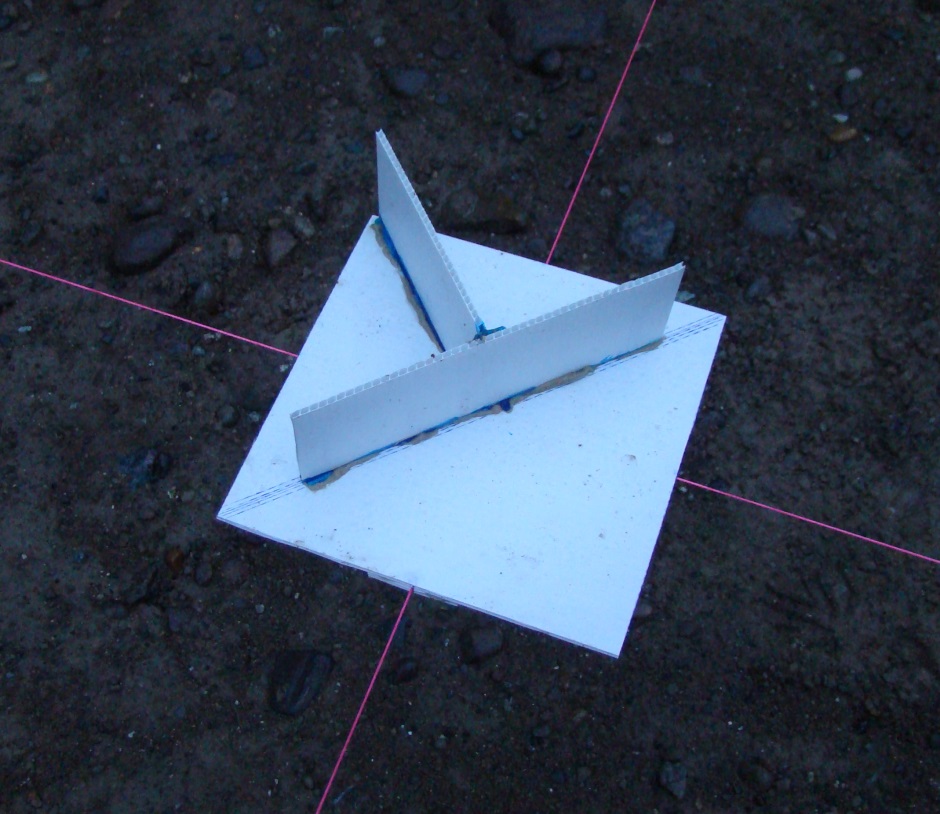
Measuring between string crossover points is hard because even very tight strings have some movement if any side force is applied, eg by the hook of a tape measure. I made assemblies (pictured below) out of plastic card that could be fitted over the string crossovers. On the underside, pairs of 1" squares of plastic card form string width grooves to make sure the strings were accurately in the right place. You just need one assembly that forms a vertical flat target for the laser and one assembly with a vertical edge against which the middle of the laser measurer will be positioned. You use the pair of assemblies to measure one hypotenuse and then you move the pair to the other hypotenuse.
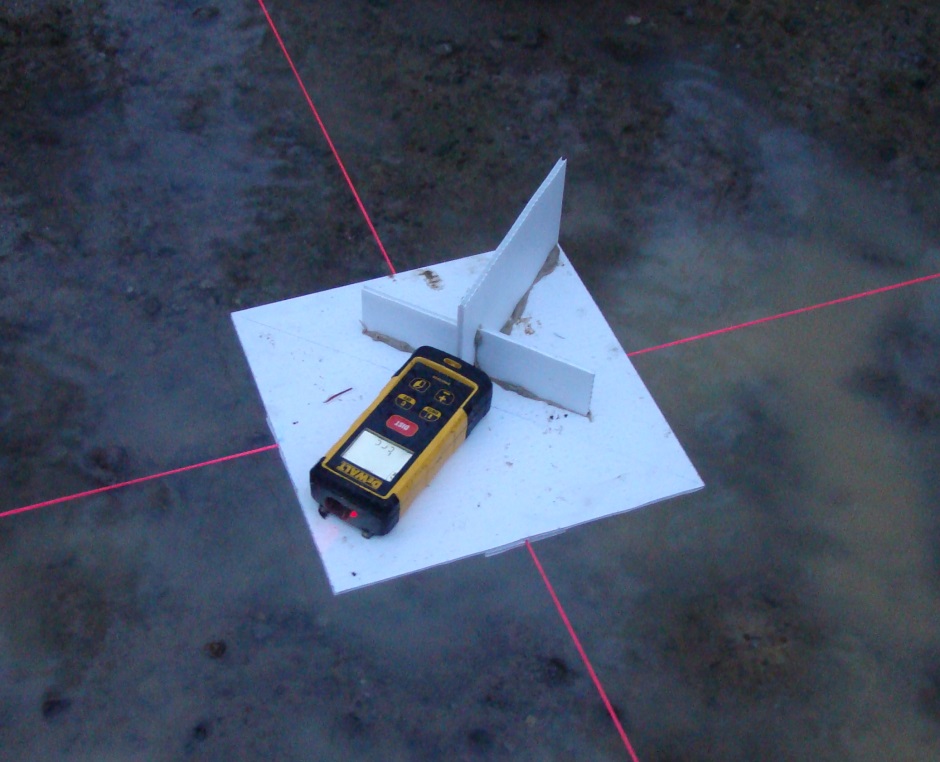
From your AutoCAD drawings you should know exactly what the hypotenuse length should be. If the measured length does not match the drawing then it probably means the leg lengths of the rectangle are wrong.
Do fine adjustment of the positions of the string screws in the batterboard top edges to gradually increment until you have the hypotenuses the same length and matching the figure from the drawings.
Realistically some adjustment will be needed to ensure you have perfect 90 degree angles and you also have exactly the required width and length for the outer footing rectangle. Keep iterating until these requirements have been accurately met. Draw a trapezoid on a piece of paper and note down the lengths of all the sides and both diagonals for each iteration you do, because it is easy to get confused about which direction to move the strings and by how much. Every time you move the screw that the string is hooked on to, try to use it as an opportunity to get the string just a little tighter.
Accuracy is very important
Any error at this stage will cumulatively multiply as you build your house and may even cause the roof not to fit properly, so it really is worth taking the time to get it right.
More complicated shapes
Typically a house foundation is more than just a simple rectangle. In my case I have portico protrusions on the north and south sides of the house and a couple of internal concrete walls. These all need proper footings. The footings for these also need to be marked out using additional batter boards and strings. Use the same techniques as described, but of course do it relative to the main house rectangle.
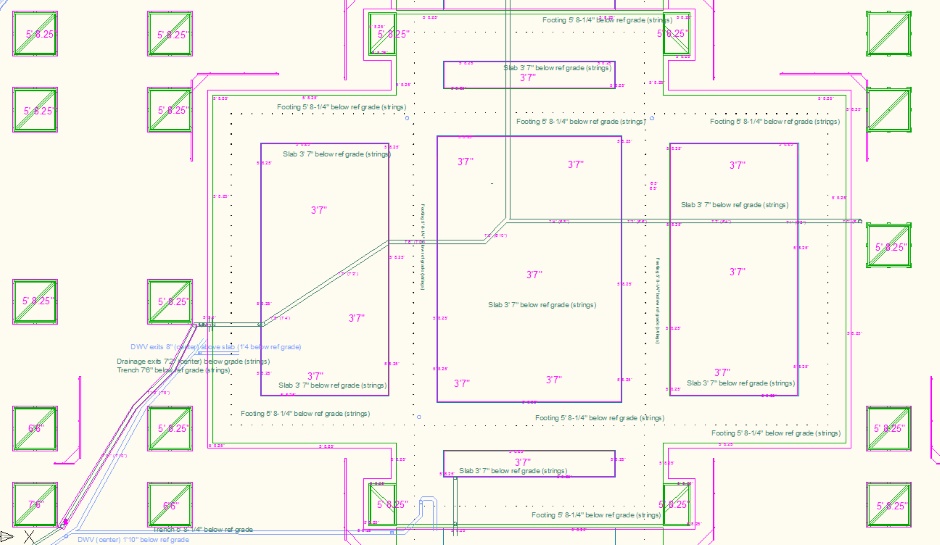
Here is my foundation layout plan...
Marking out the deck support pillars
In the case of discrete foundation blocks such as are used for the pillars that support concrete decking, it is not very efficient to use batterboards and strings. A better strategy is to implement the wooden squares that are going to be needed later anyway to form the concrete for the pillar foundation. You can then position the squares on the ground to mark where the various holes need to be dug. (You don't actually need or want diagonal wood to hold the squares square as PL-Premium glue is sufficient to hold them square.)
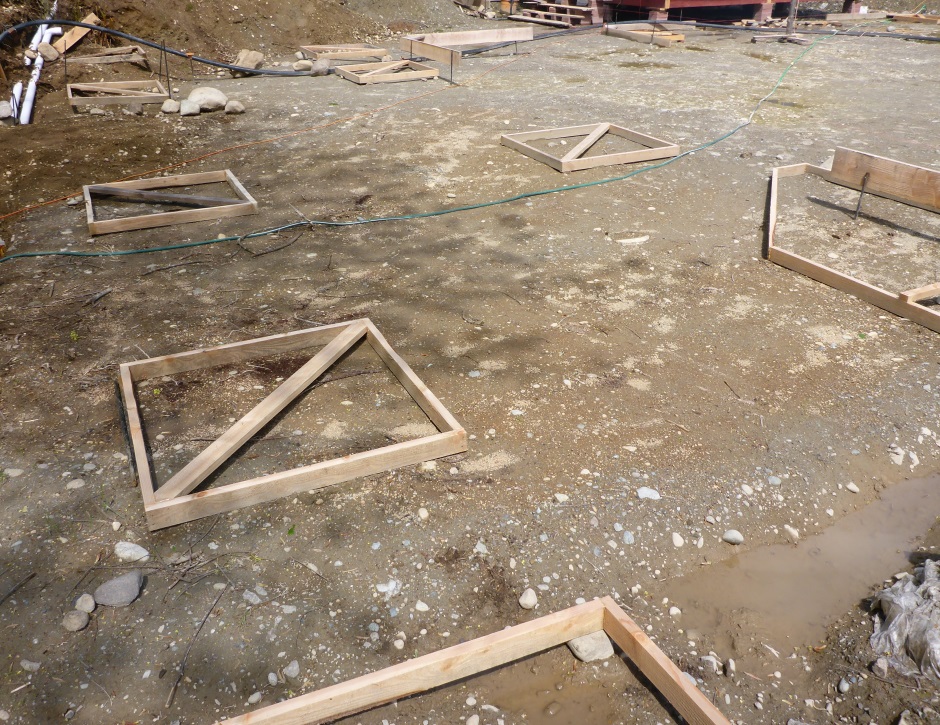
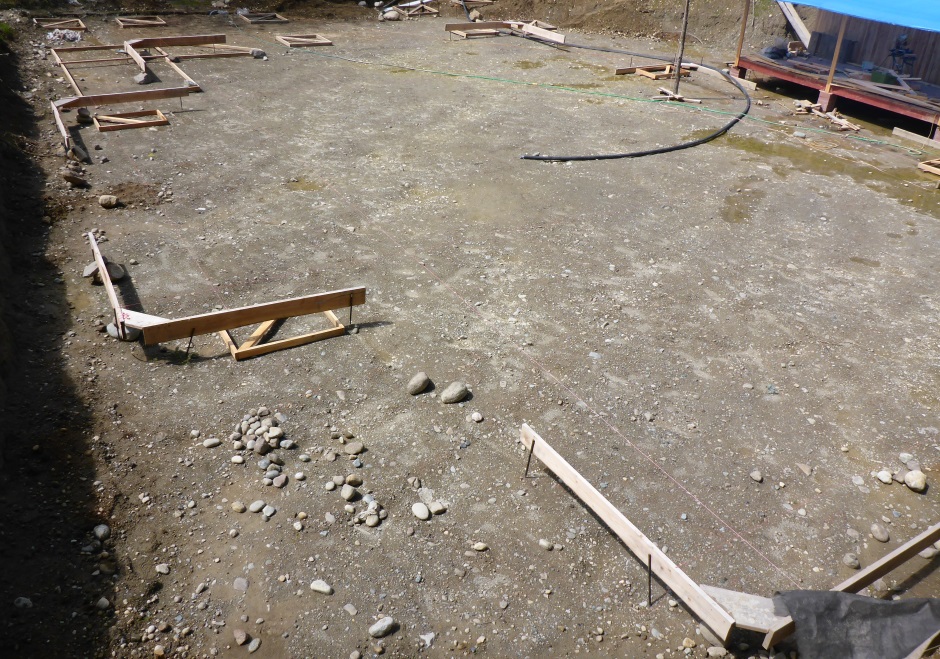
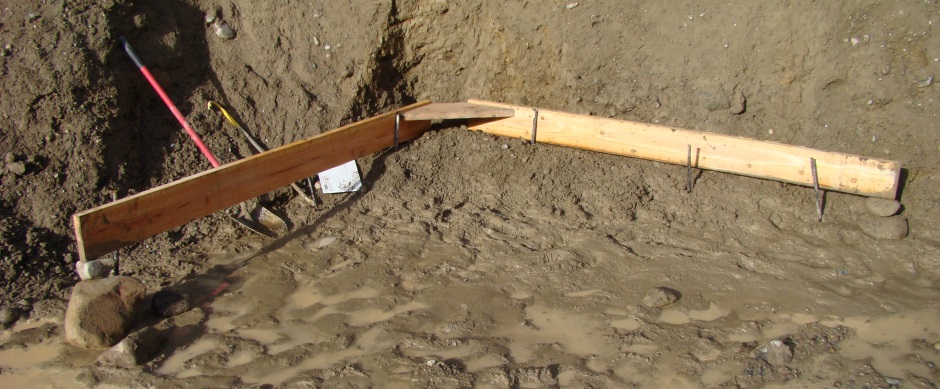
Once you have the squares in the right place then you can draw round them with paint to show the digger where to dig.
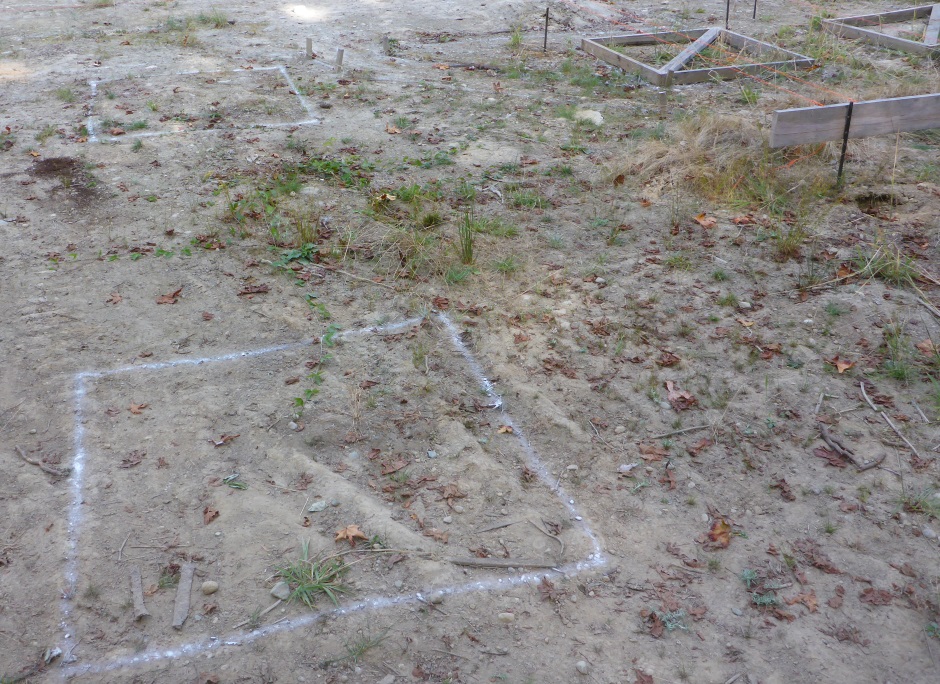
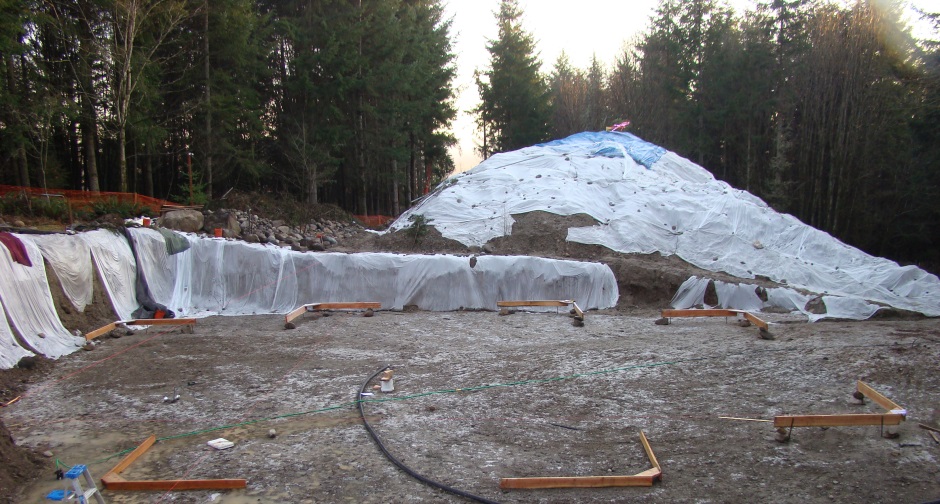
The following shows the site with the discrete foundations marked using their wooden forming frames.